|
|
|
|||
|
Home | Troubleshooting | Quick Setup | Cisco How to | Data Recovery | Forums | Blog | IT Exam Practice | Services | About Us | Chicagotech MVP | Search | Contact Us | |
|
How to setup SMTP Relay on Office 365 - Step by step with screenshots
1. Obtain the public IP address you’re using. A dynamic IP address isn’t
supported or allowed. You can share the IP with other devices and users, but
you shouldn’t be sharing the IP with anyone outside of your company. Make
note of this IP address for later.
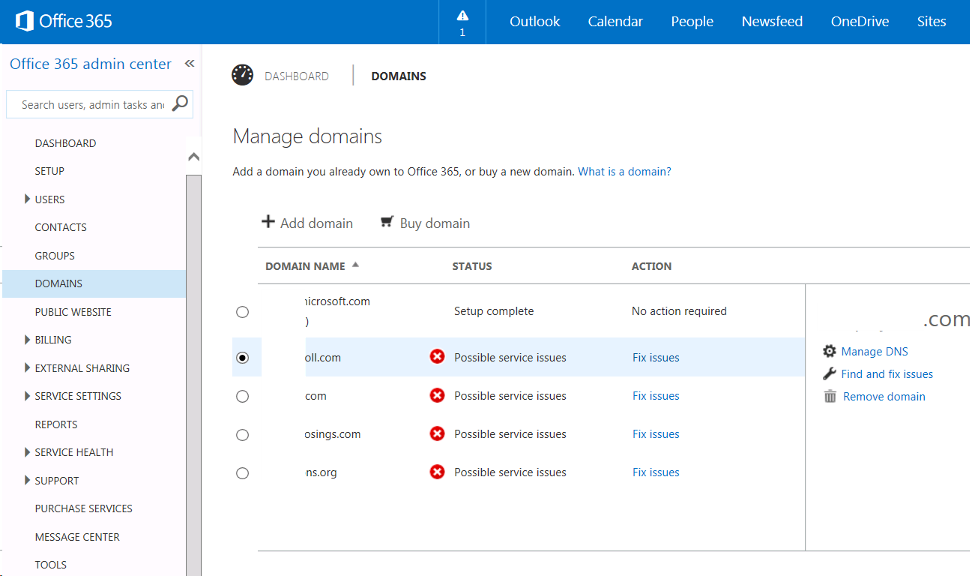
3. Check one of your domains and click Manage DNS to record your DNS information such as MX and CNAME records.
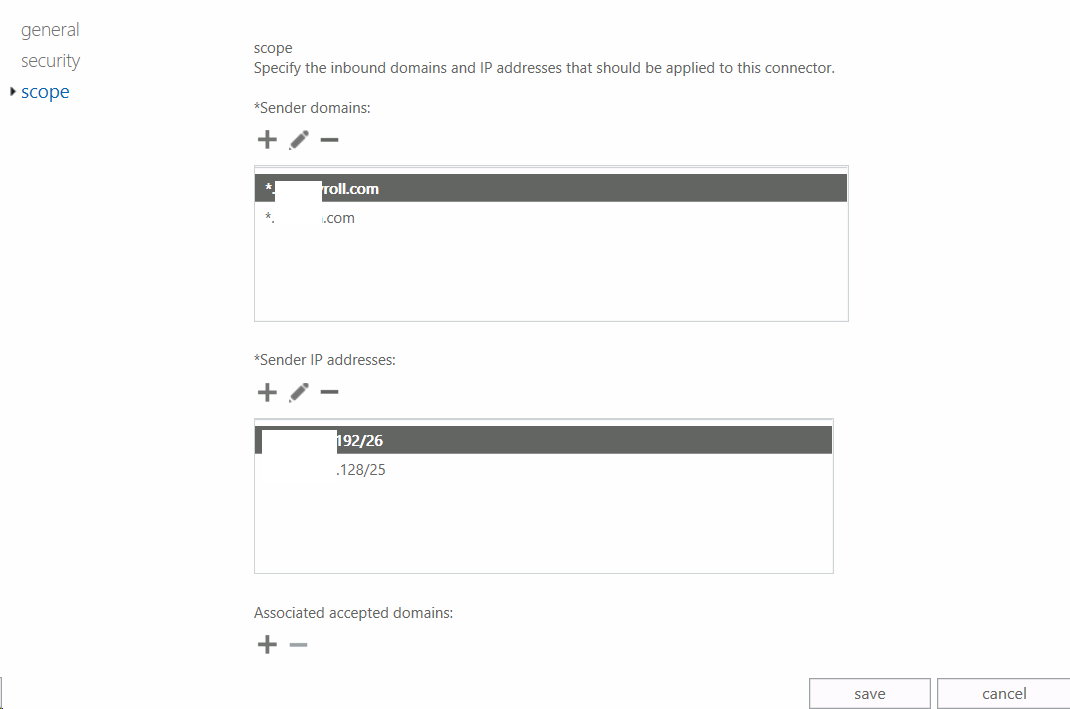
6. Click + to create new connector by giving the Sender name and Sender public IP addresses.
Post your questions, comments, feedbacks and suggestions Related Topics
|
|
|
This web is provided "AS IS" with no warranties.
Copyright © 2002-2018
ChicagoTech.net,
All rights reserved. Unauthorized reproduction forbidden.