|
|
|
|||
|
Home | Troubleshooting | Quick Setup | Cisco How to | Data Recovery | Forums | Blog | IT Exam Practice | Services | About Us | Chicagotech MVP | Search | Contact Us | |
|
How to configure the Software Update Point in SCCM
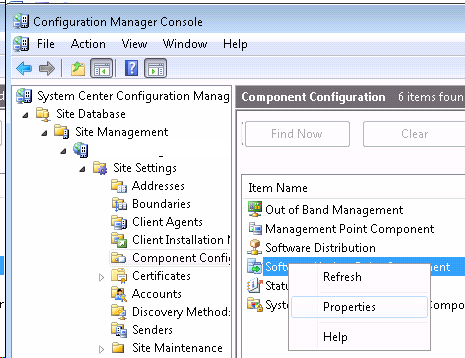
3. Right-click Software Update Point, and then click
Properties.
4. In General, you can enable Active software update point on site server and edit ports.
5. In The Sync Settings, you can setup how to synchronize.
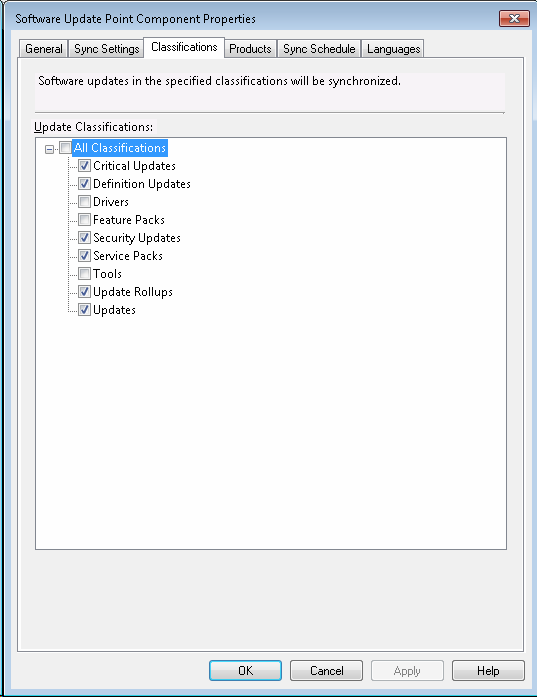
6. In the Classification, specify what you want to synchronize.
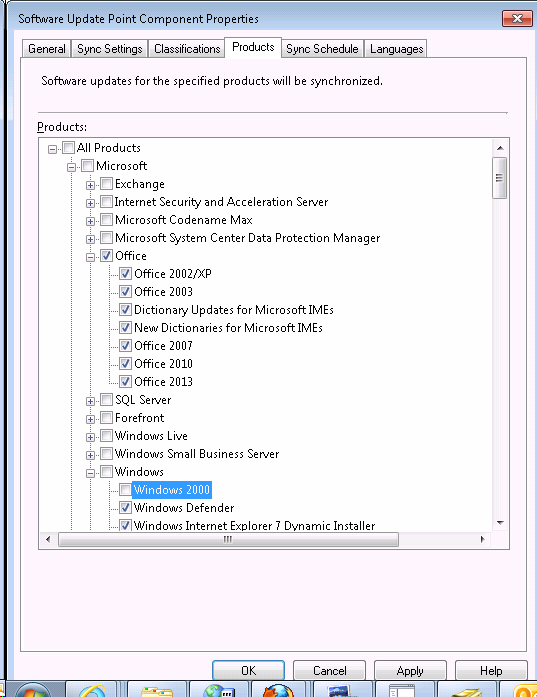
7. In the Software Update Point Component Properties,
click Products Tab to configure the
products for which software updates are synchronized.
Post your questions, comments, feedbacks and suggestions Related Topics
|
|
|
This web is provided "AS IS" with no warranties.
Copyright © 2002-2018
ChicagoTech.net,
All rights reserved. Unauthorized reproduction forbidden.