|
|
|
|||
|
How to transfer FSMO Roles in Windows 2012 R2 - Step by step with screenshots
1. Open the Active Directory Users and Computers console on
your new Windows Server 2012 R2 computer.
I
5. Select Yes when asked about
transferring the operations master role. 4. Select your new 2012 R2 Windows Server.
1.
Click OK to
continue.
2.
Back in the
Active Directory Domains and Trusts window, hover over the Active
Directory Domains and Trusts found in the folder tree on the left hand
side to ensure the server now reflects your new 2012 R2 Windows server.
3.
Right click Active
Directory Domains and Trusts found in the folder tree and select
Operations Manager... in the sub menu.
4.
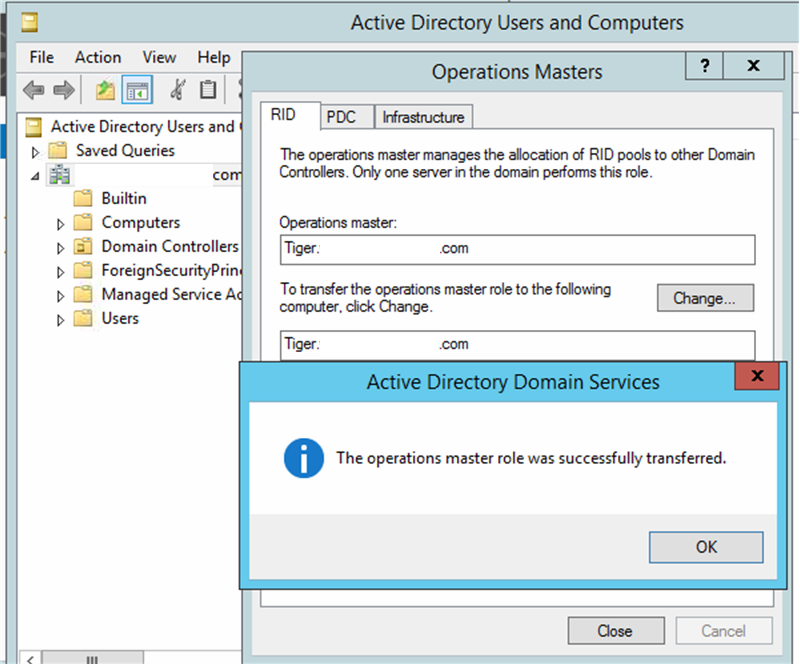
In the
Operations Master window, click Change to transfer the
domain naming master role to the 2012 R2 Windows Server.
5.
When asked if
you are sure you wish to transfer the operations master role to a different
computer, click Yes.
6.
Once the
operations master is successfully transferred, click OK to
continue.
7.
Click Close to
close the Operations Master window.
8.
Close the Active
Directory Domains and Trusts console.
Changing the Schema Master
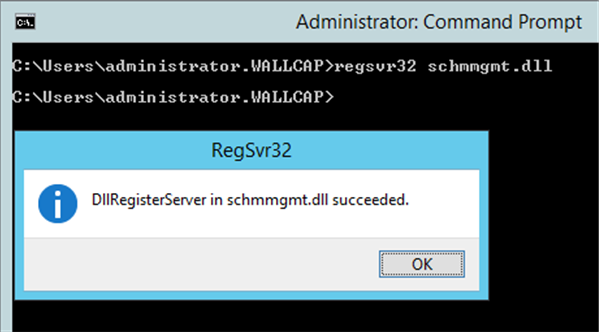
4. Close the command prompt.
1.
Click OK to
continue.
Change the Schema Master
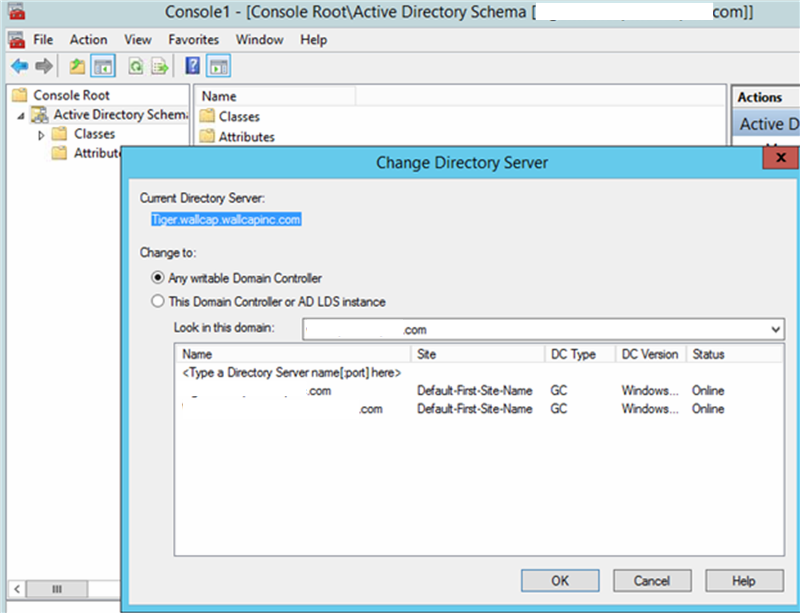
1.
In the same MMC
console, right click Active Directory Schema and select Change
Active Directory Domain Controller... in the sub menu.
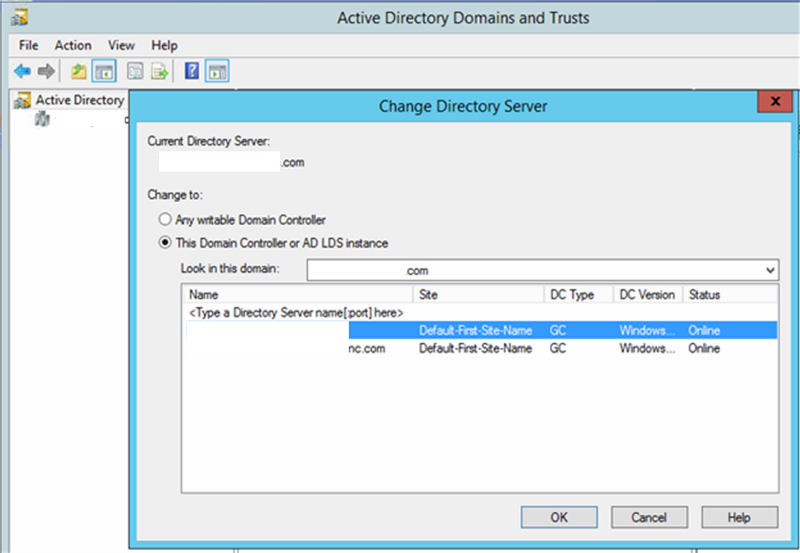
2.
In the Change
Directory Server window, select This Domain Controller or AD
LDS instance.
3.
Select your new
2012 R2 Windows Server.
4.
Click OK to
continue.
5.
A warning will
appear stating that the Active Directory Schema snap-in in not connected.
Click OK to continue.
6.
Hover over the
Active Directory Schema folder in the folder tree to ensure the new
Windows Server 2012 R2 computer is shown.
7.
Now right
click Active Directory Schema and select Operations
Master... in the sub menu.
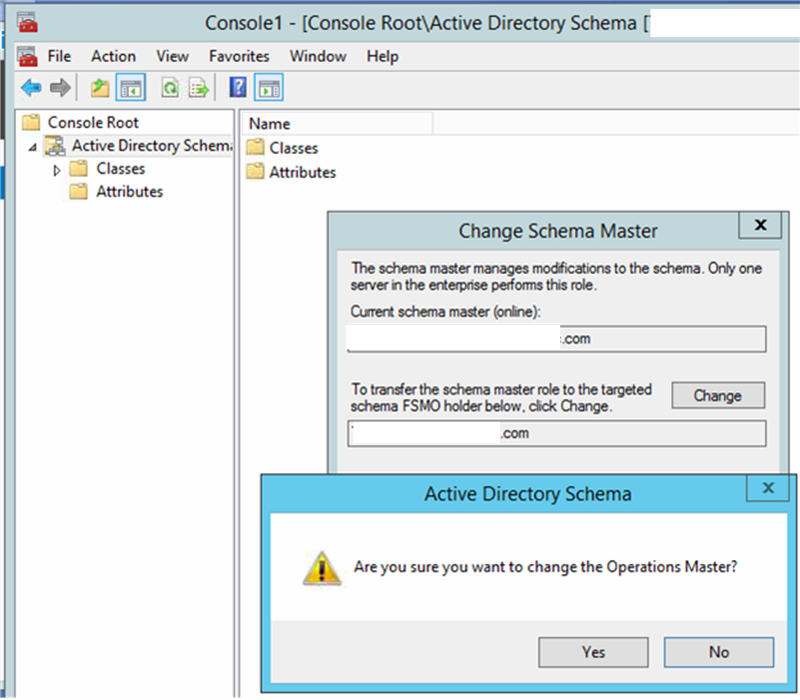
8.
In the Change
Schema Master window, click Change to transfer the schema
master role to the 2012 R2 Windows Server.
9.
When asked if
you are sure you wish to transfer the schema master role to a different
computer, click Yes.
10.
Once the schema
master is successfully transferred, click OK to continue.
11.
Click
Close to close the Change Schema Master window. 12. In the MMC, click File > Exit.
Once completed,
open the Active Directory Users and Computers console to
verify that the Active Directory database successfully replicated to your
new Windows Server 2012 R2 computer. Be aware that the database
replication may take some time depending on the number of objects in Active
Directory.
Post your questions, comments, feedbacks and suggestions Related Topics
|
|
|
This web is provided "AS IS" with no warranties.
Copyright © 2002-2018
ChicagoTech.net,
All rights reserved. Unauthorized reproduction forbidden.