- With Outlook pen, click on the “File” tab on the top left-hand corner.
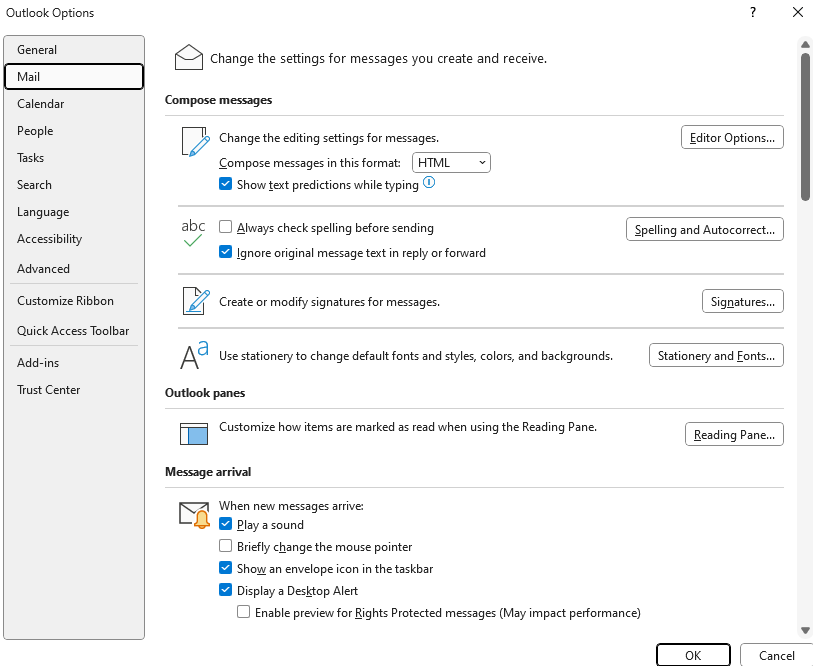
- Click on “Options” on the bottom of the left-hand side.
- Under the “Mail” tab, uncheck “Always check spelling before sending“.
A. Email Remover App
Duplicate Email Remover Developer: MAPILab Platform: Microsoft Outlook (Windows) Features:
How to Use:
Note: Always ensure you have a backup of your emails before using any third-party tool for managing your mailbox.
Duplicate Email Remover by MAPILab is not entirely free. While it may offer a free trial period during which you can use its features, access to its full functionality typically requires purchasing a license or subscription.
Bitrecover Outlook Duplicate Remover.
Other remover apps: REMOVE DUPLICATE MESSAGES, Outlook duplicate finder – Free Add-ins for Microsoft® Outlook,
B. Outlook Clean Up Tool
Outlook also offers an inbuilt function to remove duplicate emails in Outlook that we know as the Clean Up Tool. You need to follow the instructions as we have discussed below:
C. remove duplicated emails manaully
If you’re experiencing duplicate emails in your Outlook inbox, you can follow these steps to remove them from within Microsoft 365 Outlook:
What is Microsoft PC Manager ?
Quoted:
On Windows 11 (or 10), PC Manager is an app from the Microsoft Store designed to enhance the overall performance, security, and management of the operating system.
It serves as a comprehensive tool that helps you maintain your computer’s health by providing a variety of functionalities to resolve high memory usage, free up space quickly, disable and terminate unnecessary processes, scan for malware, and more.
However, the PC Manager app doesn’t introduce anything innovative since virtually every feature is already available on Windows 11 (or 10). The app feels more like a combination of the Task Manager and Settings app with a bunch of shortcuts to features and other Microsoft tools.
After you select and set up your methods, choose Finish to complete the process.
A. Switch between classic Outlook and New Outlook.
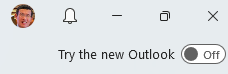
If you don’t see a toggle in the new Outlook for Windows, troubleshoot with these steps:
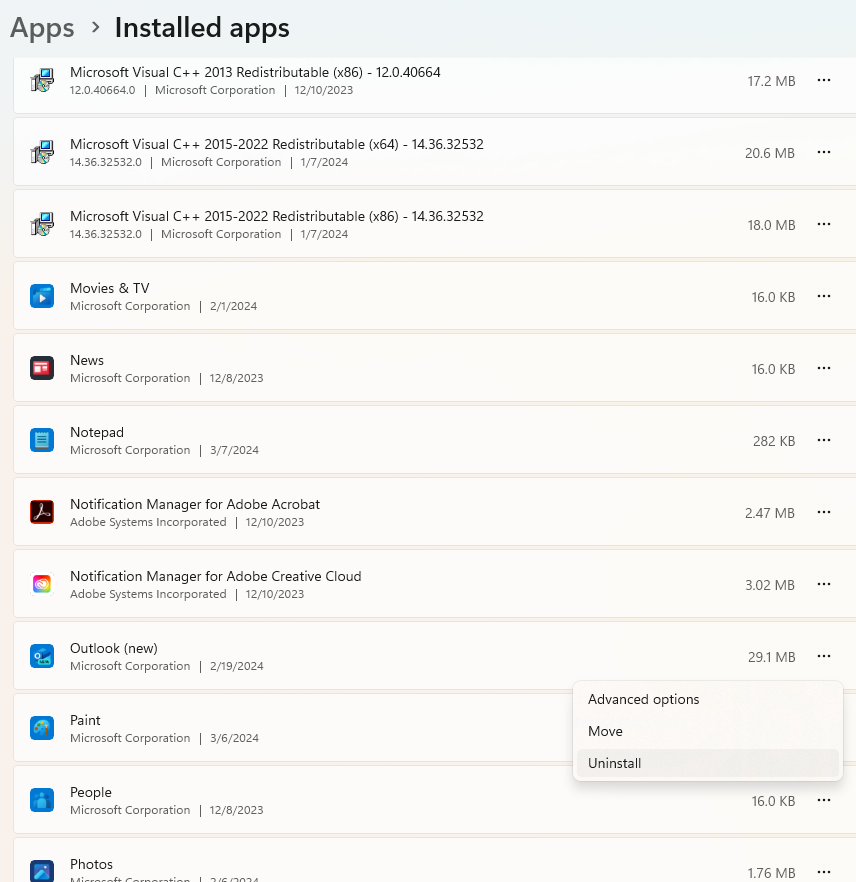
Or UNINSTALL THE NEW OUTLOOK APP
Step 1: Open the Start menu and click the gear-shaped icon to open the Settings app.
Step 2: Use the left pane to switch to the Apps tab and click on Installed apps.
Step 3: Scroll through the list or use the search bar at the top to locate Outlook (new) on the list. Click the three-dot menu icon next to it and select Uninstall.
Step 4: Select Uninstall again to confirm.
Step 1: Log in to the SonicWall Management Interface
You can use a web browser to access the SonicWall management interface and input the SonicWall device’s IP address.
The service’s default IP address is 192.168.168.168. After this, you have to enter the administrator login and password.
Step 2: Navigate to the NAT Policies Section
Go to the Network section and choose NAT Policies. The NAT Policy section enables you to define how traffic is translated between the public Internet and your private network.
Step 3: Create a new NAT policy
Select Add to add a new NAT policy. The Add button is positioned in the top right-hand corner of the page. This will take you to a new screen where you may configure the NAT policy details.
Step 4: Configure the source and destination
The Original Source and Destination indicate the origin and destination of the communication that has to be forwarded.
For instance, if you are forwarding traffic from the public Internet to a device over your private network, you would provide the public IP address as the Original destination and the device’s private IP address as the Translated Destination.
Step 5: Choose the appropriate service object
The Service Object defines the port or protocol that has to be forwarded. SonicWall supports several predefined service objects for common applications and protocols like HTTPS, HTTP, and FTP.
If the service object you require is not provided, you may build a new one by selecting Custom from the drop-down list.
Step 6: Configure the Inbound and Outbound Interfaces
The Inbound Interface provides the network interface on the SonicWall where traffic would arrive, whereas the Outbound Interface specifies the network interface where traffic would be sent.
In most circumstances, keep the Inbound and Outbound interfaces set to Any.
Step 7: Set the Translation Method
The Translation Method describes how SonicWall should convert traffic. There are two options, i.e., static and dynamic IP and port. Static translation maps a single public IP address to a single private IP address, whereas Dynamic IP and Port translation map a range of public IP addresses to a range of private IP addresses.
Step 8: Choose the appropriate security services
You can customize numerous security features in The Security Services section, like content filtering, antivirus scanning, and intrusion prevention. You can activate any or all of these functions based on your network requirements.
Step 9: Save the NAT Policy
When entering this data, click the OK button to save the policy. The SonicWall will route traffic to the appropriate network device on the given port.
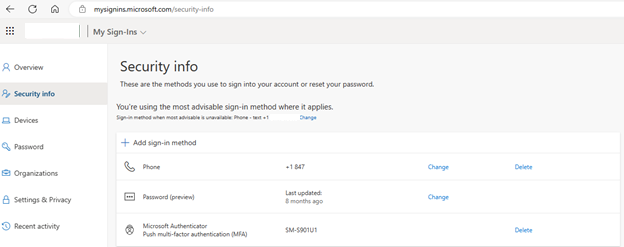
Each user can manage his/her own office 365 settings by accessing https://aka.ms/MFASetup. You have these options: Security info, Devices, Password, Organizations, my sigh-ins and more.
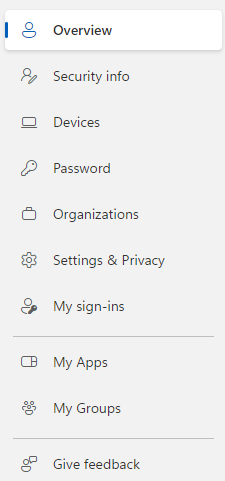
Under Security info, you can manage your Microsoft Authenticator.
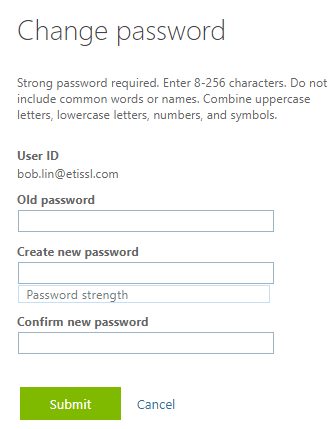
Reset password.
And more.
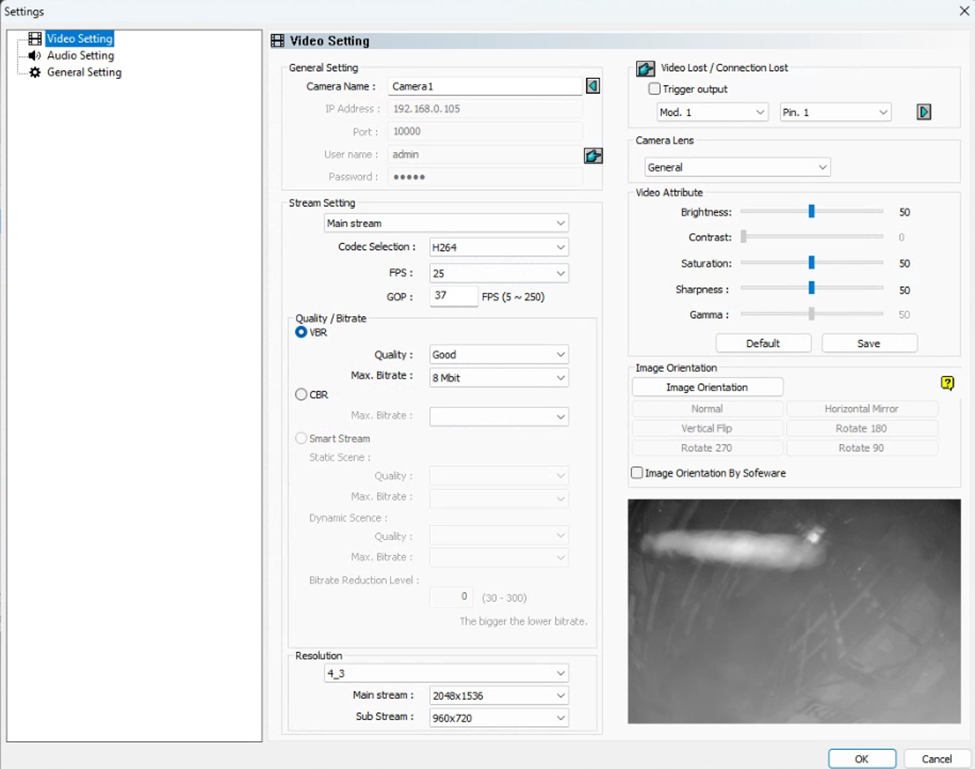
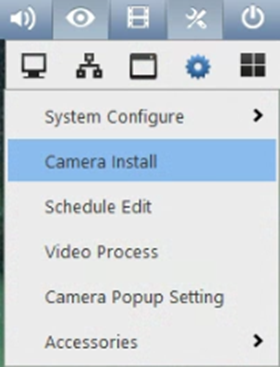
To change the GV-VMS Device settings such as name, Stream, Quality, resolution in GeoVision GV-VMS, please follow these stspes.
1. Navigate o to Toolbar.

2. Click on Configure.

3. Click on Camera Install.
4. With IP Device Setup open, highlight the device you want to manage.
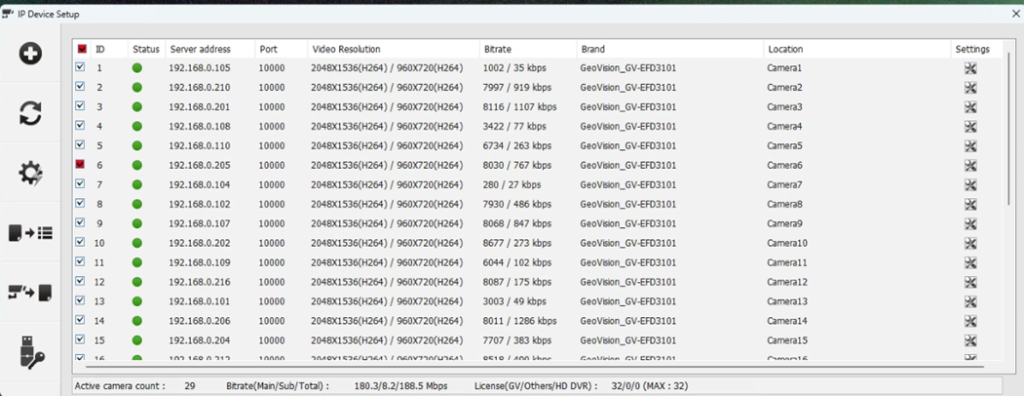
5. Click on the settings icon.

6. That will open the Settings page.