Just type this commands: change subtitle to highlight each word as it’s spoken, and then click Generate.

Please view this YouTube video: How to highlight words in invideo AI
Just type this commands: change subtitle to highlight each word as it’s spoken, and then click Generate.
Please view this YouTube video: How to highlight words in invideo AI
Just type change language to whatever language you prefer. Then click on Generate.

Please view this YouTube: How to change language in invideo AI
Situation: The client received a return MacBook without knowing the password. They decide to reinstall macOS.
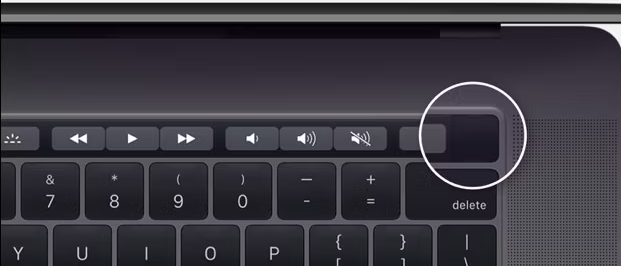
Resolution: Reinstalling macOS using 3 keyboard combinations: the Option + Command + R key combination allows you to install the latest macOS version compatible with your Mac. Here are the steps to do this: 1) Command + R for reinstalling the latest version of macOS installed on your Mac; 2) Option + Command + R for upgrading to the latest version of macOS; 3) Shift + Option + Command + R for reinstalling the version of macOS that came with your Mac.
3. Enter macOS Recovery:
As your Mac restarts, immediately press and hold Option + Command + R. Keep holding these keys until you see a spinning globe or the Apple logo with a progress bar.
This will start up your Mac from macOS Recovery over the internet, and it may take some time to load.

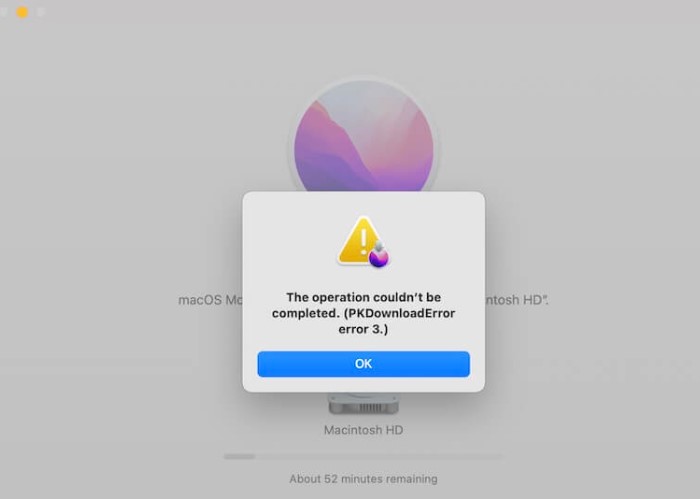
Note: You must have WiFi to reinstall macOS. Otherwise, you may receive this message:
Click the WiFi icon in thetop right.

4. macOS Utilities Window:
Once the macOS Utilities window appears, select “Reinstall macOS” or “Reinstall macOS [version name]” from the list of options.
Click “Continue.”

5. Follow the On-Screen Instructions:
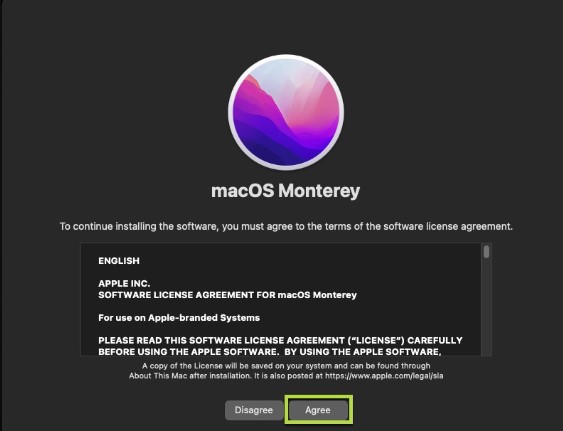
Agree to the terms and conditions.
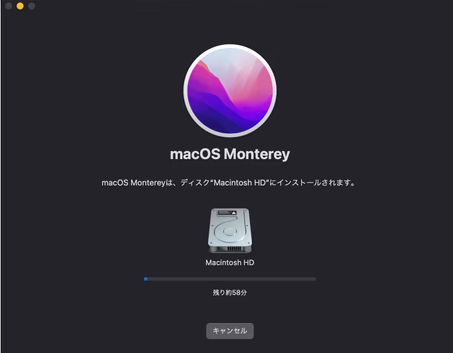
Select the disk where you want to install macOS. Typically, this will be your Macintosh HD or a similarly named disk.
Click “Install.”
Complete the Installation:
The installer will download the necessary files and begin the installation process. This can take some time depending on your internet speed and the size of the macOS update.
Your Mac may restart multiple times during the installation. Allow it to complete the process without interruption.
Set Up Your Mac:
After the installation is complete, your Mac will restart and present the Setup Assistant.
Follow the on-screen instructions to set up your Mac, including configuring your settings, signing in with your Apple ID, and restoring your data from a backup if desired.
Once the setup is complete, your Mac will be running the latest version of macOS compatible with your device.
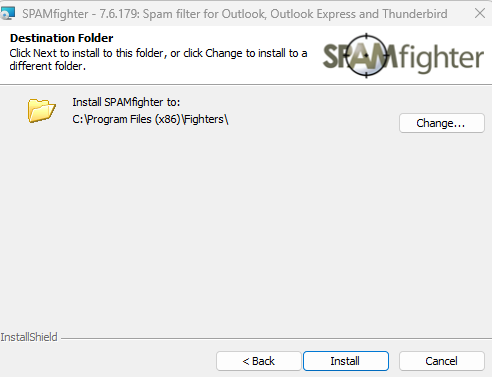
5. Click Install in Destination Folder.
6. Click Next.
7. Click Finish.
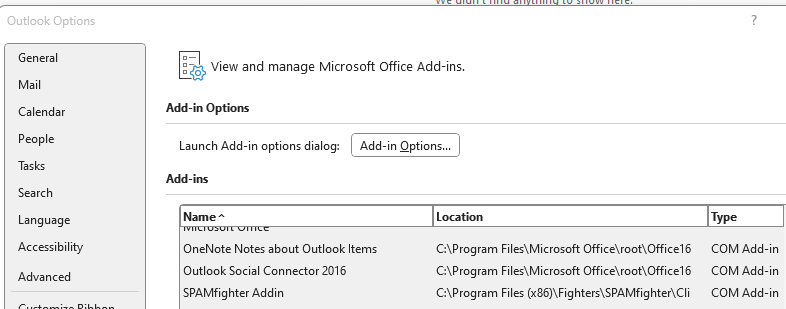
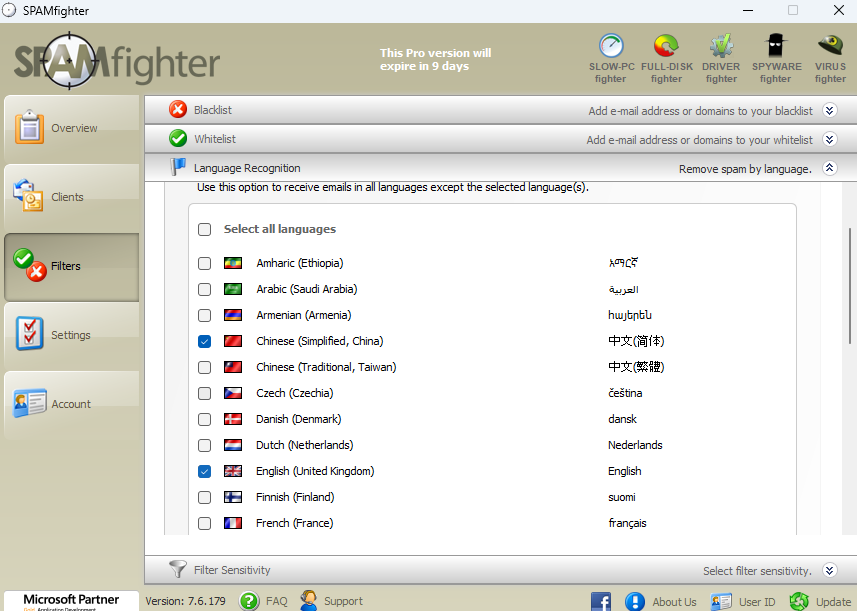
7. Open the email app, for example Outlook. You should see SPAMfighter folder.

8. If you click File>Options>Add-ins, you should have SPAMfighter addin.
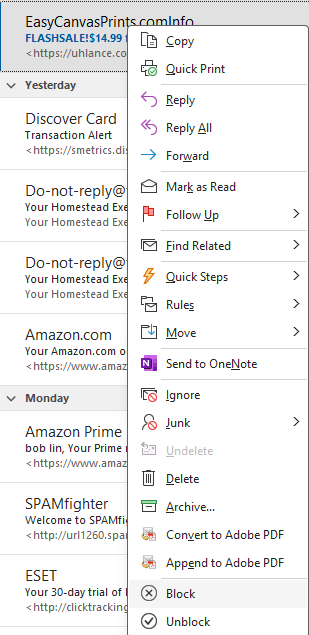
9. if you want to block an email, right click on the email and select Block.
10. If you want to manage the SPAMfighter settings, click on Home>More…(near to Unblock).

11. You have options to manage Blacklist, Whitelist, and other options.
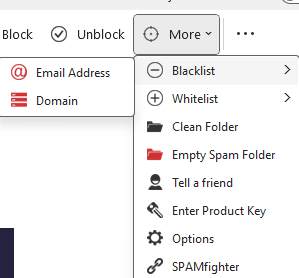
12. In options, you can also Filter Language Recognition.
Log in to your Bluehost control panel.
From your menu, click on ‘My Sites’. This will take you to the ‘Sites’ page Where all your websites are listed.
Select the website for which you want to change the URL and click on ‘Log in’. This will lead you to your WordPress admin page.
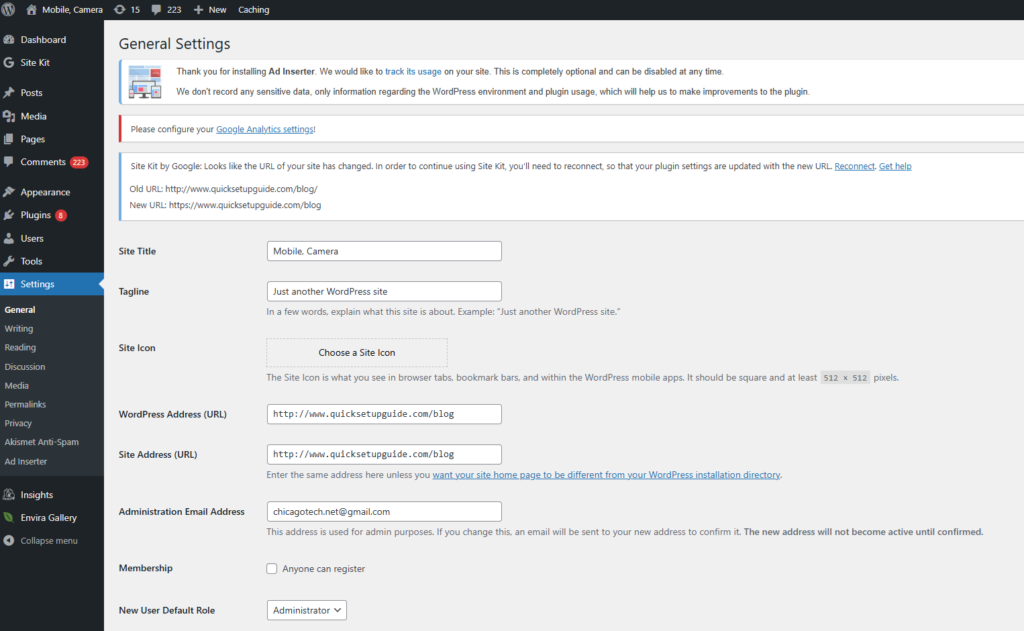
Next, scroll down and from the menu select ‘Setting’, this is close to the bottom of the scroll. And from the options select ‘General’.
This will take you to your general settings page. Scroll down to find the text box ‘WordPress Address (URL)’ and ‘Site Address’. Make the necessary changes here and change the URL’s to the new ones.
After you have added the new URLs, scroll down further and click on ‘Save Changes’.
Once you do that, you will see this message confirming your changes being saved.
onicWall firewalls are primarily designed for network security, including threat prevention, intrusion detection, and ensuring safe access to internet resources. While SonicWall firewalls have advanced security features, they are not specifically designed to block spam emails directly.
However, SonicWall offers complementary solutions that can effectively handle spam email:
To summarize, while SonicWall firewalls alone do not block spam emails, combining them with SonicWall Email Security provides a powerful solution to protect your network and manage spam effectively.
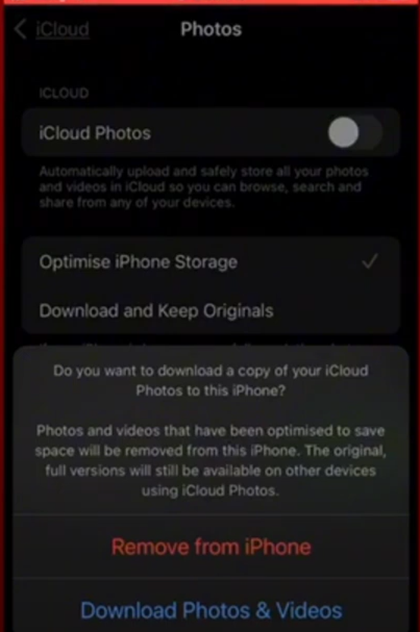
The Files app, introduced in iOS 11, is the central repository for all of the files services with apps on your iPhone and iPad, like iCloud, Google Drive, Dropbox, and many more. It lets you open documents, photos, videos, and audio from any compatible app from a single point on your device.

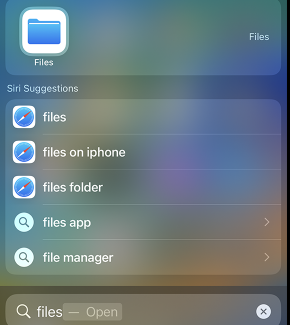
Don’t see the blue Files app icon on your Home Screen? Just swipe down, then search for the Files app.
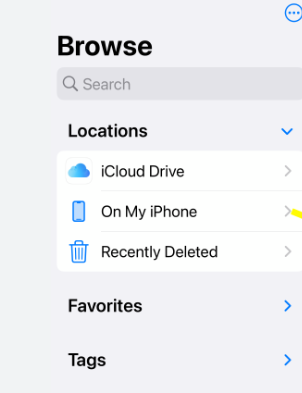
2. With Files app open, you can browse to iCloud drive, On My iPhone/iPad.
3. In the Files app, search or browse for the file that you want.

On your iPhone or iPad
On your Mac
By design, Google defaults to the first account you logged in with. So, the solution is to set a default Gmail or Google account:
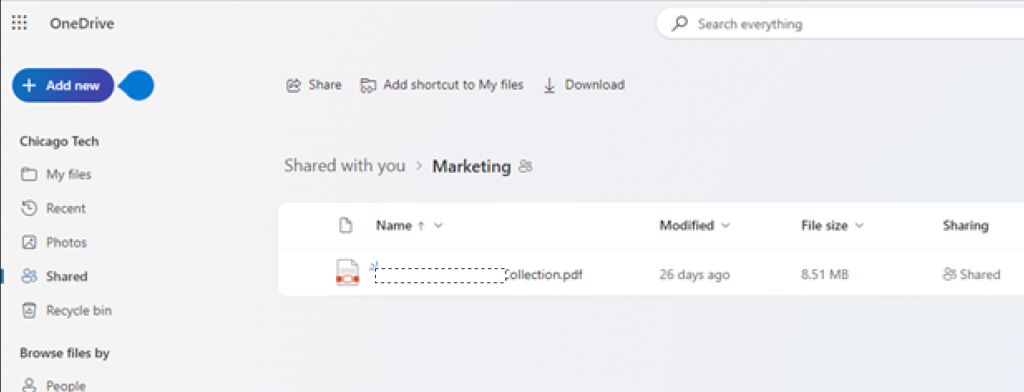
This “How to” will show you how to access shared OneDrive folder from a PC using the internet. You can access the shared OneDrive folder from home, hotel and even outside of the country with the Internet connection.
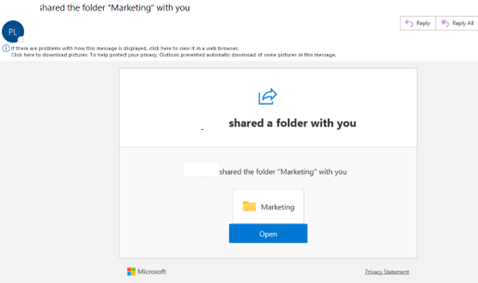
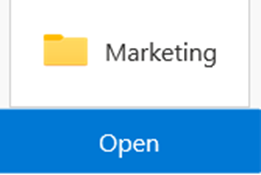
2. Click Open.
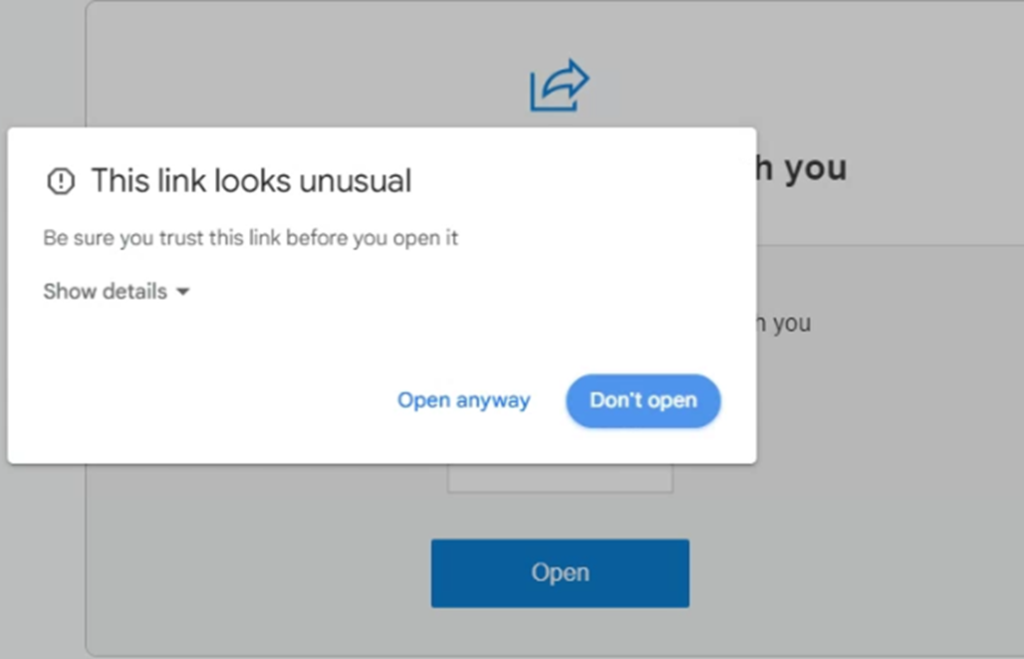
3. Click on Open anyway if you receive this message:
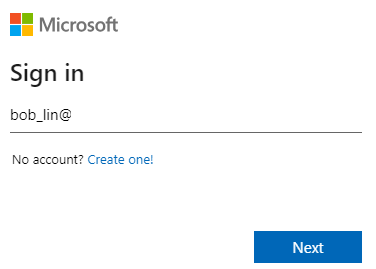
4. Please Sign in Microsoft using your (receiver) email, for example bob_lin@chicagotech.net. Note: you must have a Microsoft account to access the cloud folder. If you don’t have a Microsoft account, please register first. It is free.
5. Enter your Microsoft account password.

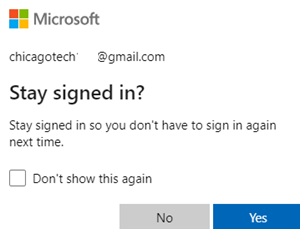
6. Check Don’t show this again and then click on Yes.
7. Now, you should be able to access shared OneDrive folder.