If the user has been locked, you can go to Device>Authentication Profile, click the username under Locked Users.

If the user has been locked, you can go to Device>Authentication Profile, click the username under Locked Users.
By default, “Remove and quarantine all threats automatically” is disabled in Malwarebytes. To enable ti, go to Policy>Scheduler. Click Edit and check “Remove and quarantine all threats automatically”. Restart the Malwarebytes service.

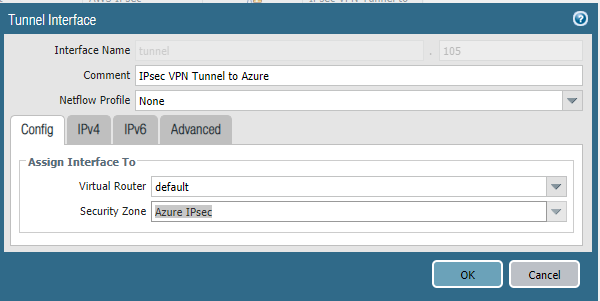
2. In Tunnel Interface, choose Interface Name, Virtual Router, default in our example, Security Zone (you can have preset zone or an IP on the same subnet as the Azure Gateway for dymanic routing)
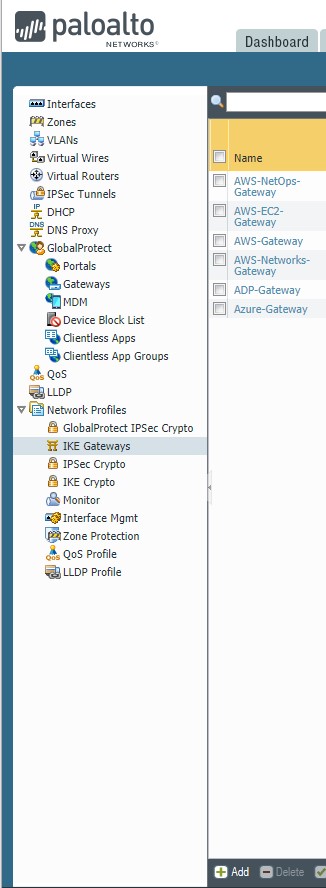
3. To configure IKE Gateway, go to Network > Network Profiles >IKE Gateway. Click Add. The following values are to be configured: Version: Set to ‘IKEv2 Only mode’ OR ‘IKEv2 preferred mode’
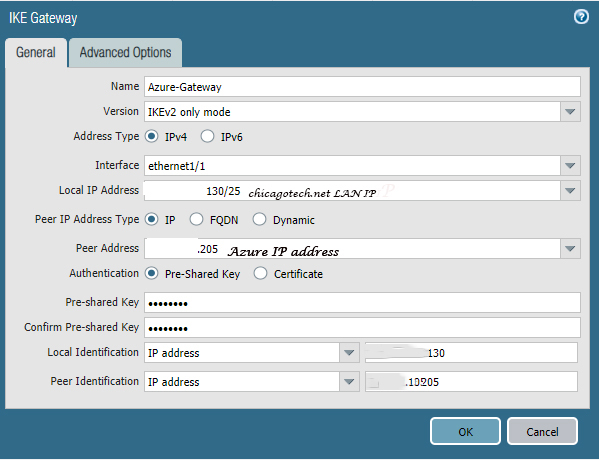
1) Choose the following values. Version: Set to ‘IKEv2 Only mode’ OR ‘IKEv2 preferred mode’. Interface: Set to the public(internet) facing interface of the firewall used to connect to Azure, ethenet1/1 in our example. Local IP Address: IP address of the external interface of the firewall. If not behind a NAT device, this will be the VPN Gateway Address as configured in Azure. Peer IP Address: IP address of the Azure VPN Gateway. This can be obtained from the Azure Virtual Network dashboard. Note: Make sure you use the NAT-ed IP on Azure to define the peer IP. Pre-shared Key: Azure uses a Pre-shared key(PSK or Pre-Shared Secret) for authentication. The Key should be configured as the same value on Azure VPN settings and Palo Alto Networks’ firewall.
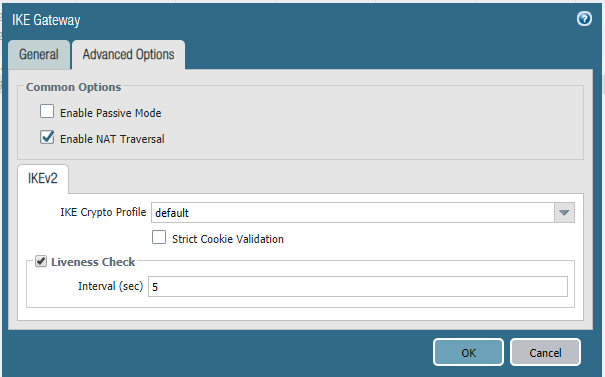
2) On the Advanced Options tab, leave the Enable Passive Mode (Set as responder) unchecked, and in the IKEv2 section leave Liveness Check enabled. Note: Enable NAT traversal if the firewall is behind a NAT device.
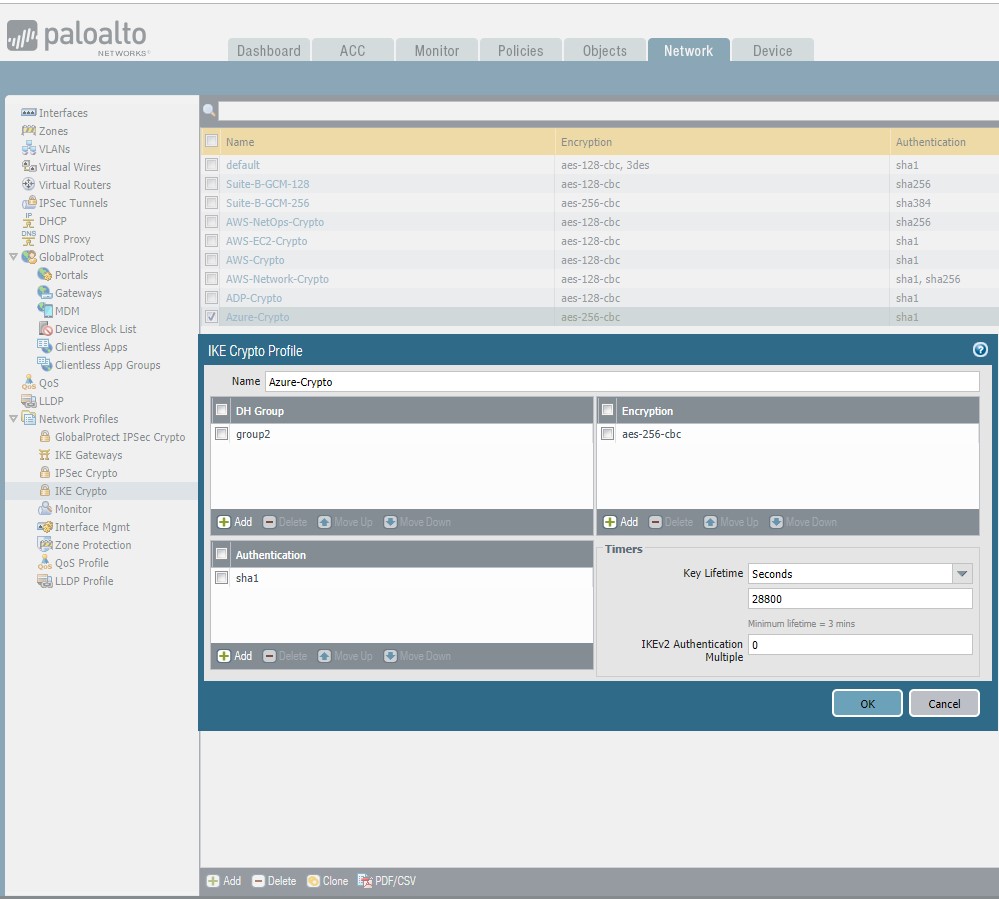
4. To configure IKE Crypto Profile, go to Network > Network Profiles >IKE Crypto. this is PA default settings: DH Group: group2 Encryption: aes-256-cbc, 3des Authentication: sha1, sha256 Note: Set lifespans longer than Azure settings to ensure that Azure renews the keys during re-keying. Set phase 1 lifetime to 28800 seconds.
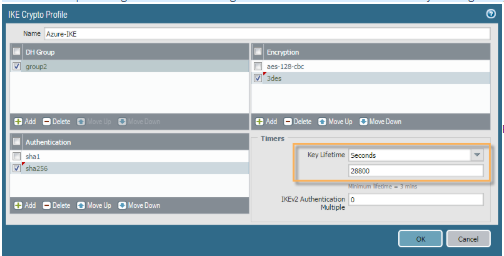
You are better to configure new crypto profile, which matches the IKE crypto settings of Azure VPN. This is our working configuration.
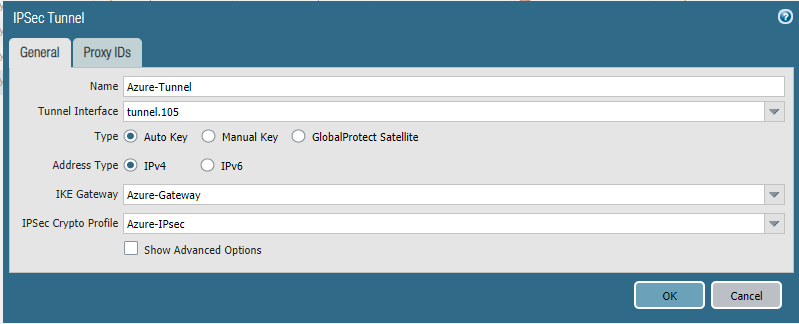
5. Configure a new IPSec Tunnel by going to Network->IPSec Tunnels. The following values are to be configured: Tunnel Interface: Select the configured Tunnel Interface in Step 2. above.
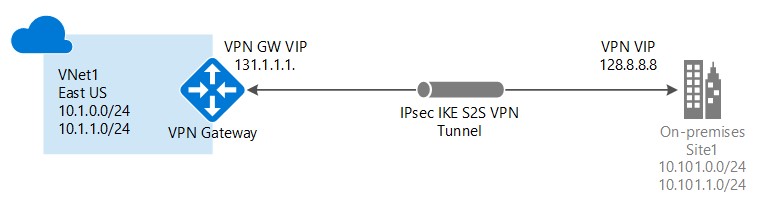
Microsoft Azure requires IKEv2 (route-based VPN) for dynamic routing. IKEv1 is restricted to static routing only. IKEv2 is supported in PAN-OS 7.1.4 and newer versions, and fully supports the necessary route-based VPN and crypto profiles to connect to MS Azure’s dynamic VPN architecture. This document discusses the basic configuration on both Palo Alto Networks firewall and Microsoft Azure site to site VPN.
Part 1 Create a Site-to-Site VPN (VNet) using the Azure portal
A Site-to-Site VPN gateway connection is used to connect your on-premises network to an Azure virtual network over an IPsec/IKE (IKEv1 or IKEv2) VPN tunnel.

3. In the Search the marketplace field, type ‘virtual network’. Locate Virtual network from the returned list and click to open the Virtual Network page.
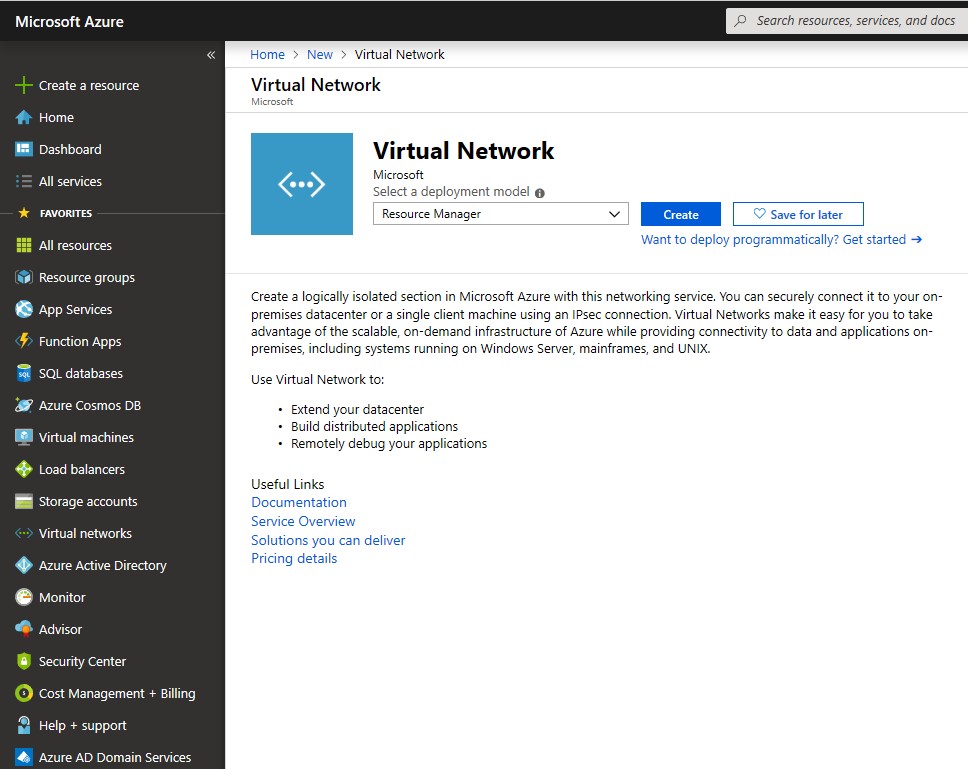
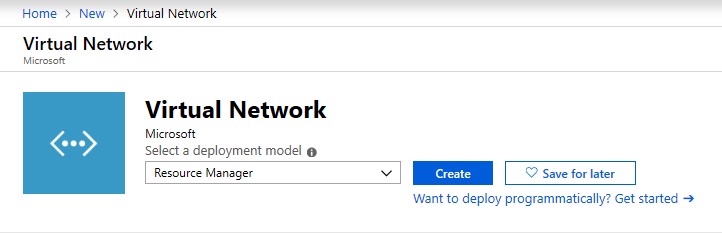
4. From the Select a deployment model list, select Resource Manager, and then click Create. This opens the ‘Create virtual network’ page.
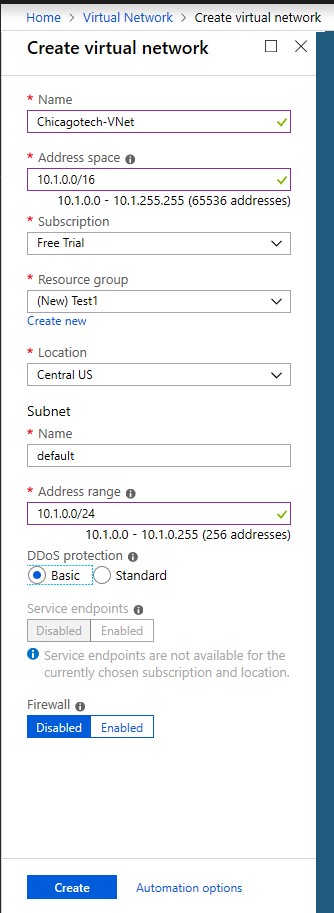
5. With the ‘Create virtual network’ open, enter information such as Name, Address space, Address range. Click Create to create VNet.
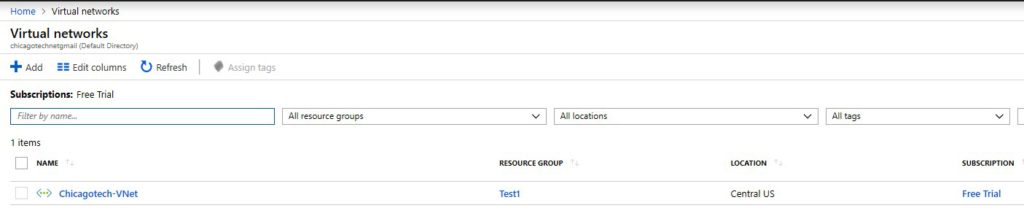
6. Now, you should the VNet created.
You may use Powershell. Here is how.
This is the example and result.
PS C:\Users\blin> Set-ExecutionPolicy unrestricted -scope currentuser Execution Policy Change The execution policy helps protect you from scripts that you do not trust. Changing the execution policy might expose you to the security risks described in the about_Execution_Policies help topic at https:/go.microsoft.com/fwlink/?LinkID=135170. Do you want to change the execution policy? [Y] Yes [A] Yes to All [N] No [L] No to All [S] Suspend [?] Help (default is “N”): y
PS C:\Users\blin> $UserCredential = Get-Credential
cmdlet Get-Credential at command pipeline position 1 Supply values for the following parameters: Credential
PS C:\Users\blin> $Session = New-PSSession -ConfigurationName Microsoft.Exchange -ConnectionUri https://outlook.office365.com/powershell-liveid/ -Credential $UserCredential -Authentication Basic -AllowRedirection
PS C:\Users\blin> Import-PSSession $Session -DisableNameChecking
ModuleType Version Name ExportedCommands ———- ——- —- —————- Script 1.0 tmp_4uncrkjn.uv3 {Add-AvailabilityAddressSpace, Add-DistributionGroupMember…
PS C:\Users\blin> Get-MailboxFolderPermission boardroom@chicagotech.net FolderName User AccessRights SharingPermissionFlags ———- —- ———— ———————- Top of Informatio… Default {None} Top of Informatio… Anonymous {None}
PS C:\Users\blin> Add-MailboxFolderPermission -Identity boardroom@chicagotech.net -User “blin@chicagotech.net” -Accessrights Editor
FolderName User AccessRights SharingPermissionFlags ———- —- ———— ———————- Top of Informatio… Bob Lin {Editor}
PS C:\Users\blin> Get-MailboxFolderPermission
cmdlet Get-MailboxFolderPermission at command pipeline position 1 Supply values for the following parameters: Identity: boardroom@Chicagotech.net FolderName User AccessRights SharingPermissionFlags ———- —- ———— ———————- Top of Informatio… Default {None} Top of Informatio… Anonymous {None} Top of Informatio… Bob Lin {Editor}
PS C:\Users\blin> Get-DistributionGroupMember cmdlet Get-DistributionGroupMember at command pipeline position 1 Supply values for the following parameters: Identity: AllEmployees@chicagotech.net Name RecipientType —- ————- blin UserMailbox
……..
PS C:\Users\blin> Get-DistributionGroupMember “AllEmployees@chicagotech.net” | export-csv c:\temp\list.csv
PS C:\Users\blin> Import-csv c:\temp\list.csv | %{Add-MailboxFolderPermission -identity boardroom@chicagotech.net:\calendar -user $_.PrimarySMTPAddress -Accessrights Editor} FolderName
User AccessRights SharingPermissionFlags ———- —- ———— ———————- Calendar Doug Simon {Editor}