Situation: The client would like to know all their network devices and MAC addresses. We use Windows DHCP export to collect this information for them. Here is how.
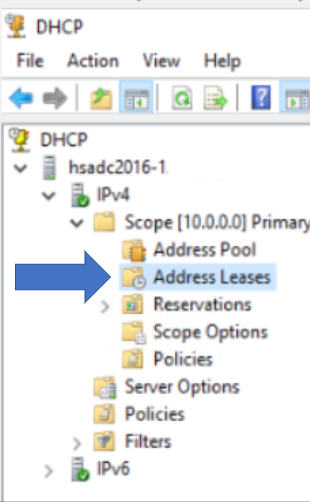
1.Login Domain Controller.
2.Open DCHP Server.
3.Navigate to Address Leases.
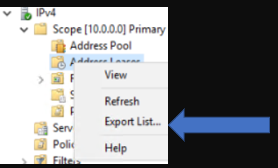
4. Right click on Address Leases and then Export List.
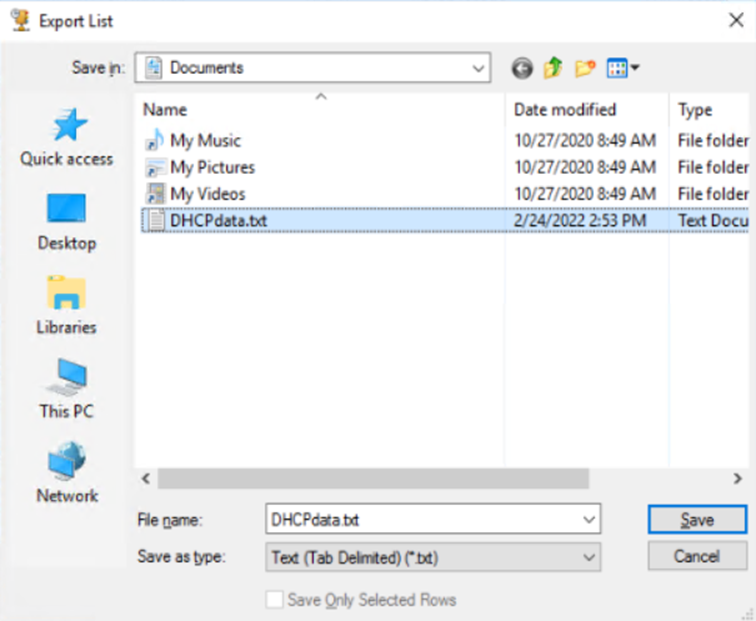
5. Type the File name and save it
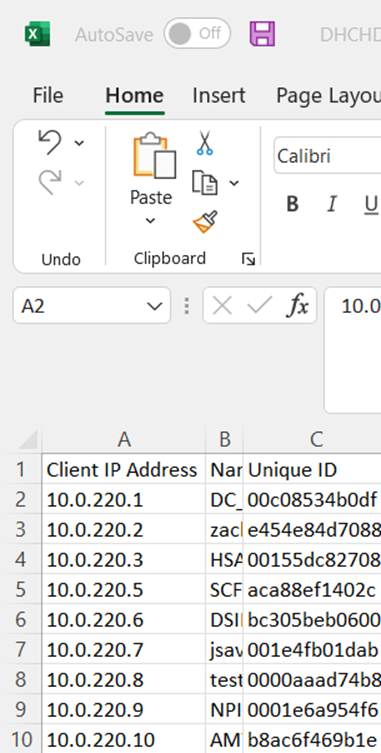
6. Open saved DHCP export list from the Excel and modify it.
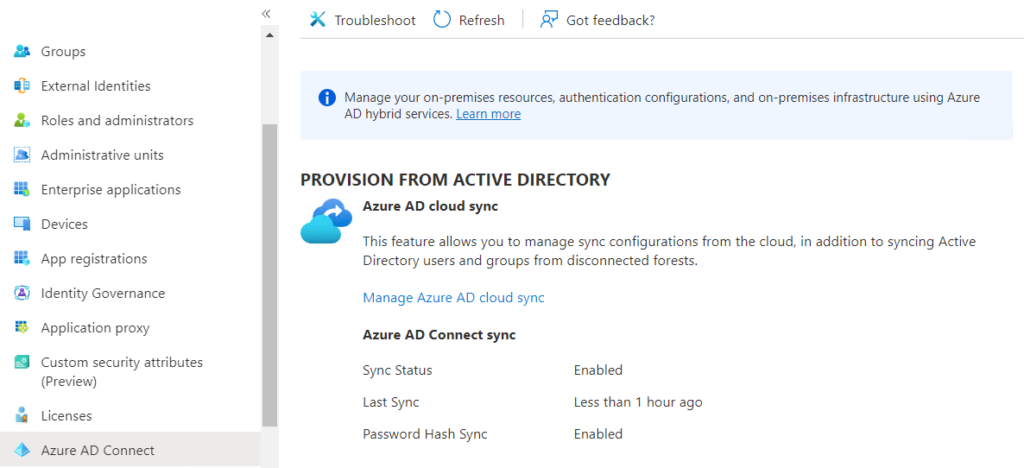
situation: The client is running AAD connect on their Windows 2012 R2 server. They would like to migrate it to a new Windows 2019 server.
Step 1: Install a new Windows 2019 Server.
Step 2: Review the configuration of the existing Azure AD Connect instance
you can use the AADConnectConfigDocumenter tool from MIcrosoft to create a HTML document of your existing configuration.
Step 3: Download and install the new Azure AD Connect instance in the new Windows server 2019.
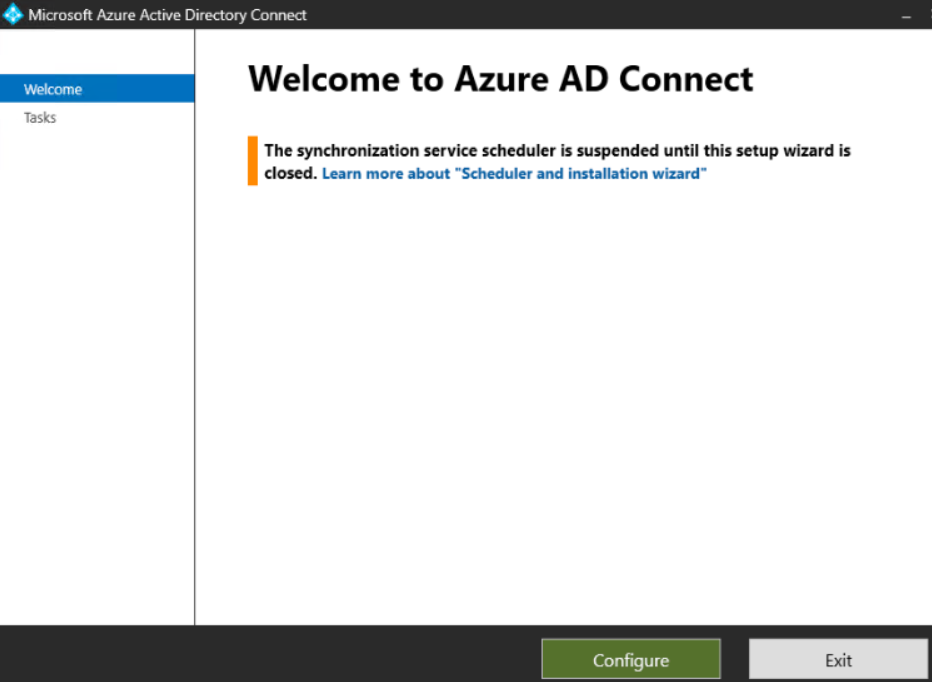
At the Express Settings dialog, choose Customize so that you can fully customize the AADConnect install.
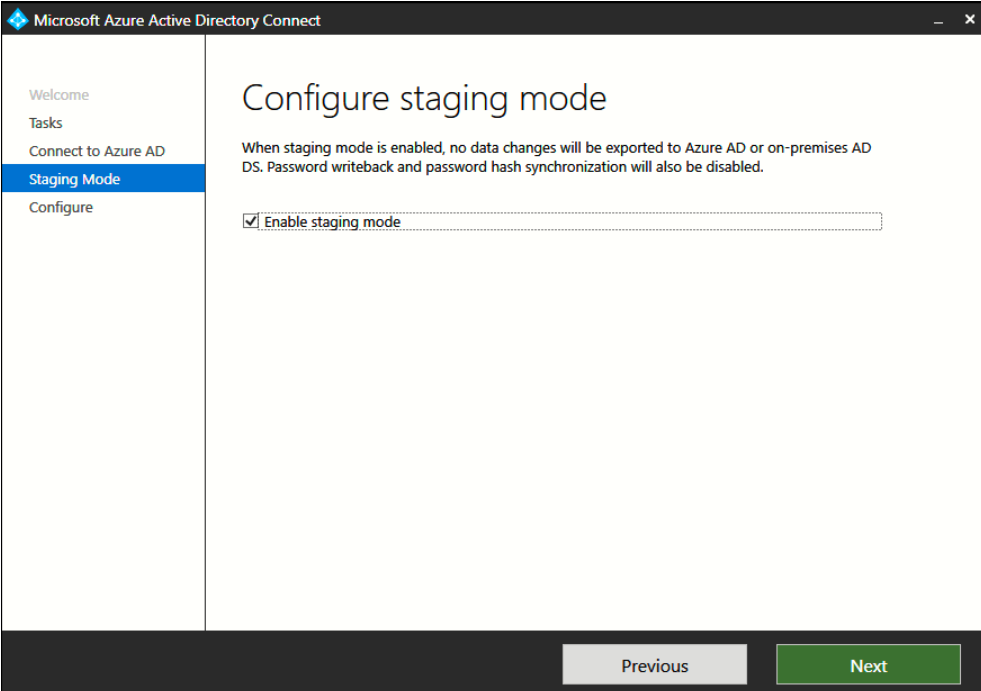
As you step through the custom setup you’ll be able to choose the same configuration options as your existing AADConnect instance. At the final stage, check the box to enable staging mode as well as start the synchronization process when configuration completes.
Step 4: Import and export Azure AD Connect configuration settings
Step 5: Swtich-over synchronization to the new server
Currently your environment has the following servers installed with AAD Connect:
Windows 2012 R2 server(Old): Synchronization enabled, staging mode disabled
Windows 2019 Server (New): Synchronization enabled, staging mode enabled
For example
Click Configure on Microsoft Azure Active Directory Connect Wizard.
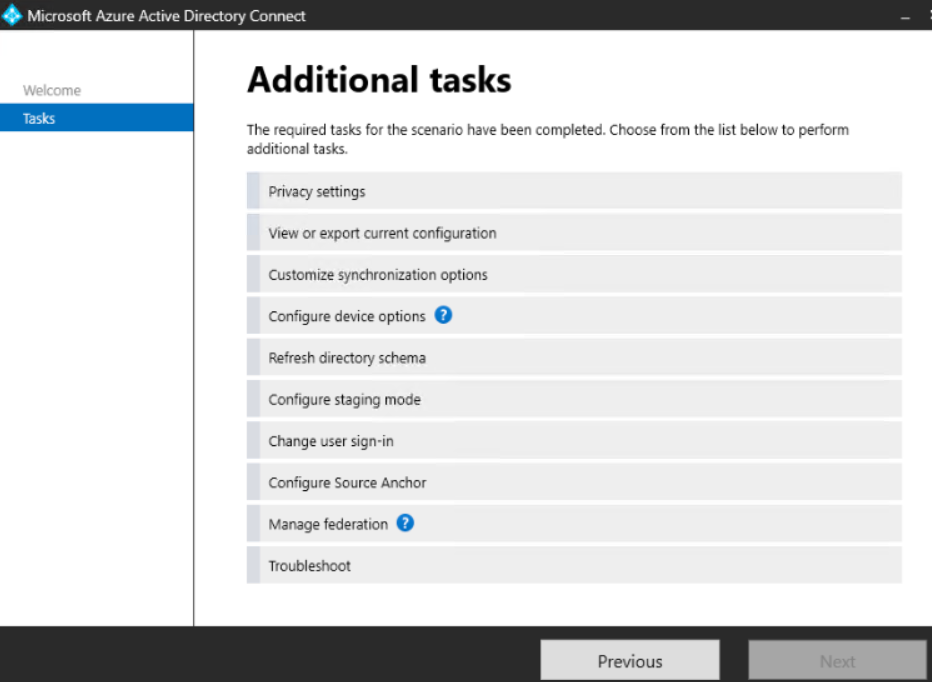
Select Customize synchronization options
Follow the Wizard to disable or enable staging mode.
While the two servers are in this state, the new server Windows 2019 server (New) will stay up to date with the latest changes in the on-premises Active Directory and Azure AD. However, it will not export any changes to the directories until staging mode is disabled. Before taking the new server out of staging mode, we first need to place the old server into staging mode so that we don’t have two servers trying to export changes to the directories.
During the switch-over, which is a pretty quick process, there’ll be no synchronization of changes between directories. This might mean a delay in the synchronization of a recent change that one of your administrators made (e.g. a group’s membership) or synchronization of a changed password. Keep in mind though that most changes have a synchronization delay anyway, since the sync schedule runs every 30 minutes. Password changes sync nearly instantaneous though, so that’s got a slightly higher risk of being impacted. To reduce the likelihood of the switch-over impacting someone or something important, you might prefer to schedule the change to occur during a period of low usage in your environment, such as an evening or weekend.
On the old server, launch Azure AD Connect and choose Configure, then from the Tasks list choose Configure staging mode. Click Next, and follow the wizard to authenticate and configure staging mode to be enabled. At the final step you can decide whether to keep synchronization enabled or not, depending on whether you think you might need to switch back to this server again (e.g. if the switch-over is only for DR, testing or site maintenance purposes).
On the new server, launch Azure AD Connect and choose Configure, and again from the Tasks list choose Configure staging mode. Follow the same wizard as before to disable staging mode on the new server, and make sure to start the synchronization process.
Step 6: Decommission the old server
When you’re satisfied that the new AADConnect instance is successfully synchronizing your directories, you can decommission the old instance of AADConnect if you no longer have a need for it. The uninstall process can be initiated from the Control Panel in Programs and Features.
When you start the uninstall of Microsoft Azure AD Connect you’ll be prompted to also remove the additional components that were installed on the server for AADConnect, such as SQL instance and the Microsoft Online Services Sign-In Assistant. You can remove them if you no longer have a need for them (e.g. the sign-on assistant is still needed by some PowerShell modules, so if you’re going to keep using the server for admin tasks or scripts, either leave that component alone or reinstall it afterwards).
After the uninstall has finished you can go ahead with any server decommission tasks you need to complete for your environment.
Step 7: Make sure AAD Connect is working
Run Synchronization Service Manager to make sure Dir Sync is working.
2. Login Microsoft 365 admin center to make sure azure AD Connect working without any issues.
3. Login Azure Active Directory admin center to make sure AAD Connect working
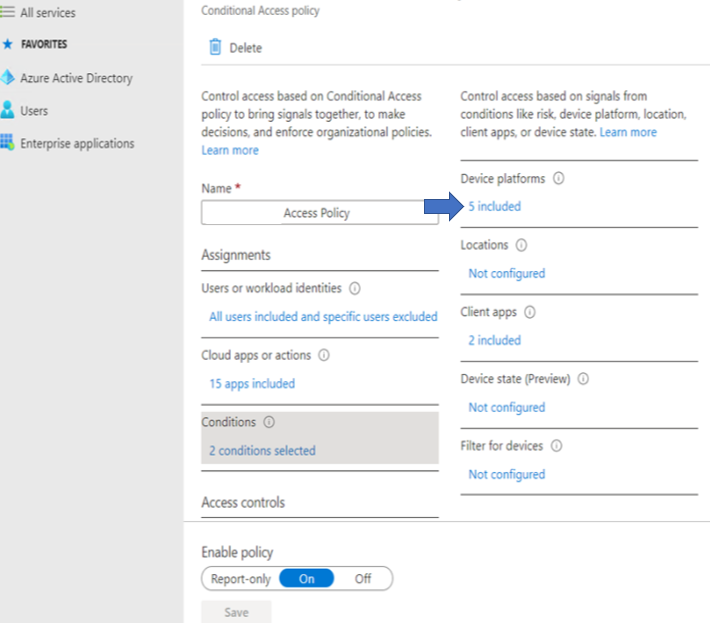
With Azure Conditional Access Policy, you enforce organizational policies to allow or block conditional access such as users, devices and location. This article shows how to manage device conditional access.
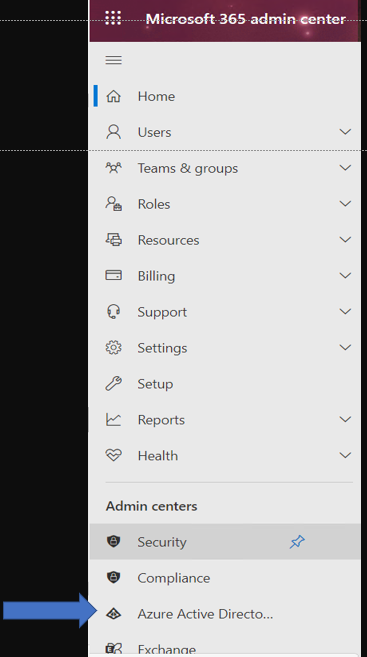
1.After
login Microsoft 365,
Click on Azure Active Directory.
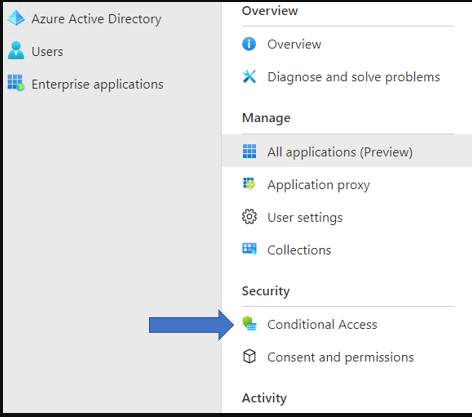
2. In Azure Active Directory admin center, click on Azure Active Directory.
3. Click Enterprise applications.
4. Click on Conditional Access.
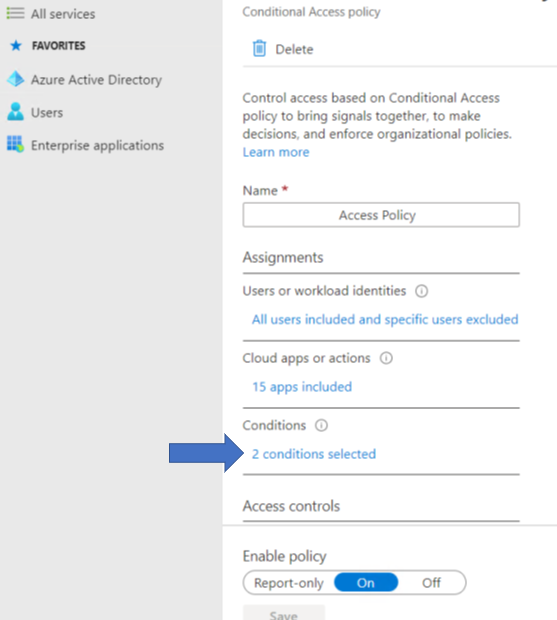
5. Click on your company Access Policy.
6. Click on Conditions
(2conditionsselectedin Our example).
7. Click on 5 included Under Device platforms
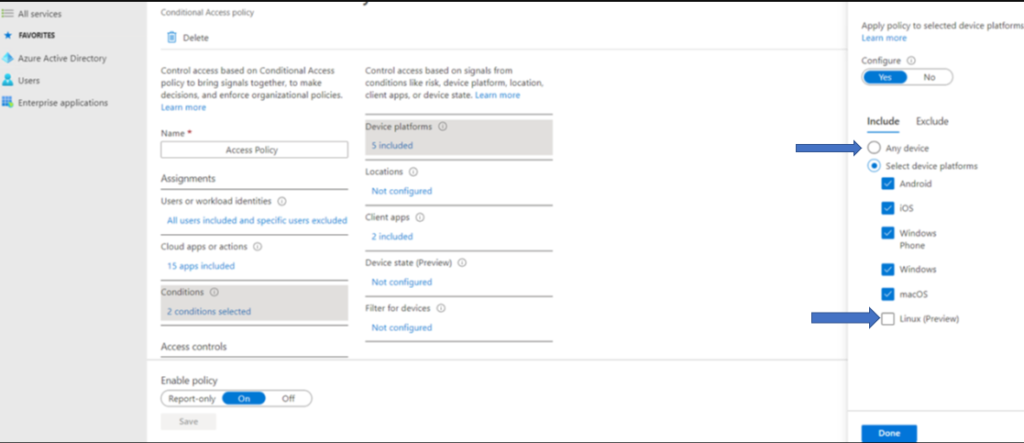
8. Modify the settings, check Any devise. In our case, we need Linux.
Our client just built a new printer server. They would like to remove old printers from each workstation and add the printers from the new printer server. There are different ways to do so, for example group policy and run command lines. This article shows you how to remove or add printers using commands (rundll32 printui.dll PrintUIEntry) or created batch file to remove or add multiple printers.
Step 1: Find the printer server
name and printer name
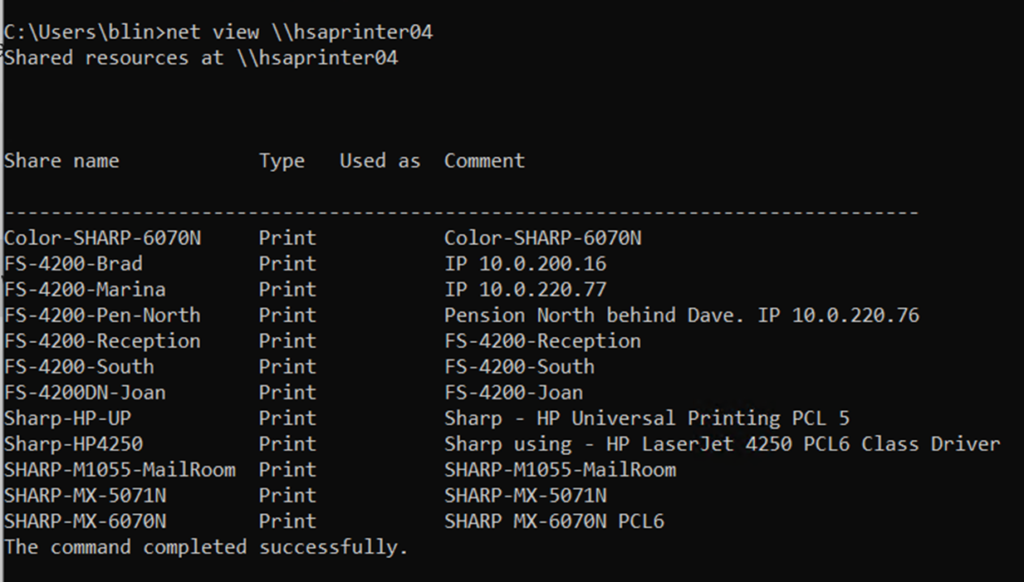
Option 1: if you know the printer
server name, use net view command.
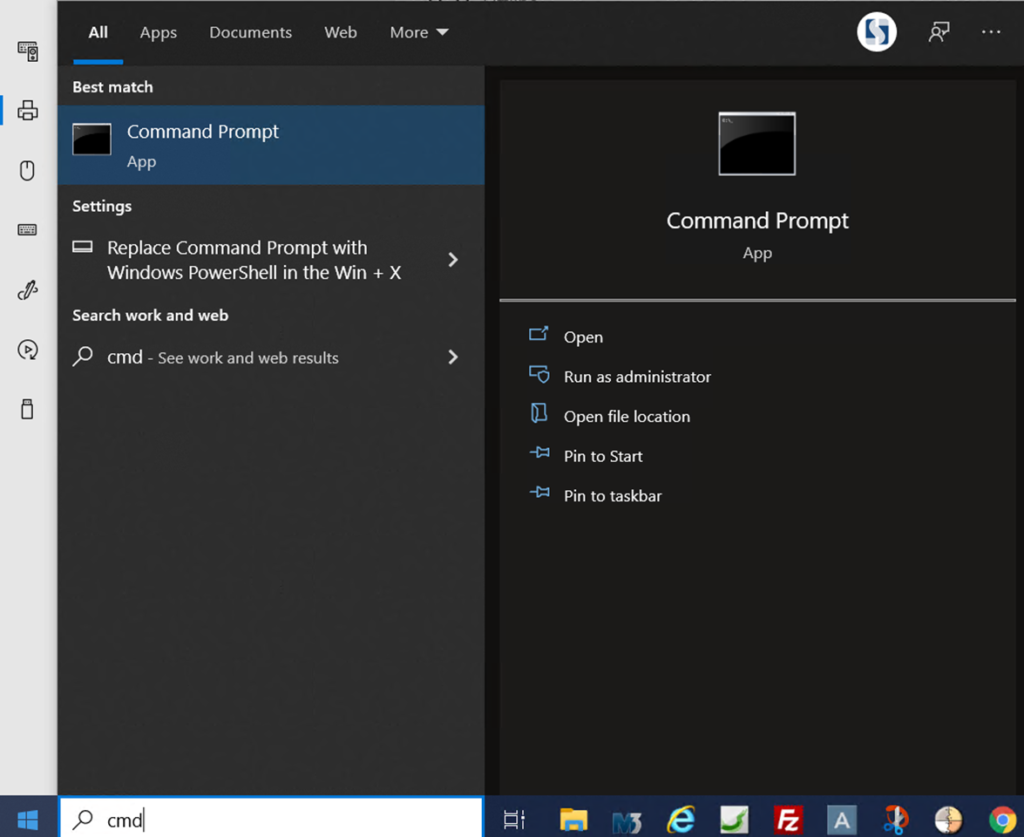
1. Open Command Prompt by typing cmd in
the search bar.
2. Use net view to check the printer name
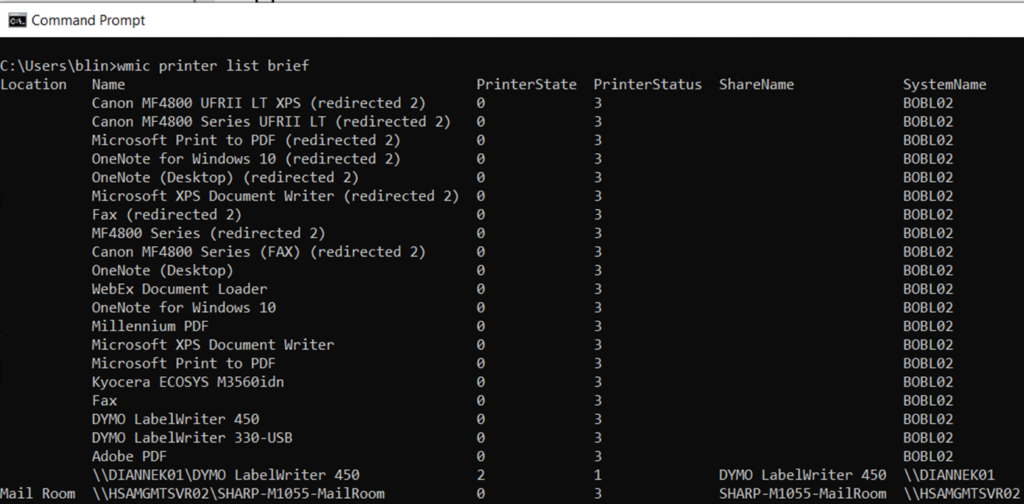
Option 2: If you don’t know the server name, use wmic printer list brief command
Option 3: You can also use
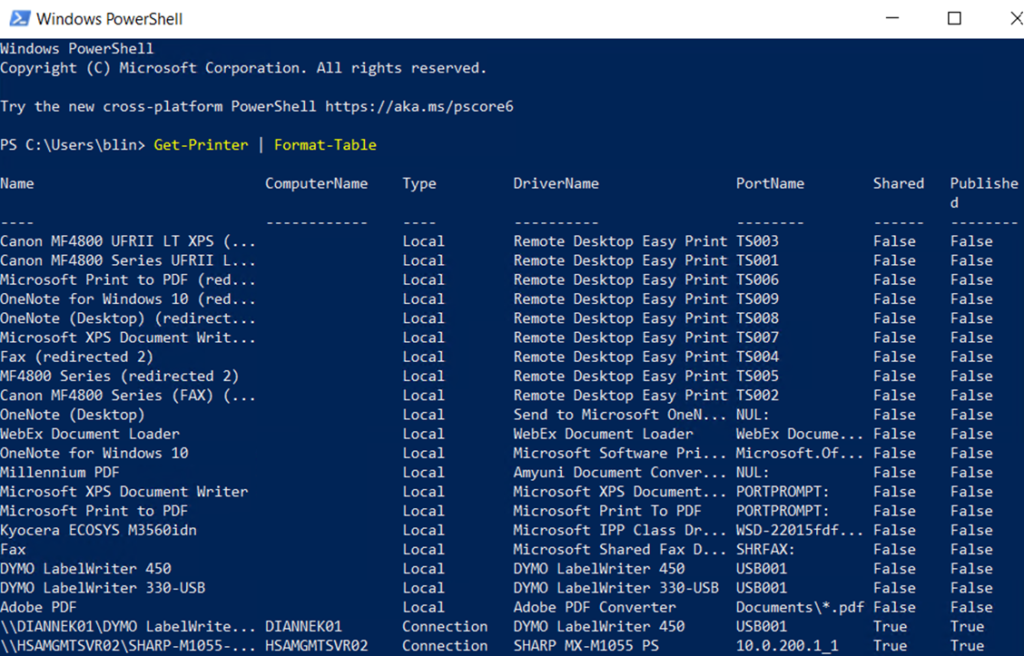
PowerShell command; Get-Printer | Format-Table
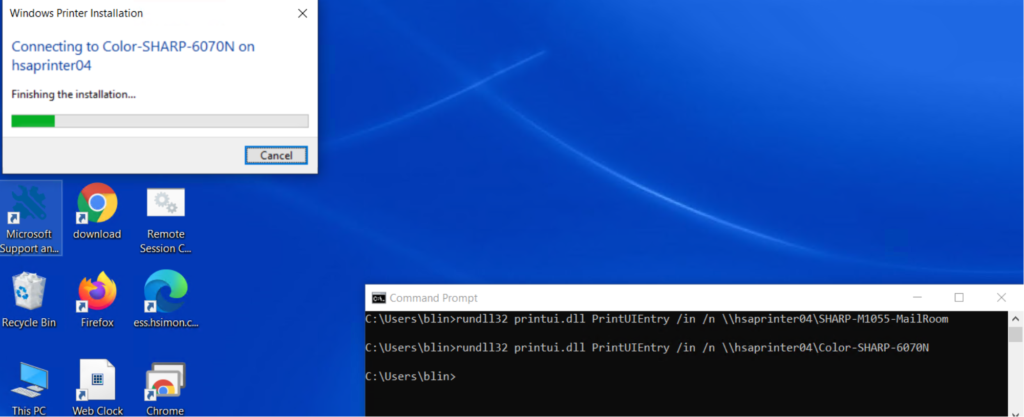
Step 2: Remove a printer or
printers using rundll32
To delete a printer uses this
command rundll32 printui.dll PrintUIEntry /dn /n \\server1\printername, for
example