Find out which devices are still using the old DNS Server

Situation: The client is migrating their DC, DNS and DHCP. The problem they are facing is they don’t have a detail inventory to show which network devices are using Statics IP address and DNS.

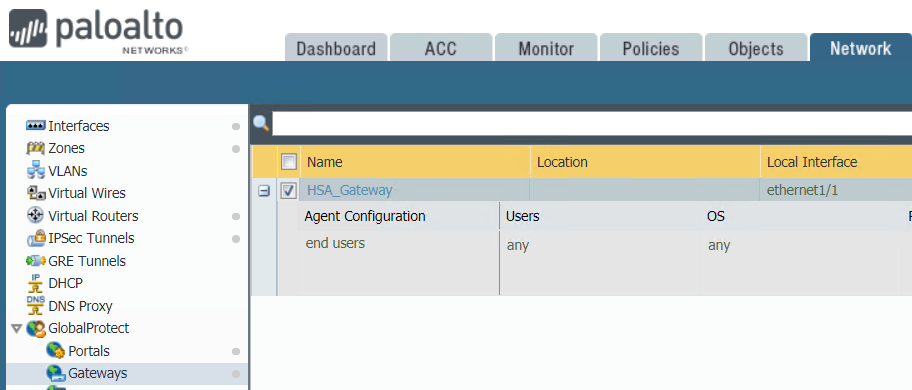
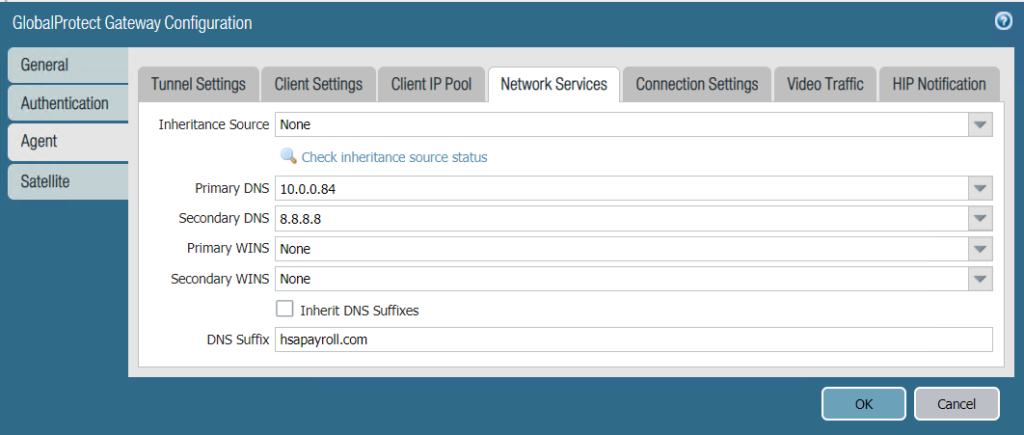
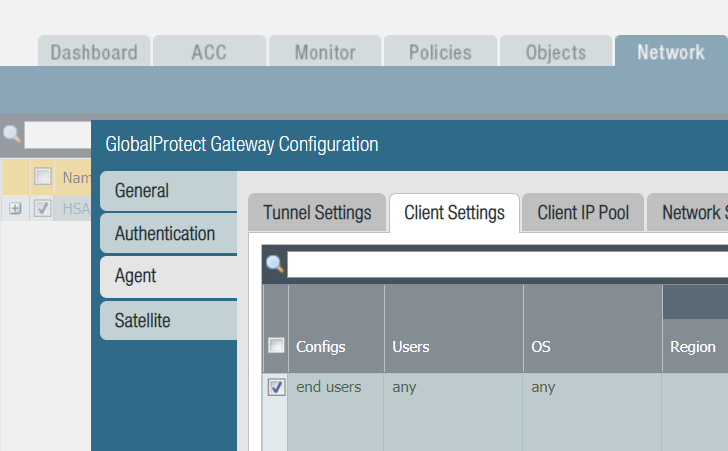
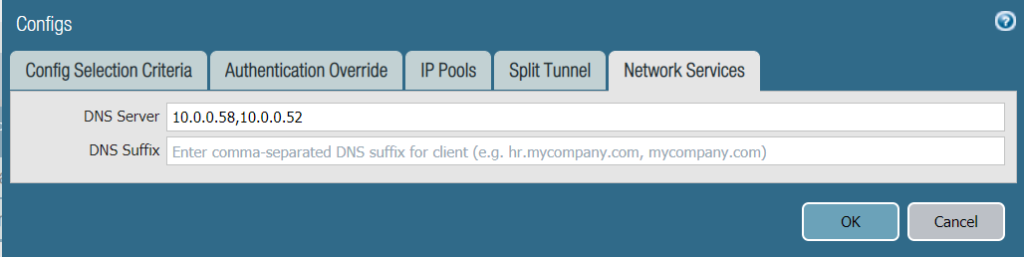
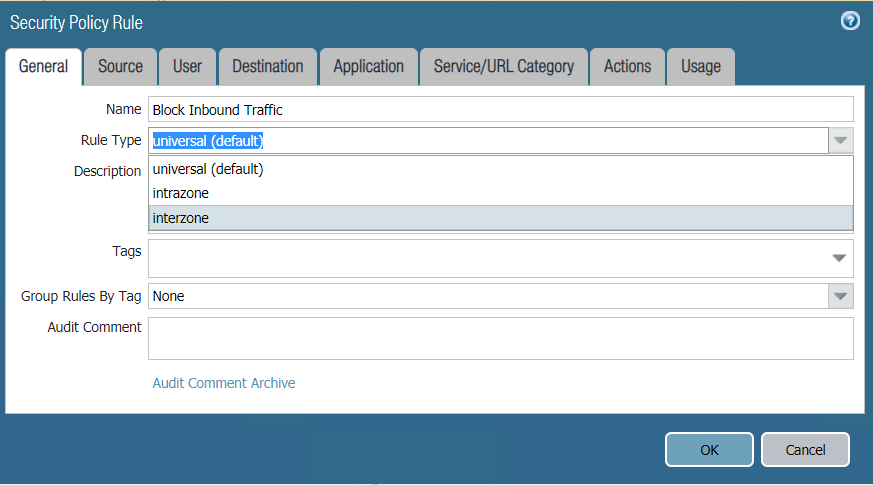
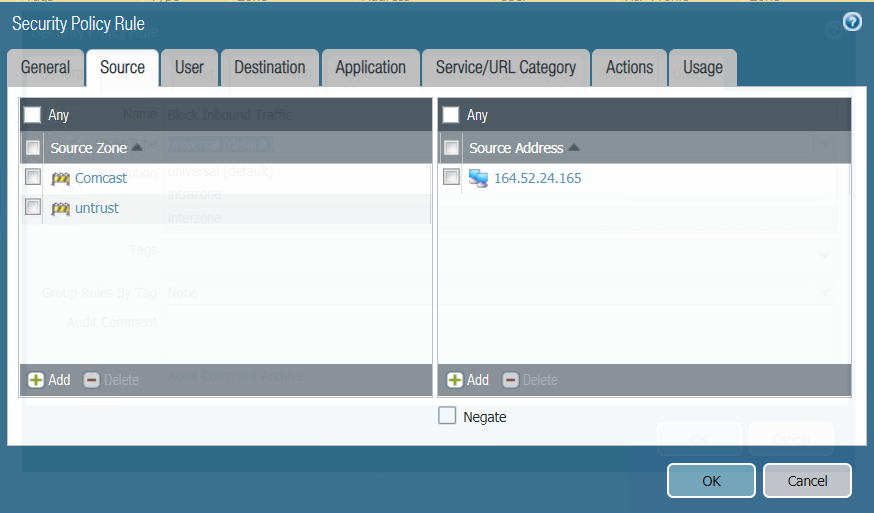
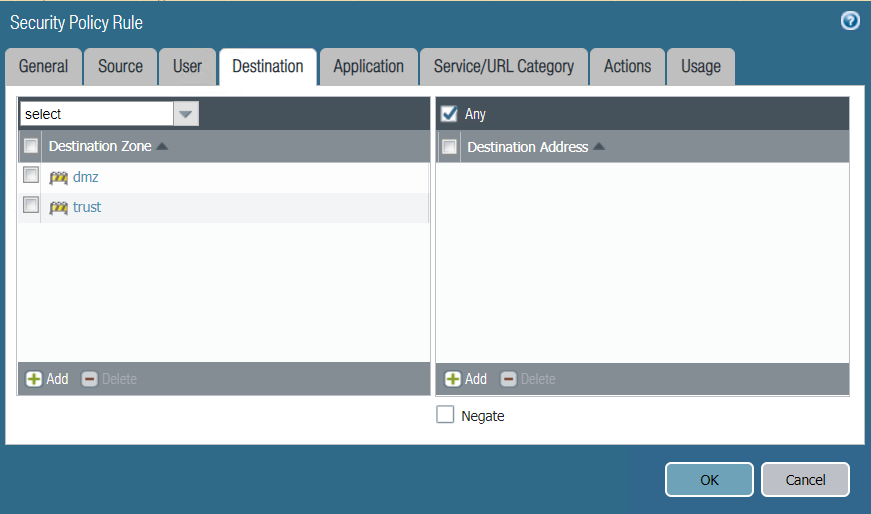
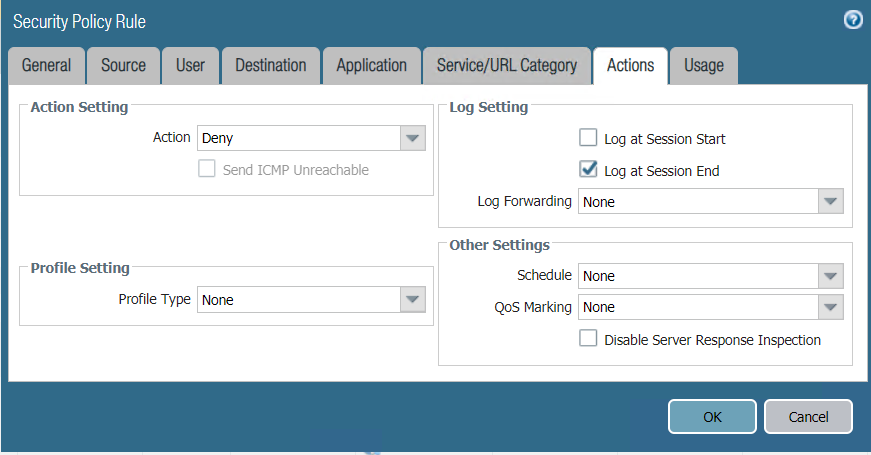
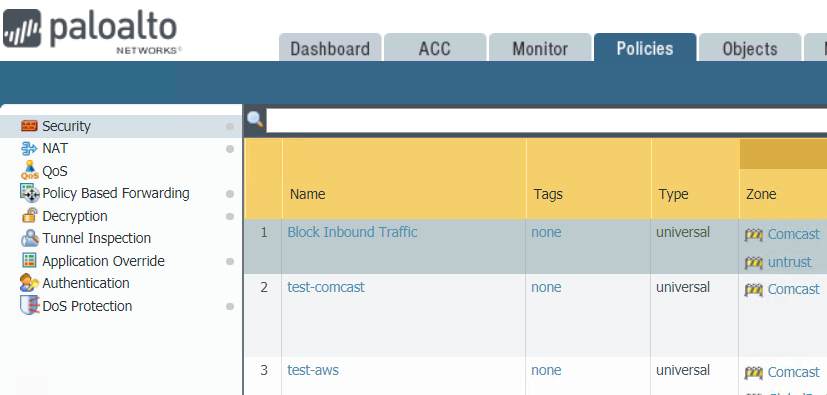
Resolution: Use network monitor to check destination IP addresses, age-out so that we can find out which devices are still accessing the old DNS IP addresses. In our example, we run Paloalto Firewall Monitor, add destination DNS IP address 10.0.0.85. It shows GloablProtect Zone still uses this DNS IP address.

Please view this step by step:

How to check if my PC is ready for Windows 11

Windows 11 will come in the end of 2021. This is minimum system requirements for running Windows 11

To check if your PC is meet the requirements, please follow these steps: 1.Visit Microsoft website: https://www.microsoft.com/en-us/windows/windows-11

Or

https://aka.ms/GetPCHealthCheckApp

2. Download PC Health Check app.

3. Run the downloaded app.

4. You receive this result:

Please view this step by step video:

How to change DNS settings for PA Firewall GloablProetc

Situation: The client has a Paloalto Firewall 850 running GloableProtect. Recently, they change their internal DNS. They would like to know how to change the DNS on the GloableProtect.

  1. Login Paloalto Firewall.
  2. Go to Network>GloablProtect>Gateway.

3. Click on Gateway under Name.

4. Go to Agent and then Network services.

5. You have options to change the DNS and WINS.

6. Still in the Agent, click Client Settings and end users.

7. Select Network Services and enter the DNS Server IP address.

8. Click OK and then Commit.

Please view this step by step video:

How to create a block policy in Paloalto firewall

  1. After login, go to Policies>Security.

2. Click Add on the bottom.

3. In General, type the Name, select Rule type, for example universal (default).

4. Add source zone and Source Address.

5. Add Destination

6. In Action, select Deny.

7. Click OK to save it

8. Move up the policy to the top.

9. Commit.

Please view this step by step video: