How to connect to Exchangeonline using Powrshell commands

To connect to Exchange Online (part of Microsoft 365) using PowerShell, you can use the following commands:

powershellCopy code

# Install the required module if not already installed Install-Module -Name ExchangeOnlineManagement -Force -AllowClobber # Connect to Exchange Online $UserCredential = Get-Credential Connect-ExchangeOnline -UserPrincipalName $UserCredential.UserName -ShowProgress $true

Explanation:

  1. The Install-Module command installs the Exchange Online Management module if it’s not already installed. This module provides the necessary cmdlets to manage Exchange Online.
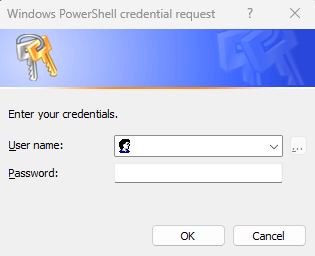
  2. The Get-Credential command prompts you to enter your Microsoft 365 email address and password. This creates a secure credential object that will be used to authenticate when connecting to Exchange Online.

3. The Connect-ExchangeOnline command is used to establish a connection to Exchange Online. You provide the email address from the credential object (UserPrincipalName) and set the -ShowProgress $true parameter to display the progress of the connection.

or Connect-ExchangeOnline -UserPrincipalName username@yourdomain.com

Make sure you have the necessary permissions and prerequisites to run PowerShell commands against Exchange Online. Also, keep in mind that the module and commands may have received updates since my knowledge cutoff in September 2021, so make sure to refer to Microsoft’s official documentation for the most up-to-date information.

How to Export Microsoft 365 Group Members To CSV

Option 1: Export group members to CSV Using Exchange Admin Center

  1. With Office 365 Admin Center open, go to the Exchange option.

2. In the Recipients category, go to Groups and select Microsoft 365 or Distribution list.

3. Under the Group, choose the group you want to export its members. for example AM Meeting under Microsoft 365.

4. When you click on the Export option, it shows two options – Exports groups in this list or Export all groups or Export group members.

5. When you choose an export option, a popup message will inform you about the time it will take to export groups. Click Continue.

6. The CSV file is created and downloaded in download folder.

Option 2: Export Microsoft 365 Group Members Using PowerShell Script

How to install Cato VPN Client

Step 1: Download the Cato Client from:

clientdownload.catonetworks.com

Step 2: install Cato VPN Client.

Step 3: Open the Client, enter your login credentials and then connect to the Cato Cloud.

  • Click on Stars.

  • Enter the login email.

  • Enter the credentials.
  • Send code.
  • Enter the code and conenct.
  • You should have the connection.

  • You should be able to ping or access the inside network device.
  • To disconnect, right click n the Cato icon and lick on Disconnect.

How to Set Up Windows Without a Microsoft Account

By design, Microsoft requires to have a Microsoft account to set up Windows. This article shows you how to set up Windows without Microsoft account. In other words, we bypass Microsoft account creation and will create a local account to login Windows.

In Windows 10, you can create a local account by disconnecting it from the internet.

With Windows 11, you may pull out your Ethernet cable (if you use one) or hitting Shift+F10 to open command line and run ipconfig /release to disconnect the Intrenet.

How to add Gmail folder All Mail in Outlook

  • In Outlook, click on the “Folder” tab at the top. Then you will see “IMAP Folders”
  • Hit the “Query” button
  • Click on the [Gmail]/All Mail and unsubscribe and then hit query and then subscribe again.
  • Gmail/All Mail is selected.  Then click on OK.
  • In Outlook, expand the folders under the [Gmail}. Right click on the [Gmail} and select “New Folder” (see image below)
  • Name it “All Mail”
  • Hit send/receive and email will start downloading to Outlook.

Hopefully this helps someone out there like it did me!

P.S. after doing this it can take several minutes (15+) before you will start to see sync progress due to the normal size of this folder and contents.

How to delete emails in Gmail before 2022

  1. Open your Gmail account in a web browser.
  2. Click on the search bar at the top of the Gmail window to activate the search options.
  3. Click on the downward-pointing arrow at the right end of the search bar to open the advanced search options.
  4. In the “From” field, you can leave it empty to include all emails or type the email address of a specific sender if you only want to delete emails from a particular sender.
  5. In the “To” field, you can leave it empty to include all emails or type your email address if you want to delete emails sent to you.
  6. In the “Subject” field, you can leave it empty if you want to include all emails, or type a specific keyword if you want to delete emails with a particular subject.
  7. In the “Has the words” field, enter before:2022/01/01 to filter emails received before January 1, 2022.
  8. After entering the search criteria, click on the blue “Search” button. Gmail will display all the emails that match the specified search parameters.
  9. If you want to delete all the emails in the search results, click the checkbox at the top-left corner of the email list to select all emails on the page.
  10. Once you’ve selected the emails you want to delete, click on the “Delete” button (trash can icon) located at the top of the Gmail window.
  11. Gmail will prompt you to confirm the deletion. Click “OK” to proceed. The selected emails will be moved to the trash.

How to delete emails older than 1 year

The process of deleting emails older than 1 year depends on the email service or application you are using. Here are general steps for some common email platforms:

  1. Gmail:
  1. In the search bar, type older_than:1y and hit Enter. This will show all emails older than one year.
  2. If you want to delete all those emails, you can click the checkbox at the top-left to select all emails on the page, then click “Select all conversations that match this search.”
  3. After selecting the emails, click the “Delete” button to remove them permanently.
  1. Outlook (Web version):
  1. Go to the “Search mail” box at the top of the page.
  2. Type received:<01/01/yyyy (replace yyyy with the appropriate year, e.g., 2022 if you want to delete emails before January 1, 2022) and press Enter.
  3. This will filter emails older than the specified date.
  4. Select the emails by clicking the checkbox at the top of the list, then click the “Delete” button to delete them.
  1. Apple Mail (macOS):
  1. Go to the Mailbox containing the emails you want to delete.
  2. Click on the “View” menu and select “Sort by” > “Date Received.”
  3. Scroll to the emails older than 1 year, select them, and press the “Delete” key to remove them.
  1. Microsoft Outlook (Desktop version):
  1. Open your Outlook application.
  2. In the search bar, type received:<01/01/yyyy (replace yyyy with the appropriate year, e.g., 2022).
  3. This will filter emails older than the specified date.
  4. Select the emails, then click the “Delete” button to remove them.

How to archive all of your email on Yahoo Mail

If you want to clean up your inbox but don’t necessarily need to permanently delete them, archive your messages instead. Yahoo provides a one-click tool for doing this, which is generally more efficient than deleting, since you don’t need to scroll, select, and delete more than once. 

1. Open Yahoo Mail in a web browser. 

2. Hover the mouse over “Inbox” in the navigation pane on the left and click the drop-down arrow. 

3. Choose “Clean your Inbox.”

Choose “Clean your Inbox” to move all messages to the Archive folder.

4. In the pop-up window, click “Archive emails.” Depending upon how many messages you have, this might take a while, but when it’s done, your inbox will be empty and all the email will be moved to the Archive folder.