How to setup scan to shared folder in Konica bizhub C4050i/C3350i

Step 1: Configuring network settings of this machine

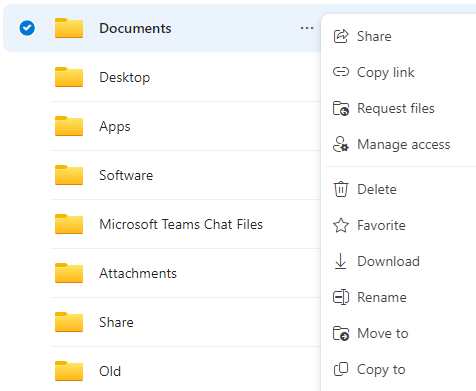
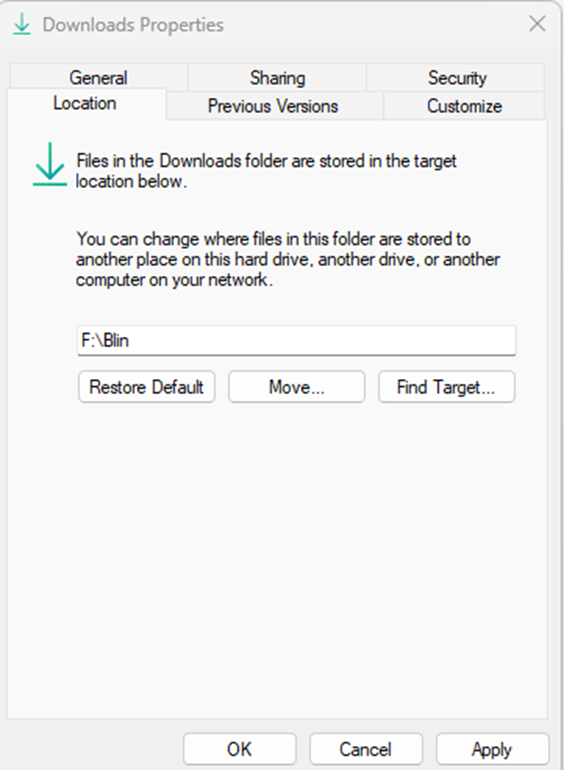
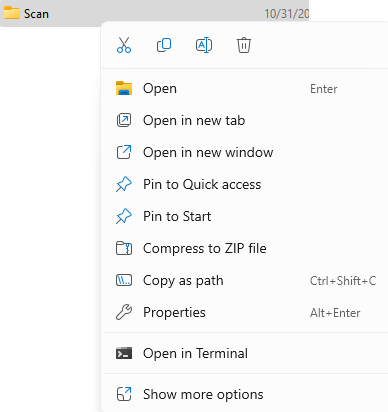
In windows, open File Explorer. Right click on the folder you want to share and select Properties.

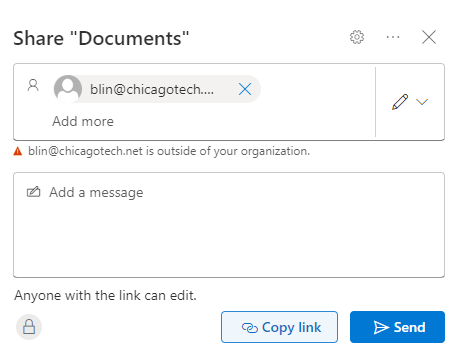
Click on Sharin>Advanced Sharing. Check Share this folder.

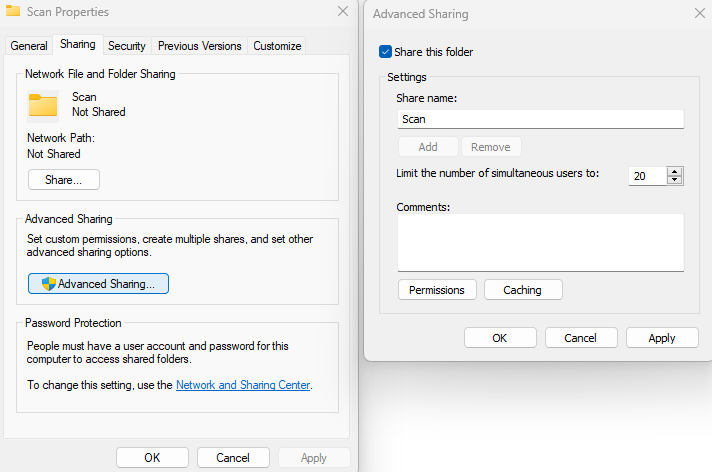
Check Full Control for Everyone.

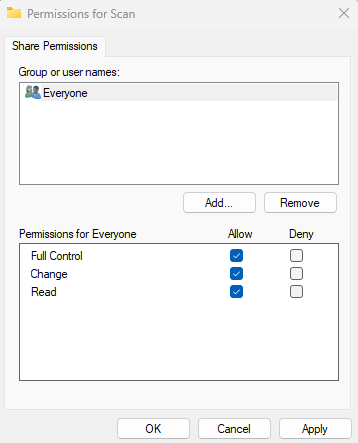
Clock OKs to close the File Explorer.

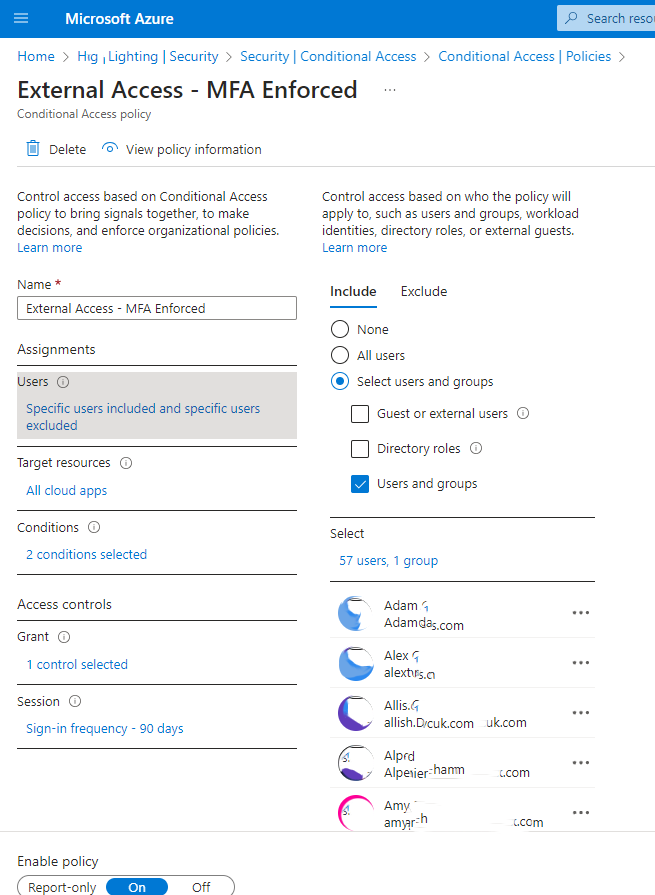
Step 2: Configure basic settings for the SMB transmission

Configure the settings for using the SMB Send function.

Select [Network] – [SMB Setting] – [Client Setting] in administrator mode of Web Connection (or in [Utility] – [Administrator] of this machine), and configure the following settings.

How to change Microsoft 365 Profile

Resolution 1: Change Microsoft 365 Profile by the user self.

Edit your profile page

  1. Sign in to office.com/signin with your Microsoft 365 for business.
  2. Select your profile picture.
  3. Select My Microsoft 365 profile.

4. Select Update profile.

5. Update the information you want, such as About meProjects, and more.

Note: Some details, like your name and job title may be provided by your IT or human resources department. If you want to update those details, contact them or your admin.

Resolution 2: Change Microsoft 365 Profile by Administrator.

  1. Sign in to the Microsoft Entra admin center using Administrator.
  2. Browse to Identity > Users > All users.

3. Select a user.

4. Select Edit properties from the top of the page or select Properties.

5. In the Properties, you have options

How to Assign a Phone Number in Microsoft Teams

Step 1: Assign Microsoft Linces to the user.

  1. Login Microsoft 365 admin center and click Users>Active Users.

2. Select the user you want to assign the License.

3. Assign the licenses, Communications Credits and Teams Phone with Calling Plan (country zone 1 – US) in our example.

4. Save the changes.

Step 2: Assign a Phone Number to a user.

  1. In Microsoft 365 admin center, click Show all…. Then click on Teams.

2. Select Voice, Phone Numbers and then select a number to assign to a user using Edit button.

3. Now when you are assigning the desired number, search for the desired user and select desired emergency location. Click Apply and the number will be assigned to that user.

Use Mailing Merge to printer shipping labels with boxes’ numbers

Situation: The client would like to print shipping labels with boxes numbers, for example 1 of 100, 2 of 100…

Resolution: Use Microsoft Word Mailing Merge feature.

Step 1: Create a excel file with numbers.

Note: Excel can generate numbers for you automatically. Yu type only 1 in the column 1 and 2 in column 2. Highlight these two columns and hold mouse and move down until 100.

Step 2: Create and select mailing label.

  1. With Word open, click on Mailing.

2. Click Start Mail Merge>Labels...

3. Select Label Product number under Label Options.

4. Type the of numbers, for example of 100.

5. From Select Recipients, click on Use an Existing List.

6. Select Excel sheet you created in step 1.

7. Click on Insert Merge Field and select Numbers.

8. Click Update Labels.

9. The <<Numbers>> shows n all labels.

10. Now, click on Finish & Merge>Print Document.

11. For a test, we select from 1 to 4.

12. here is the printed result.

How to grant access to a user’s OneDriv

Resolution 1: Grant access via Microsoft 365 admin center

  • Login the Microsoft 365 admin center.
  • Navigate to Users > Active Users > select the individual who’s OneDrive you wish to grant access.
  • Click on OneDrive
  • Under the OneDrive, click on Create link to files.

  • Click on the link to get access to the users OneDrive

  • Click on settings icon and then OneDrive settings
  • Click on More Settings > Manage access > Press Site collection administrators.

  • Enter the name of the person you wish to grant access for The person specified above will now have full control access over the user’s OneDrive.

Resolution 2: Grant access via SharePoint admin center

  • Login the Microsoft 365 admin center.
  • Click on … Show al.
  • Click on the SharePoint and sign in administrator account.
  • Under Advanced > More features > Open User Profiles
  • Under User profile, click no People > Press Manage User Profiles
  • Enter the first name and/or last name and press Find
  • Hover next to the account name of the individual, a drop down button will appear, press it and select Manage site collection owners
  • Under Site Collection Administrators, enter the name of the person you wish to grant access to
  • Press OK

Resolution 3: A user Share OneDrive with someone

  1. Go to the OneDrive website and sign in with your Microsoft account or your work or school account.
  2. Pick the files or folders you want to share by selecting its circle icon.
  3. Select Share  Share icon at the top of the page.

3. Type the other user’s email address and then Send. Note: you can edit the permissions by click edit icon.

How to Move a Folder to Another Drive in Windows

Situation: Because o slow space on C drive, the client wants to his profile folders such as Desktop, Document, Downloads, Pictures, Videos, and Music to different location. Here is how.

  1. Open File Explorer and browse to the Profile folders. Right-click the folder you want to move and select Properties.

2. Click on Location tab, and click on the Move button

3. When the folder browse dialog shows up, select a new location where you want the folder to be moved. Then click on Apply.

4. Afterwards, click Yes to confirm moving all your files from the old location to the new folder.

Note: Whenever you want to restore the Desktop or Documents folders to its original location, just right-click on the folder and select Properties, then click on the Restore Default button under the Location tab.

How to restore deleted Micrsoft Teams

Situation: A user deleted a teams group he created. He has a problem to restore it.

Resolution 1: The fast and easy way to restore is going to this link: https://outlook.office.com/people/group/deleted

Restore it from Deleted under group.

Resolution 2: Your IT administrator can restore it for you.

1: Go to the admin center.

2: Expand Groups, and then click Deleted groups.

3: Select the group that you want to restore, and then click Restore group.

Resolution 3: Your IT can always recover deleted teams by restoring the Microsoft 365 Groups that backs them, here’s a Powershell code i wrote that gets the job done:
Get-AzureADMSDeletedGroup -Top 10000| Export-Csv -Path “E:\DeletedTeams.csv” -Encoding UTF8
$DG_list = Import-Csv E:\DeletedGID.csv
foreach ($DGmember in $DG_list) {
Restore-AzureADMSDeletedDirectoryObject –Id $DGmember.GroupID
}
*The first line will export the recent 10000 deleted office 365 groups. You can always change this number. 
*The rest of the code will iterate over items in another csv file named DeletedGID.csv that has one column with the deleted groups ID (GroupID)

How to restore deleted SharePoint site

Situation: The client deleted a SharePoint site by accident. They would like to know how to restore it.

Resolution:

  1. Login Microsoft 365 admin center.
  2. Click on More… and then SharePoint.

3. In SharePoint admin center, click on Deleted sites.

4. Highlight the deleted SharePoint Site and then click on Restore.

How to manage SharePoint permissions

  1. Go to My Sites and click Settings icon. Then select Site Settigns.

2. Click on Site permissions

or use the link: https://yourcompay-my.sharepoint.com/_layouts/15/user.aspx

3. You can manage the SharePoint site permissions here such as Grant Permissions, Edit User Permissions, Check User Permissions.

Microsoft MFA Enforced one by one

Situation: The client is planning to enable MFA on all of their users. However, they want to do it gradually.

You can enable MFA one by one in Microsoft Azure. Here is how.

  1. Login Microsoft Azure with Global administrator account.
  2. Go to Home>Company name>Security>Conditional Access>Conditional Access|Policy.
  3. Create Assignments for User – Specific users included and specific users excluded.

4. Grant access – Required multifactor authentication.