How to archive yahoo emails in a date range

If you have too many old emails in your yahoo mailbox, it may run slow and even give you a problem. This video shows how to archive old yahoo emails based on the date range.

Note: it is recommended to clean the emails first before archiving them. That will save you more time and more organizing for the future search.

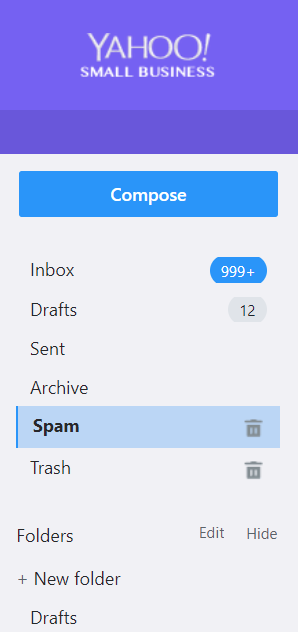
Step 1: Create a archive folder

1. Login Yahoo Account. Go to Mail.

2. On the left pane, click New Folder.

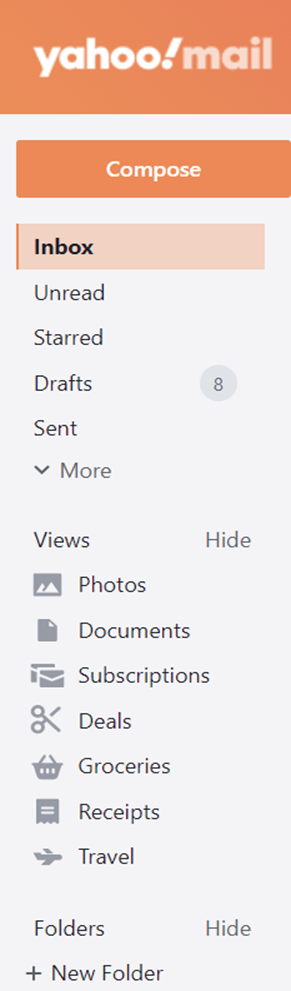
3. Create a archive folder, for example 2021.

Step 2: Search for the date you want to archive

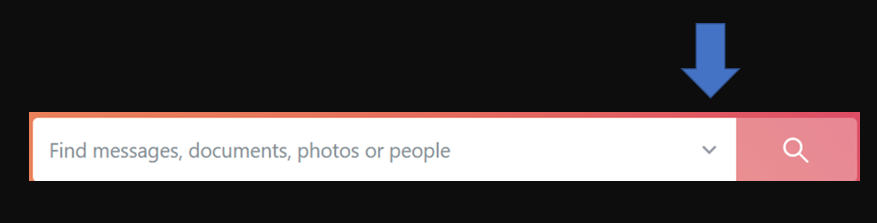
1. Click narrow down key in the Search.

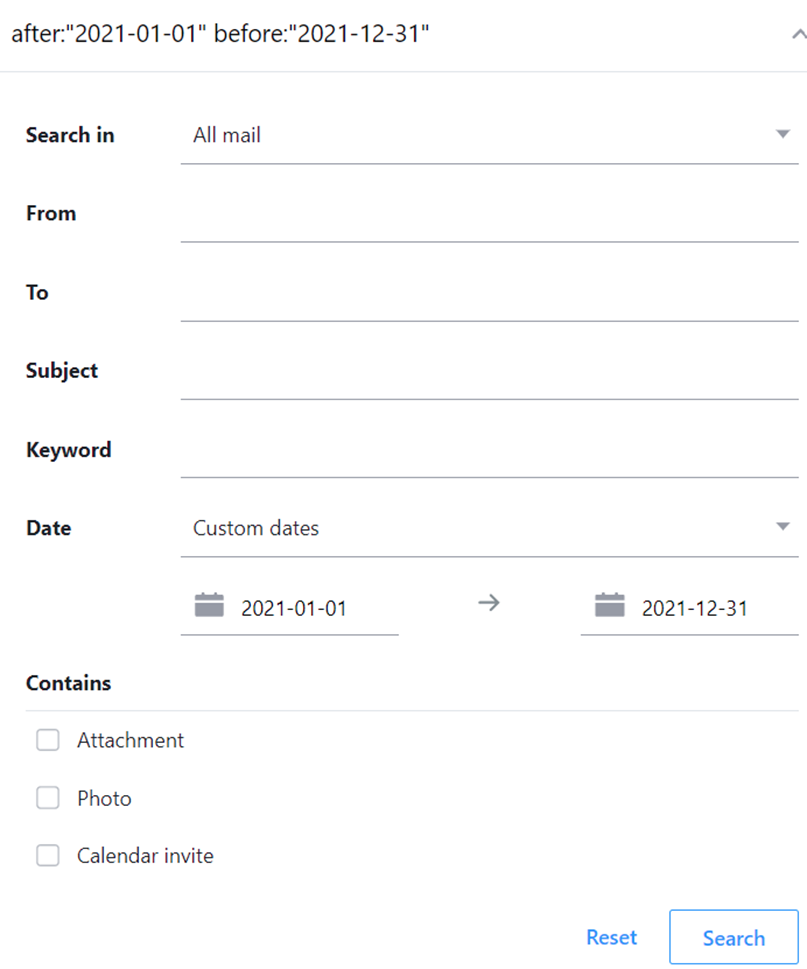
2. Make sure Search in is selected All mail. Select the date range. You also have options to select from, To, Subject Keywords, Attachment, Photo, Calendar invite.

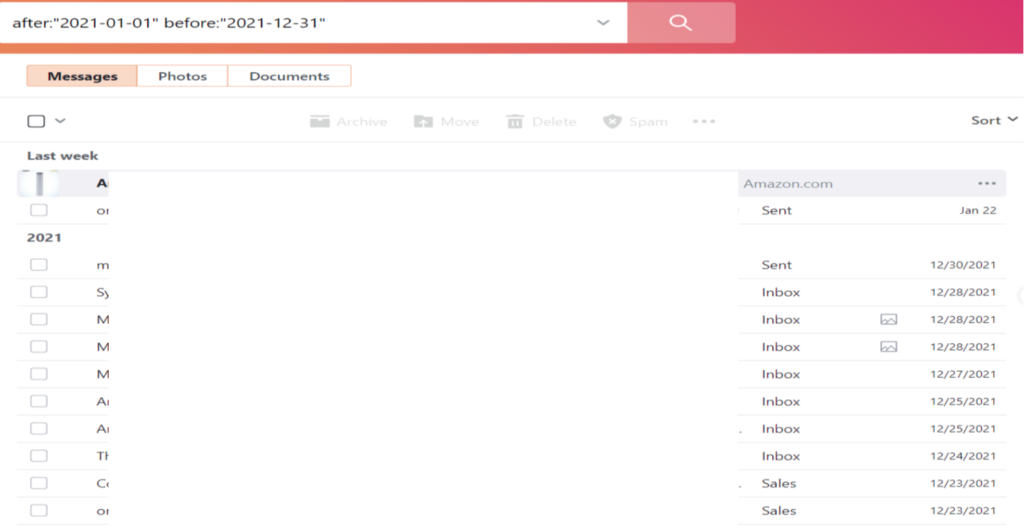
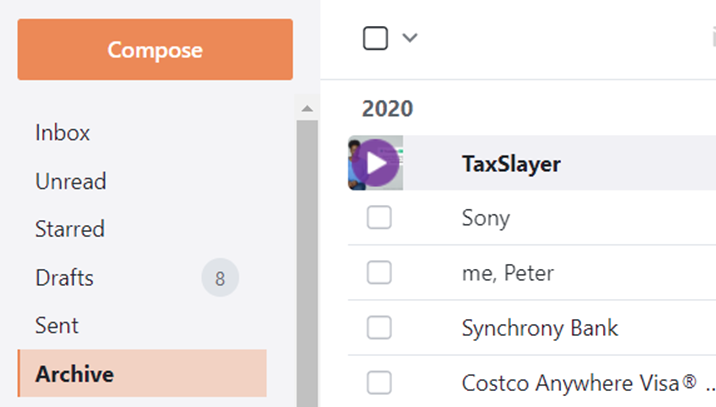
3. After clicking Search, you will have all date range emails.

Step 3: Select and move emails

1. You may move the right bar down to view more dated emails.

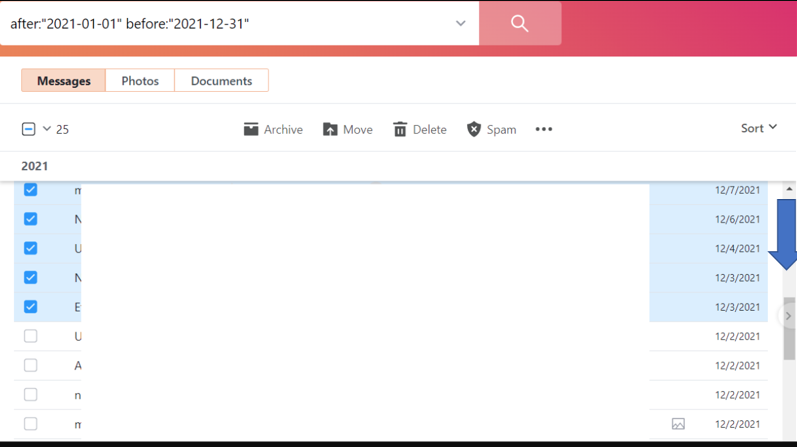
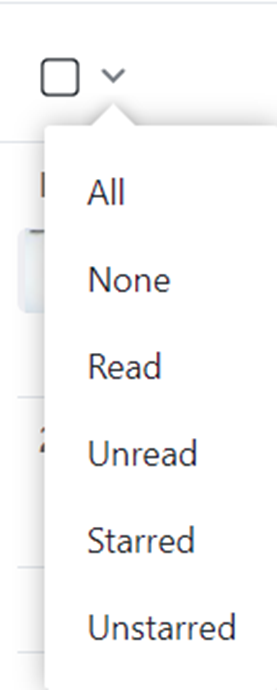
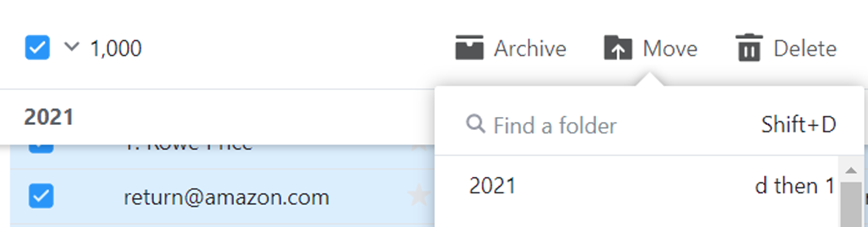
2. Check the All box 

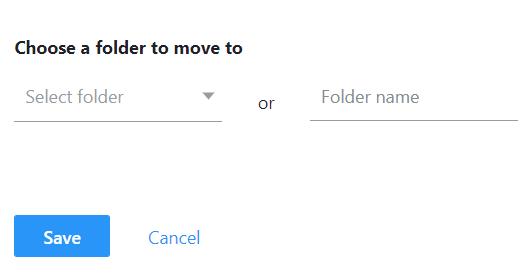
3. Click Move to move the selected emails to the folder you created before, 2021 in our example.  

4. Click OK in Move message page.

Step 4: Archive emails

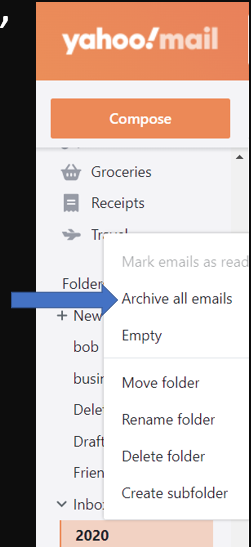
1.Right click on the folder you created, and select Archive all emails.

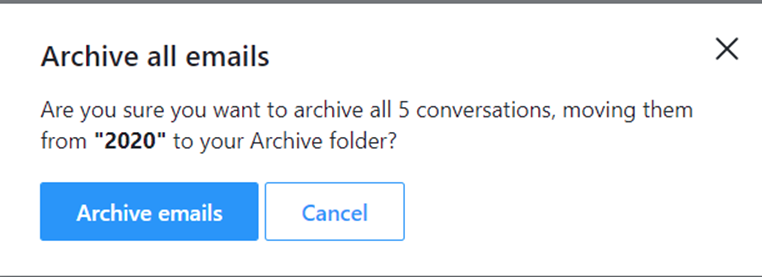
2. Click on Archive emails

3. After archiving, you will see the empty window popup.

4. If you click on Archive folder, you should see all selected emails moved into the Archive folder. 

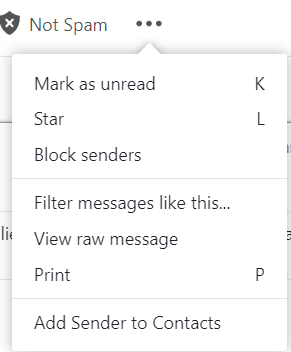
Note 1: If you want to archive one and group emails, you can select them and click Archive.

Note 2: You can do step 1 to 3 on Microsoft Outlook, and step 4 on Yahoo website.

Please view this step by step video:

How to migrate Printer Server on Windows

With the Microsoft Print Migration Wizard, you can export the core components of the Print and Document Services role, such as print queues, printer settings, and printer ports from legacy Windows server, and then reimport them to the new Windows server. This article is an example migrating printer server on Windows 20112 R2 to 2019.

Step 1: Install the Print and Document Services role on the destination server, windows 2019 in our example.

  1. Go to Server Manager>Dashboard>add Roles and Features.
  2. Under Server roles, check Print and Document Services. Click Add features and then Next>Next>Next.

3. In the Role services, make sure Print Server is checked and then Next.

4. In Confirm installation selections, click Install.

5. It starts the installation.

6. After the installation, you should have Print Services.

Step 2: Export print settings using the Print Migration Wizard

1. Open the Print Management console

2. Right click on Printer Management and select the Migrate Printers.

3. Check Export printer queues and printer drivers to a file option. Then Next.

4. Select the current printer server from which to be exported the printer settings by browsing the server typing the hostname.

5. Click Next on Review the list items to be exported.

6. Select a location for saving export printer data.

7. Click Finish to complete Exporting.

Step 3: Importing exported printer data to the destination print server

  1. Right click on Printer Management and select the Migrate Printers. Then check Import printer queues and printer drivers from a file.

2. Select the printer file exported earlier to begin the import to the destination print server.

3. Review the list of items to be imported and click Next.

4. Select a destination print server for importing the exported printer settings file.

5. in Select import options, you have Keep existing printers or Overwrite existing printer in import mode. We keep all default settings and Next.

6. Click Finish when it is done. Note: you may check Event Viewer for any issues.

7. Under Print Management, you should see all imported printers.

Please view this step by step video:

How to save a RemoteApp RDP file for clients to access it

After you add a program to RemoteApp Programs (please refer to this post: How to add a program to RemoteApp Programs in Remote Desktop Services), you may want to create and send a RDP file for clients to access it. here is how.

  1. Access the RemoteApp website, for example https://remote8.chicagotech.net/RDWeb/Pages/en-US/Default.aspx

2. Login using your domain credentials, for example chicagotech\blin.

3. Click the program you want to save the RDP file, which will save to the download folder.

4. Send the link to the user. Note: you can modify the RDP file.

5. The user can run the RemoteApp by double clicking on the RDP file and login his/her domain credentials.

How to add a program to RemoteApp Programs in Remote Desktop Services

  1. Open Server Manager, go to Remote Desktop Services>Collections>QuickSessionCollection.

2. Click TASKS in REMOTEAPP PROGRAMS, and select Publish RemoteApp Programs.

3. Select the program you want to publish in RemoteApp. If the program is not in the list, click Add. Then Next.

4. To confirm to publish the program, click on Publish.

5. Click Close to complete the settings.

Please also refer to this post: How to save a RemoteApp RDP file for clients to access it

How to keep a good email out of Spam Folder in Yahoo

With Yahoo Mail, every email is scanned, and sends suspected emails to Spam folder. In some cases, the filter system could be wrong, and good emails could be moved to Spam folder. To prevent future emails from the same sender from going to the Spam folder automatically, you can mark the email as Not Spam. Here is how.

Resolution 1: Mark a good email as Not Spam

1. Log in to your Yahoo account and click the “Spam” folder.

2. Click the email that was wrongfully treated as spam mail to open it.

3. Click the “Not Spam” button in the toolbox to immediately move the email to the Inbox folder. Emails from the same sender will not be treated as spam mail anymore and will be sent to the Inbox folder.

Resolution 2: Add Sender to Contact.

Repeat Resolution 1 steps. In Not Spam, click on 3 dots. Click on Add Sender to Contact.

Resolution 3: Unblock an email address

  1. After login Yahoo email account, select the Settings icon

2. Select More Settings

3. Select Security and Privacy

4. Make sure the email address is not listed. Here. If it is, remove it from Blocked addresses.

Resolution 4: Re-configure the filter rule

  1. Repeat resolution 3 steps.
  2. Click Filter.

3. Click Add new filter

4. Enter the Filter nae, email address you want to allow, or subject,.

5. Select the folder you want to move to, for example Inbox. Click save.

How to manage UltraViewer Screen

  1. After connect to a remote computer, click on Option menu.

2. You will have option to select Screen Size.

3. If you have two or more monitors, you have option to manage them by clicking on Active monitor.

How to make Teamviewer full screen

  1. To make full Teamviewer screen, right click the computer, click on the little wheel icon in the top right corner, select properties, click on Advanced, select Full screen.

Or follow this steps:

  1. Go to the Computer and Contact
  2. You will get the Recent Connections Click on it
  3. You will get to see a Gear Icon on the Top Right Side. After clicking on it, 2 more option will be visible, Delete and Properties
  4. Click on Properties
  5. Expand +Advanced
  6. In the View Setting change the Remote Resolution with your desired Resolution.

2. You need to set the display settings thesame on both systems you are using .

3. The solution to fix this problem is through a setting on the Compatibility tab of the program shortcut’s Properties window. Right click on the TeamViewer shortcut and left click on the Properties command from the popup menu. In the Properties window, select the Compatibility tab and then locate and select the check box for “Override high DPI scaling behavior” (Windows 10) or “Disable display scaling on high DPI settings” (Windows 7). In Windows 10, there is also an additional option for how the scaling is performed (System, System (Enhanced), or Application). For me “System (Enhanced)” or “System” worked while “Application” did not. My display is ~3000×2000 and the remote ones do not go beyond 1920×1080

4. Or go to VIEW -:> SCALE