With Mitel Connect Directory, you can generate different reports to meet management requests. This article shows you how to do so.
1. With the Mitel Connect Directory
open, Click Report icon.
2. With the Report open, you have
these options: Call Details, Web Conference, and Report Options.
3. In the Call Details, you can select report type such as Account Details Report, User Activity Summary Report, User Activity Details Report, and Workgroup Agent Detail Report.
4. To run a report, you can setup
date and time.
5. If you would like to generate an extension
report, click Add.
In a case, you need to move VM from one Windows Server host to another host or different location, you may want to use Hyper-V Move feature. This video shows how to do so.
1. With Hyper-V Manager open, click on the VM you want to migrate. Select Move.
2. Click Next.
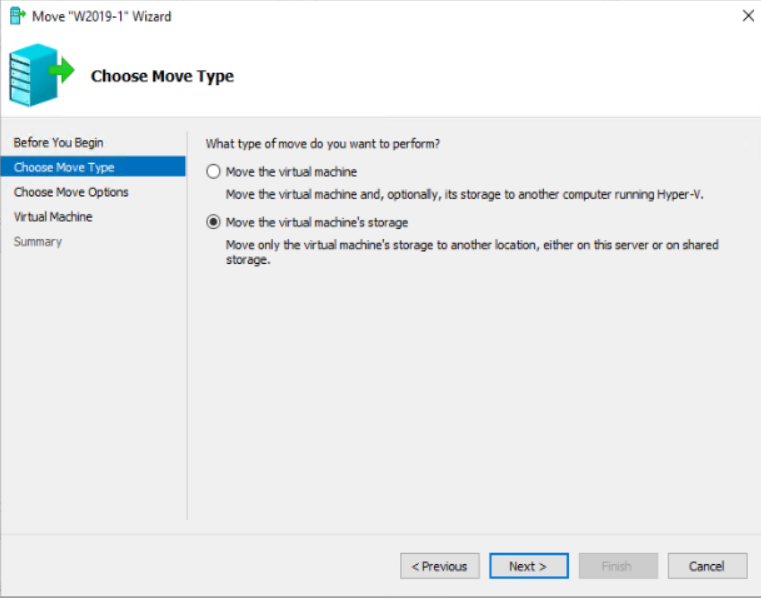
3. There are two types of migration: move the virtual machine with all files on other Host and move VM storage to different location or shared folder. In this example we move the VM to another computer.
4. Since we are moving to another computer, enter the computer hostname.
5. You have options to move all VM files into the same location, move VM files to different folders, or move the VM only.
6. Enter the VM location.
7. Click Finish to confirm the migration.
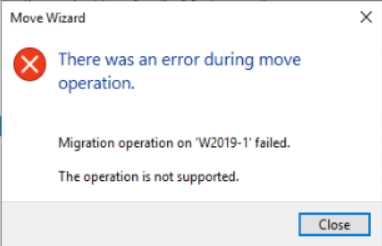
Note: If you move the VM to
different location in the same Host with moving to another computer option, you
may receive this failed message.
In this case, you should check the
second option: Move the virtual machine’s storage.
8. The process may take a few
minutes depending on the size.
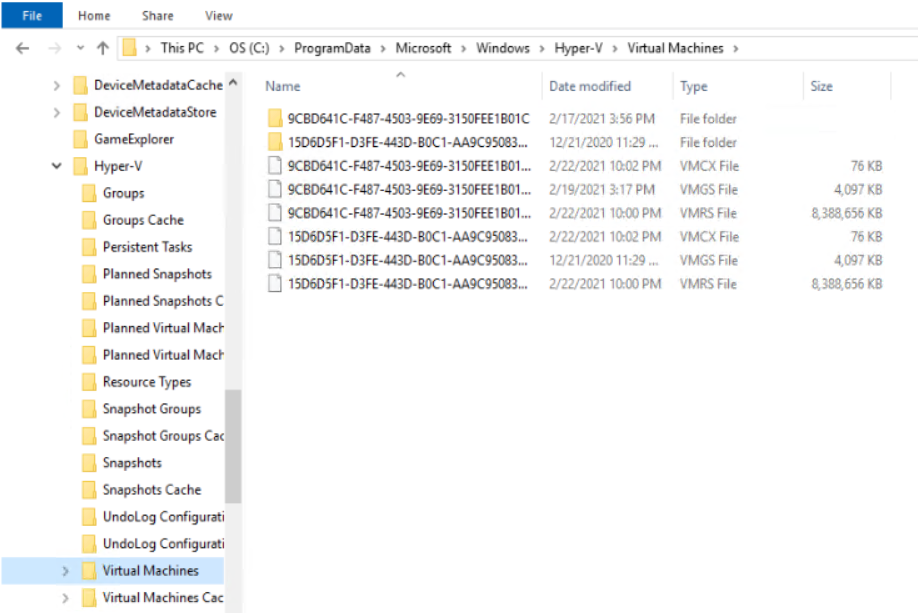
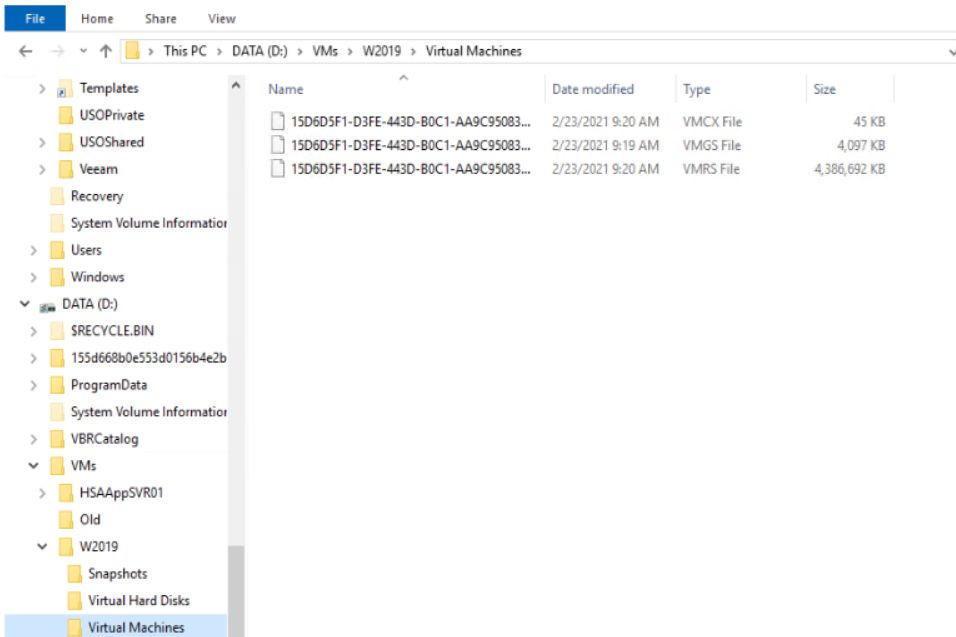
By default, Hyper-V VM configuration file (VMCX), VM State file (VMRS), VM guest state file (VMGS) are located in C:\ProgramData\Microsoft\Windows\Hyper-V\Virtual Machines. If the C drive is out of the spaces or you want to move all these files to the same location of your VM VHDX files, you can use Hyper-V export and import feature. This article shows how to do so.
1. With Hyper-V Manager open, highlight on the VM you want to move those files. Select Export.
2. Choose the drive or folder you want to export to.
3. The export may take a few
minutes depending on the size.
4. After exporting, delete the
original VM.
5. Click on Delete to confirm.
6. Now, those files in C drive should be deleted
7. Import the VM exported before by
creating a new VM.
8. Follow the wizard.
9. Choose Use an existing virtual hard disk from the location you exported.
10. Click Finish to confirm the import.
11. Start the VM.
12. You can check those files in
the new location.
iSCSI Target storage can be attached to your server or workstation as a local hard drive. This article shows how create iSCSI on Synology NAS.
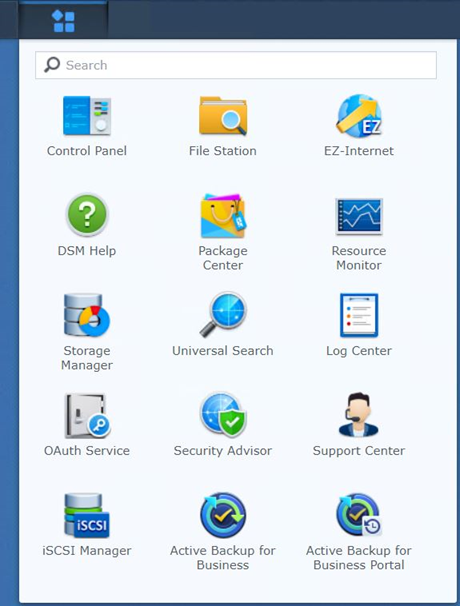
1.Open the iSCSI Manger from Mail Menu.
Note: If you don’t see the iSCSI Manger in some old version, click on Storage Manager.
You should see the iSCSI Manger under Storage Manager
2. In iSCSI Manager, click on Target.
3. Click on Create.
4. In Create a new iSCSI target,
enter the info and enable Chap if you want to use it.
5. Set up iSCSI LUN mapping.
6. Set up iSCSI properties such as
Name, Location, Total capacity, and Space allocation.
7. If you click on Advanced features you have more options: Hardware-assisted zeroing, Hardware-assisted locking, Hardware-assisted data transfer, Snapshot, and Space reclamation.
Automatic Virtual Machine Activation (AVMA) that acts a proof-of-purchase mechanism lets Microsoft customers to activate Virtual Machine license on virtualization servers. This video shows how to do so.
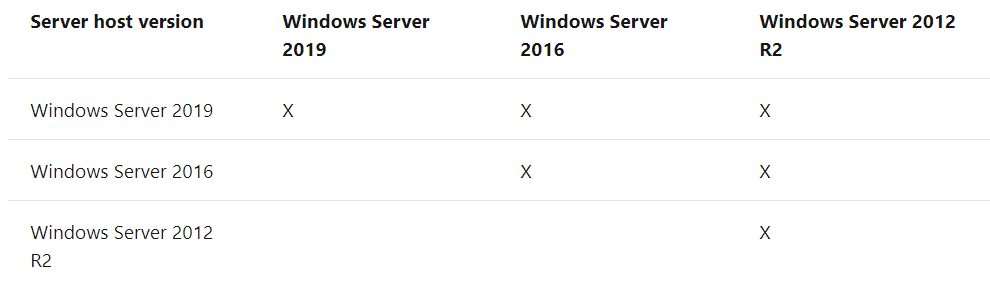
System requirements
AVMA requires a Microsoft
Virtualization Server running Windows Server 2019 Datacenter, Windows Server
2016 Datacenter, or Windows Server 2012 R2.
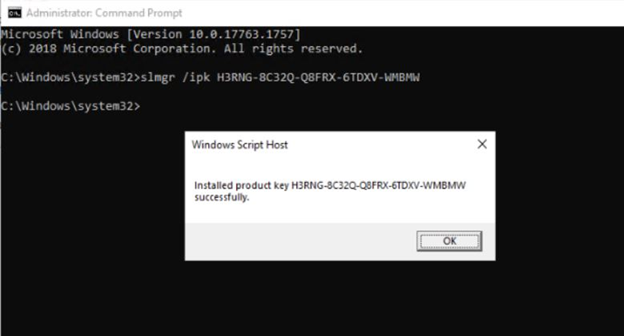
To install the AVMA key in the
virtual machine, run an elevated command prompt, run the following command:
slmgr /ipk <AVMA_key>
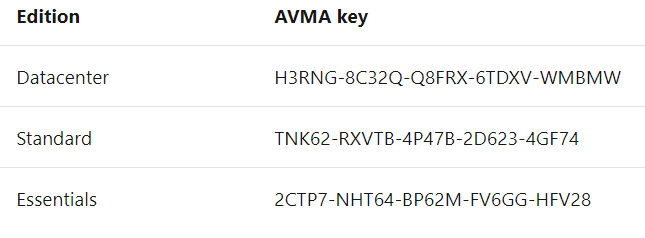
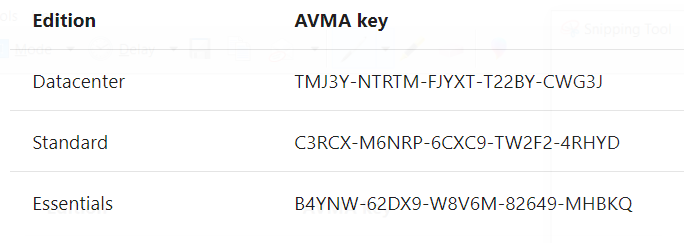
AVMA keys
The following AVMA keys can be used
for Windows Server 2019.
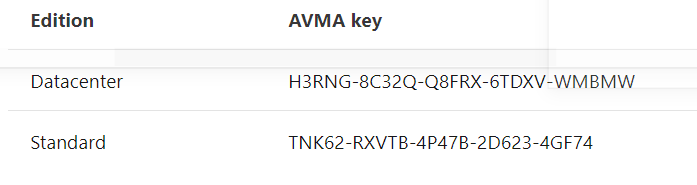
The following AVMA keys can be used
for Windows Server, versions 1909, 1903, and 1809.
The following AVMA keys can be used
for Windows Server 2016.
The following AVMA keys can be used
for Windows Server 2012 R2.
For example, for a VM on Windows Server 2019 DataCenter
iSCSI Target storage can be attached to your server or workstation as a local hard drive. This Video shows how create iSCSI on Synology NAS.
1. Open the iSCSI Manger from Mail Menu
Note: If you don’t see the iSCSI Manger in some old version, click on Storage Manager. You should see the iSCSI Manger under Storage Manager
2. In iSCSI Manager, click on Target.
3 . Click on Create.
4. In Create a new iSCSI target,
enter the info and enable Chap if you want to use it.
5. Set up iSCSI LUN mapping.
6. Set up iSCSI properties such as
Name, Location, Total capacity, and Space allocation.
7. If you click on Advanced
features you have more options: Hardware-assisted zeroing, Hardware-assisted
locking, Hardware-assisted data transfer, Snapshot, and Space reclamation.