Q: I would like to configure IPSec VPN at home connecting to our office PA Firewall. What’s your recommandation?
A: You may want to try an SSL-based VPN. Check this OpenVPN http://openvpn.net for more details. It runs on practically every platform, can use pre-shared keys or an X509 PKI, and works perfectly behind firewalls; it uses one port, UDP 1194. It’s also a bit more “standardized” than IPsec-based VPNs, as the server and client are both the same program, and behave nearly identically on every platform, something that CANNOT be said for IPsec servers/clients. In my experience, OpenVPN is MUCH easier to setup/manage than the various implementations of IPsec.
When deleting a checkpoint, it will merge snapshot files (avhdx) that will use 1.5 spaces. For example, if avhdx uses 1TB spaces, you may need 1.5TB spaces. The space combines size of the main VHD file plus all the snapshots that you are going to merge. Therefore, before deleting checkpoint, make sure you have enough free disk space.
You can see the snapshot’s size by right clicking on it, selecting settings and then clicking on the inspect button or by visiting the folder where your aVHDX files are stored.
Checkpoint uses a lot spaces, especially when a VM uses a lot spaces. Deleting these old checkpoints can be time consuming, stressful and occasionally downright ugly if you run out of disk space. We don’t recommend to enable it in a production environment. If you do take a checkpoint for some reason, be sure to erase it as soon as possible.
ciscoasa# show inter ip brie
Interface IP-Address OK? Method Status Protocol
Ethernet0/0 192.168.9.1 YES CONFIG up up
Ethernet0/1 192.168.11.2 YES manual up up
Ethernet0/2 unassigned YES unset administratively down down
Ethernet0/3 unassigned YES unset administratively down down
Management0/0 192.168.1.1 YES CONFIG down down
ciscoasa#
Evaluating BIOS Options …
Launch BIOS Extension to setup ROMMON
Cisco Systems ROMMON Version (1.0(11)5) #0: Thu Aug 28 15:23:50 PDT 2008
Platform ASA5510
Use BREAK or ESC to interrupt boot.
Use SPACE to begin boot immediately.
Boot interrupted.
Management0/0
Ethernet auto negotiation timed out.
Interface-4 Link Not Established (check cable).
Default Interface number-4 Not Up
Use ? for help. rommon #0>
3. You should now see the rommon prompt:
rommom #0>
4. Enter the confreg command to view the current Configuration Register setting: rommon #0>
5. The appliance will most probably have the default Configuration Register setting of 0x01. Answer no when it asks you if you want to change the Configuration Register setting. 6. Change the Configuration Register to 0x41, which causes the appliance to bypass its saved config at boot
Total NICs found: 7
mcwa i82557 Ethernet at irq 11 MAC: 0024.14d0.554e
mcwa i82557 Ethernet at irq 5 MAC: 0000.0001.0001
i82547GI rev00 Gigabit Ethernet @ irq11 dev 1 index 05 MAC: 0000.0001.0002
i82546GB rev03 Ethernet @ irq09 dev 2 index 03 MAC: 0024.14d0.554d
i82546GB rev03 Ethernet @ irq09 dev 2 index 02 MAC: 0024.14d0.554c
i82546GB rev03 Ethernet @ irq09 dev 3 index 01 MAC: 0024.14d0.554b
i82546GB rev03 Ethernet @ irq09 dev 3 index 00 MAC: 0024.14d0.554a
Encryption hardware device : Cisco ASA-55×0 on-board accelerator (revision 0
Boot microcode : CN1000-MC-BOOT-2.00
SSL/IKE microcode: CNLite-MC-SSLm-PLUS-2.03
IPSec microcode : CNlite-MC-IPSECm-MAIN-2.06
Verify the activation-key, it might take a while…
Running Permanent Activation Key: 0x4537cc42 0xb0e0f409 0xa8031158 0xbf1c5cd460218ad
Licensed features for this platform:
Maximum Physical Interfaces : Unlimited perpetual
Maximum VLANs : 100 perpetual
Inside Hosts : Unlimited perpetual
Failover : Active/Active perpetual
VPN-DES : Enabled perpetual
VPN-3DES-AES : Enabled perpetual
Security Contexts : 2 perpetual
GTP/GPRS : Disabled perpetual
AnyConnect Premium Peers : 2 perpetual
AnyConnect Essentials : Disabled perpetual
Other VPN Peers : 250 perpetual
Total VPN Peers : 250 perpetual
Shared License : Disabled perpetual
AnyConnect for Mobile : Disabled perpetual
AnyConnect for Cisco VPN Phone : Disabled perpetual
Advanced Endpoint Assessment : Disabled perpetual
UC Phone Proxy Sessions : 2 perpetual
Total UC Proxy Sessions : 2 perpetual
Botnet Traffic Filter : Disabled perpetual
Intercompany Media Engine : Disabled perpetual
This platform has an ASA 5510 Security Plus license.
Cisco Adaptive Security Appliance Software Version 8.4(7)31
** Warning ***
This product contains cryptographic features and is
subject to United States and local country laws
governing, import, export, transfer, and use.
Delivery of Cisco cryptographic products does not
imply third-party authority to import, export,
distribute, or use encryption. Importers, exporters,
distributors and users are responsible for compliance
with U.S. and local country laws. By using this
product you agree to comply with applicable laws and
regulations. If you are unable to comply with U.S.
and local laws, return the enclosed items immediately.
A summary of U.S. laws governing Cisco cryptographic
products may be found at:
http://www.cisco.com/wwl/export/crypto/tool/stqrg.html
If you require further assistance please contact us by
sending email to export@cisco.com. * Warning *
Copyright (c) 1996-2016 by Cisco Systems, Inc.
Restricted Rights Legend
Use, duplication, or disclosure by the Government is
subject to restrictions as set forth in subparagraph
(c) of the Commercial Computer Software – Restricted
Rights clause at FAR sec. 52.227-19 and subparagraph
(c) (1) (ii) of the Rights in Technical Data and Computer
Software clause at DFARS sec. 252.227-7013.
            Cisco Systems, Inc.
            170 West Tasman Drive
            San Jose, California 95134-1706
Ignoring startup configuration as instructed by configuration register.
INFO: MIGRATION – Saving the startup errors to file ‘flash:upgrade_startup_ s_202003211317.log’
Pre-configure Firewall now through interactive prompts [yes]?
Firewall Mode [Routed]: ?
Enable password []:
9. Now, enter the IP, time, host information.
enable password []: Pa$$word Allow password recovery [yes]? Pa$$word Allow password recovery [yes]? Clock (UTC): Year [2020]: Month [Mar]: Day [21]: Time [13:17:52]: 08:44:00 Management IP address: 192.168.9.1 Management network mask: 255.255.255.0 Host name: asa5510 Domain name: chicagotech.net IP address of host running Device Manager: 192.168.9.2
The following configuration will be used: Enable password: Pa$$word Allow password recovery: yes Clock (UTC): 08:44:00 Mar 21 2020 Firewall Mode: Routed Management IP address: 192.168.9.1 Management network mask: 255.255.255.0 Host name: asa5510 Domain name: chicagotech.net IP address of host running Device Manager: 192.168.9.2
10. Save the configuration.
Use this configuration and write to flash? yes
INFO: Security level for “management” set to 0 by default.
Cryptochecksum: c4ce2ac4 12c17474 0d56411f b393bff5
2392 bytes copied in 3.290 secs (797 bytes/sec)
11. Use wr t command to check the configuration.
asa5510# wr t
: Saved
:
: Serial Number: JMX1314L1Y4
: Hardware: ASA5510, 1024 MB RAM, CPU Pentium 4 Celeron 1600 MHz
:
ASA Version 8.4(7)31
!
hostname asa5510
domain-name chicagotech.net
enable password dA3dYOV2c.GNx9m8 encrypted
passwd 2KFQnbNIdI.2KYOU encrypted
names
!
interface Ethernet0/0
shutdown
no nameif
no security-level
no ip address
!
interface Ethernet0/1
shutdown
no nameif
no security-level
no ip address
!
interface Ethernet0/2
shutdown
no nameif
no security-level
no ip address
!
interface Ethernet0/3
shutdown
no nameif
no security-level
no ip address
!
interface Management0/0
nameif management
security-level 0
ip address 192.168.9.1 255.255.255.0
!
ftp mode passive
dns server-group DefaultDNS
domain-name chicagotech.net
pager lines 24
mtu management 1500
no failover
icmp unreachable rate-limit 1 burst-size 1
no asdm history enable
arp timeout 14400
no arp permit-nonconnected
timeout xlate 3:00:00
timeout pat-xlate 0:00:30
timeout conn 1:00:00 half-closed 0:10:00 udp 0:02:00 icmp 0:00:02
timeout sunrpc 0:10:00 h323 0:05:00 h225 1:00:00 mgcp 0:05:00 mgcp-pat 0:05:00
timeout sip 0:30:00 sip_media 0:02:00 sip-invite 0:03:00 sip-disconnect 0:02:00
timeout sip-provisional-media 0:02:00 uauth 0:05:00 absolute
timeout tcp-proxy-reassembly 0:01:00
timeout floating-conn 0:00:00
dynamic-access-policy-record DfltAccessPolicy
user-identity default-domain LOCAL
http server enable
http 192.168.9.2 255.255.255.255 management
no snmp-server location
no snmp-server contact
snmp-server enable traps snmp authentication linkup linkdown coldstart warmstart
telnet timeout 5
ssh timeout 5
ssh key-exchange group dh-group1-sha1
console timeout 0
threat-detection basic-threat
threat-detection statistics access-list
no threat-detection statistics tcp-intercept
webvpn
!
class-map inspection_default
match default-inspection-traffic
!
!
policy-map type inspect dns migrated_dns_map_1
parameters
message-length maximum client auto
message-length maximum 512
policy-map global_policy
class inspection_default
inspect dns migrated_dns_map_1
inspect ftp
inspect h323 h225
inspect h323 ras
inspect ip-options
inspect netbios
inspect rsh
inspect rtsp
inspect skinny
inspect esmtp
inspect sqlnet
inspect sunrpc
inspect tftp
inspect sip
inspect xdmcp
!
service-policy global_policy global
prompt hostname context
call-home
profile CiscoTAC-1
no active
destination address http https://tools.cisco.com/its/service/oddce/services/DDCEService
destination address email callhome@cisco.com
destination transport-method http
subscribe-to-alert-group diagnostic
subscribe-to-alert-group environment
subscribe-to-alert-group inventory periodic monthly
subscribe-to-alert-group configuration periodic monthly
subscribe-to-alert-group telemetry periodic daily
Cryptochecksum:c4ce2ac412c174740d56411fb393bff5
: end
12. If you make any cahnged, write to save the configuration and reload the ASA.
In a case you would like to have the calls redirect to your cellphone, you can set the Mitel phone’s Custom call forwarding calls to your mobile phone. You as administrator can do it on the Mitel Director or the user can do it on Mitel Connect.
A. Configure external assignment on Mitel Director
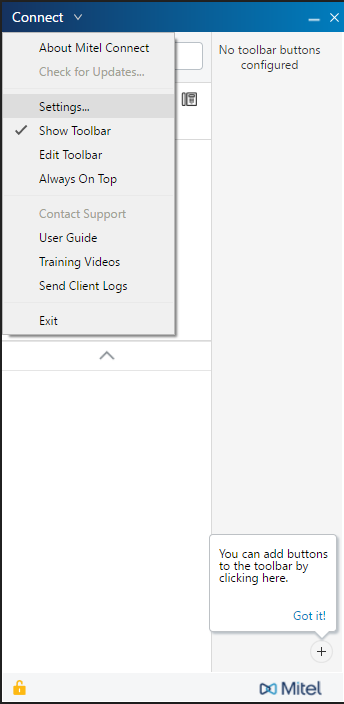
B. Mitel Connect
1.. With Mitel Connect open, click Connect>Settings.
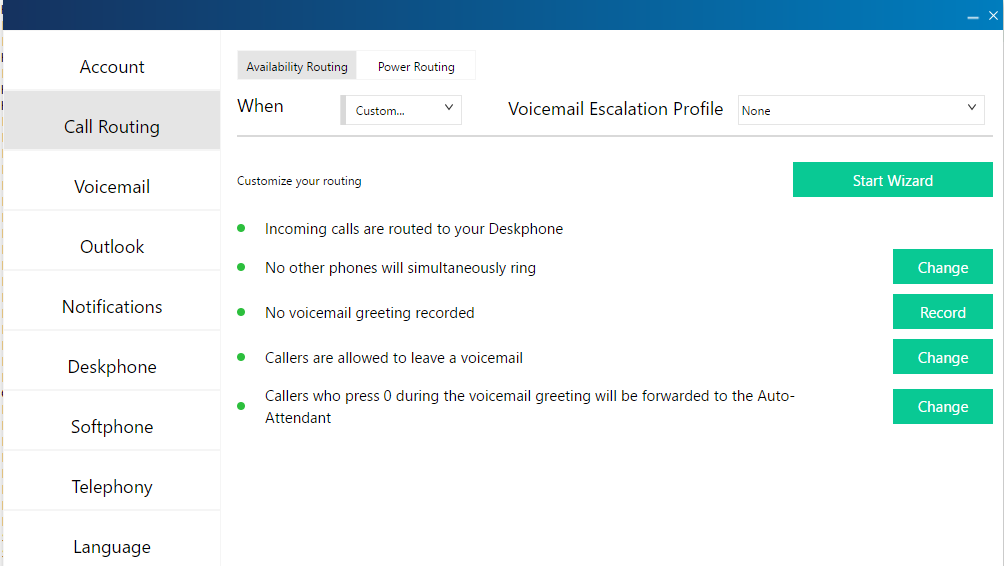
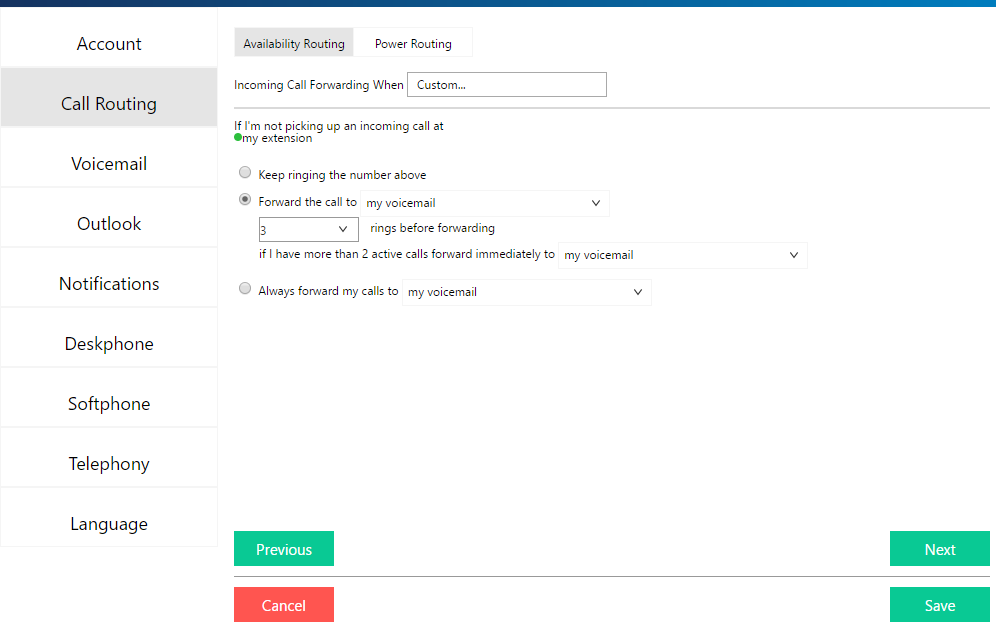
2. Click on Call Routing and select Custom in When session.
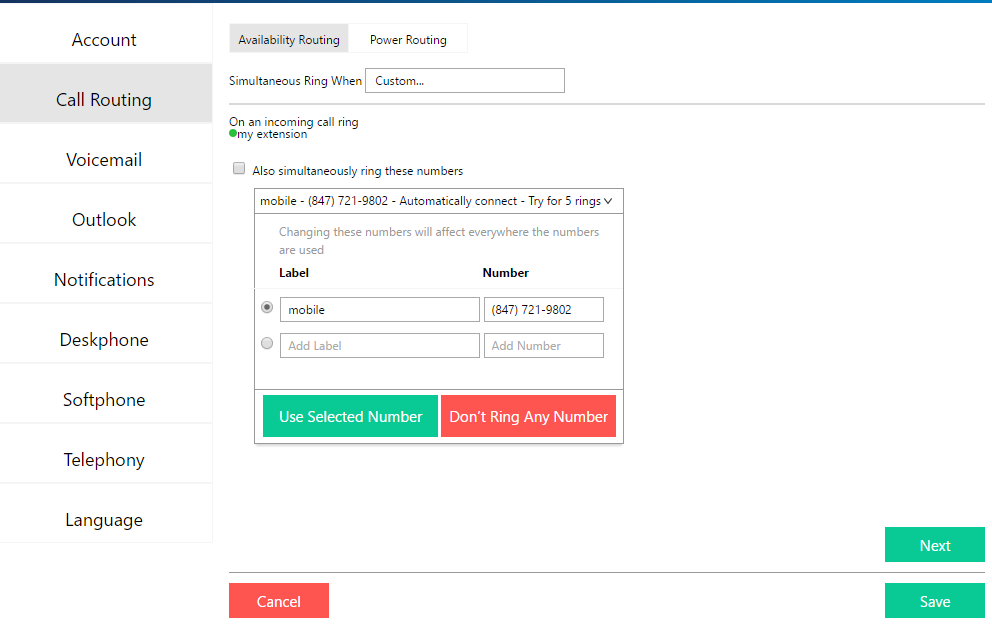
3. Click Start Wizard. Enter your mobile phone # and other info. Click Next to continue.
4. Configure how many ring before forwarding the call to voicemail. Click Next.
5. In this settings and the following, you can keep the default and click Save to save the configuration.
Make sure the VM is turned off. Right-click on the VM. You will have an option to upgrade configuration version to 8… which warns you that after you upgrade, you won’t be able to migrate or import to Hyper-V servers of previous versions.
The cache timeout on Palo Alto Networks firewalls is 30-minutes (1800 seconds) for ARP entries on all interfaces, which is a fixed setting and cannot be adjusted. If you do want to clear the ARP manually, you may run a commend line.
To show arp status, run this command: >show arp all
To clear arp on ethernet1/1, run these command: >clear arp ethernet1/1
To clear all arp, run this command: >clear arp all.