How to use multipass step by step

Multipass is a tool for managing and launching Ubuntu virtual machines (VMs) on Windows, macOS, and Linux. Here are the steps to use Multipass:

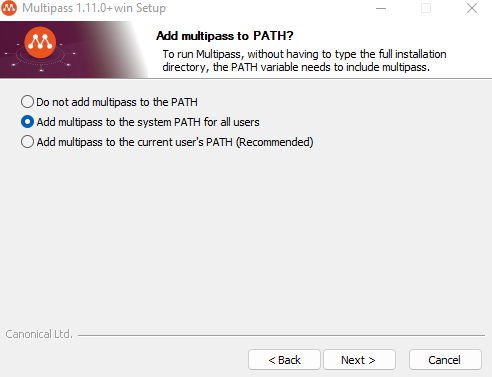
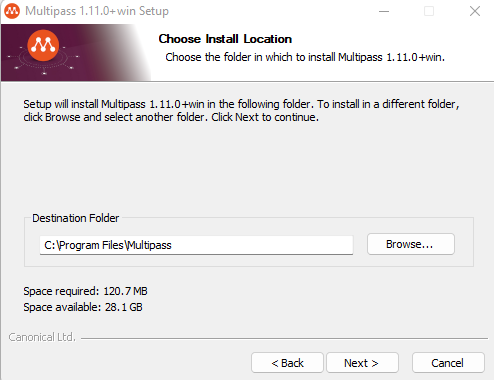
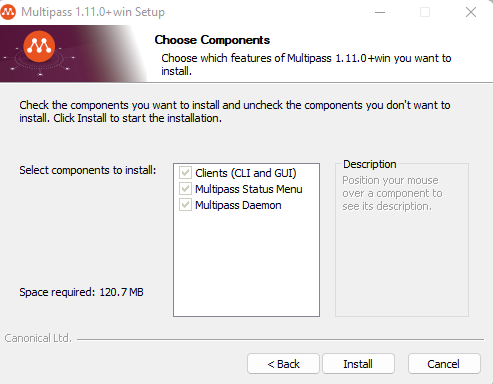
  1. Install Multipass by following the instructions on the Multipass website for your operating system.

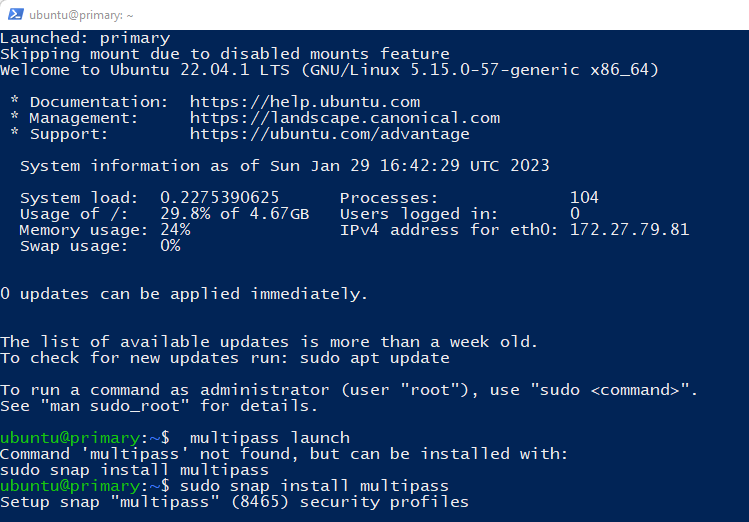
2. Open a terminal or command prompt and type multipass launch to launch the latest version of Ubuntu. This will download the image and start the VM.

To check the status of the VMs running, type multipass list

To connect to a running VM, type multipass shell <name or id> where name or id is the name or ID of the VM as shown in the multipass list command.

Once connected to the VM, you can run any command on the Ubuntu system as if it were a local machine.

To stop a running VM, type multipass stop <name or id>

To delete a VM, type multipass delete <name or id>

To launch a specific version of Ubuntu, type multipass launch --name <name> --image <image> where name is the desired name for the VM and image is the desired version of Ubuntu (e.g. focal, bionic, etc.)

To run a command in the VM without entering the shell, you can use multipass exec <name or id> <command>

To copy files to or from the VM, you can use multipass copy-files <source> <name or id> <destination>

Keep in mind that multipass uses a local cache of the images that it downloads, you can use multipass flush to remove all the images that you don’t need anymore.

How to use Disk2vhd to convert a physical PC to Virtual Machine

Disk2vhd is a utility provided by Microsoft that allows you to create a virtual hard drive (VHD) of a physical hard drive. Here are the steps to use Disk2vhd:

  1. Download Disk2vhd from the Microsoft website and save it to your computer.
  2. Run the Disk2vhd executable file to launch the application.
  3. Select the physical hard drive that you want to convert to a VHD. You can select multiple hard drives if desired.
  4. Choose a location to save the VHD file. This can be a local drive or a network location.
  5. Click the “Create” button to start the conversion process. Depending on the size of the hard drive and the speed of your computer, this process may take some time.

6. Once the conversion process is complete, you will have a VHD file that can be used with virtualization software such as Hyper-V, Virtual PC, or VirtualBox.

7. To use the VHD file, you will need to create a new virtual machine and attach the VHD file as the virtual hard drive. This can be done in the virtualization software of your choice.

8. Once the virtual machine is created, you can start it and begin using the virtualized version of your physical hard drive.

How to use Veeam Agent for Windows to convert P2V

Veeam Agent for Windows is a backup and recovery software that can be used to create backups of your Windows-based systems and restore them in case of data loss. To use Veeam Agent for Windows, you will need to first install the software on your Windows system. Once installed, you can configure the software to create backups of your system, schedule backups, and manage your backups. You can also use the software to restore your system in case of data loss. Additionally, you can use the Veeam Agent for Windows to create a backup of your Windows system and store it in a remote location for added protection.

  1. Download and install Veeam Agent for Windows on your Windows system.
  2. Once installed, open the Veeam Agent for Windows from the Start menu or by searching for it in Windows search.

You can check the backup by

  1. In the Veeam Agent for Windows interface, click on the Backup tab.
  2. On the Backup tab, select the type of backup you want to create: full, incremental, or differential.
  3. Select the files, folders, or entire partitions that you want to include in the backup.
  4. Choose the destination for your backup. You can choose to save the backup to a local drive, an external drive, or a network share.
  5. Set the schedule for your backup. You can choose to run the backup daily, weekly, or at a custom schedule.
  6. Click the Run Backup button to start the backup process.
  7. Once the backup process is complete, you can view and manage your backups in the Backup tab.
  8. To restore your system, go to the Backup tab and select the backup you want to restore. Click the Restore button and follow the prompts to restore your system.

How to install Microsoft Exchange Online PowerShell Module on your computer

Situation: The client has migrated their Exchange to Microsoft 365. They would like to know if they can use Microsoft Exchange PowerShell remotely.

Yes, they can if they install Microsoft Exchange online PowerShell Module. Here is how.

  1. Login Microsoft 365 admin center and click on Exchange.

2. Click on Classica Exchange admin

3. Select configure under The Exchange Online PowerShell Module supports multi-factor authentication. Download the module to manage Exchange Online more securely.

4. Clock Open on the popup.

5. Click Install.

6. Microsoft Exchange Online PowerShell is open.

To connect, use this command:

Connect-EXOPSSession -UserPrincipalName <your UPN>

for example

Connect-EXOPSSession -UserPrincipalName blin@chicagotech.net

To get your Exchange FDNS, run this ocmmand:

get-organizationconfig

How to change AD default login email address

Situation: The client just added one new email address (@B.com) to their domain users and would like to replace old email address (@A.com) with the new email address as AD default login email address. Here is how.

  1. Login ADU&C.
  2. Go to Users. Right click on the user and select Properties.

3. Click on Attribute Editor and go to userPrincipalName. Change the default email address from username@A.com to username@B.com.

4. Click OK to save it.

Also please refer to this post:

How to setup or change Office 365 user login email address

How to manage Outlook navigation bar

Situation: With the new version of the Outlook, the navigation bar display in the left side instead of the bottom. This post shows you how to the navigation bar from the left side to the bottom.

  1. With Outlook open, click File>Option.

2. Click on Advanced

3. Uncheck Show Apps in Outlook.

4. Restart the Outlook.

5. Now, the Navigate bar should show in bottom.

Configure Certificate in Palos Alto Firewall

To configure certificate in Palo Alto Firewall, we may have two options: Generate a Certificate or Import a certificate if you already have a certificate on a device.

A. Generate a Certificate

  1. Logon PA firewall and go to Device>Certificate Management>Certificates

2. Click on Generate

3. Select Local (default) as the Certificate Type. Enter the information such as Certificate Name, Common Name.

4. In Certificate Attributes, Select the check boxes that correspond to the intended use of the certificate on the firewall. Then click on Generate.

5. If it is successfully generated the certificate, click OK and then Commit.

B. Import a Certificate and Private Key

If your company has been using a certificate on other devices, you can import it from the certificate authority (CA). Assuming you already export the certificate, here is the steps for importing the certificate to PA Firewall.

  1. Go to Device>Certificate Management>Certificates
  2. Click on Import.

3. Enter the information such as Certificate Name, Certificate File, Import Private Key.

4. Click O and then commit.

How to configure both Authentication Local User and AD user to access GlobalProtect in PaloAlto

Q: Currently, we are using a local user database to access GloablProtect in PA 850 firewall. We are migrating Local user database to AD user database. We have created two Authentications, one for Local user and another for AD user. only the top is working.

Can we have both Authentication Local User and AD user to access GlobalProtect? If so, how do you make them work?

A: Yes, you can use Authentication Sequence, where you enter all Authentication profiles to be use for login. Go to Device > Authentication sequence.

Create new sequence and select all needed profiles and use this sequence-entry in GP (Portal/Gateway).

How to install or Activate DUO app

Situation: In a case, you need to re-install or Active the DUO App, please follow thi sprocedure.

  1. Login duo.com
  2. Go to Users.

3. For a new user, click on Add User. For an existing user who need to re-activate, click on the username.

4. For the new user, click on Add Phone. For an existing user, click on Reactivate Duo Mobile.

5. The user’s phone, he/she will receive a text message. Click the link on the message to follow the instruction to Activate the DUO Mobile.