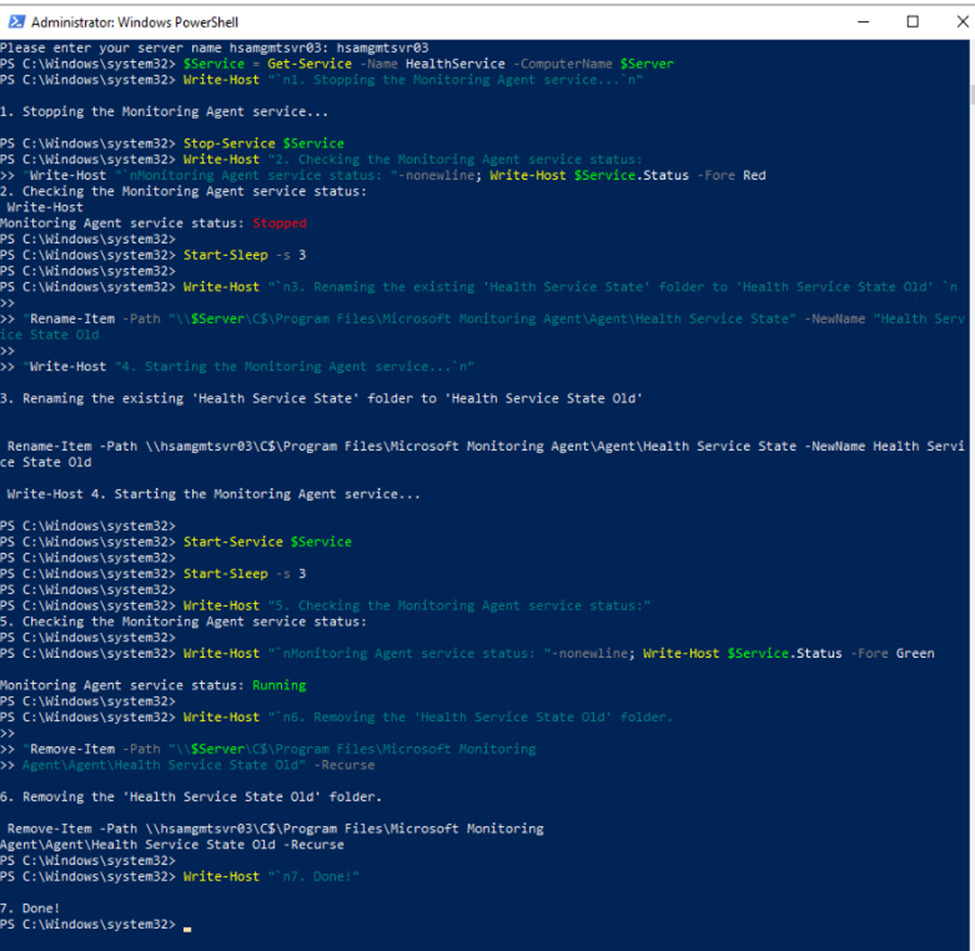
Situation: The client has Microsoft System center 2019. They have some issues such as servers in Pending management with status of “Installation in Progress ” and never process. Also, some SCOM agents show “gray” state. In these cases, you may want to clear SCOM agent cache by running Powershell commands.
Run Powershell as administrator.
Run these commands:
[powershell]
$Server = Read-Host "Please enter your server name"
$Service = Get-Service -Name HealthService -ComputerName $Server
Write-Host "`n1. Stopping the Monitoring Agent service…`n"
Stop-Service $Service
Write-Host "2. Checking the Monitoring Agent service status:
"Write-Host "`nMonitoring Agent service status: "-nonewline;
Write-Host
$Service.Status -Fore Red
Start-Sleep -s 3
Write-Host "`n3. Renaming the existing ‘Health Service State’ folder to
‘Health Service State Old’ `n
"Rename-Item -Path "\\$Server\C$\Program Files\Microsoft Monitoring
Agent\Agent\Health Service State" -NewName "Health Service State Old
"Write-Host "4. Starting the Monitoring Agent service…`n"
Start-Service $Service
Start-Sleep -s 3
Write-Host "5. Checking the Monitoring Agent service status:"
Write-Host "`nMonitoring Agent service status: "-nonewline;
Write-Host
$Service.Status -Fore Green
Write-Host "`n6. Removing the ‘Health Service State Old’ folder.
"Remove-Item -Path "\\$Server\C$\Program Files\Microsoft Monitoring
Agent\Agent\Health Service State Old" -Recurse
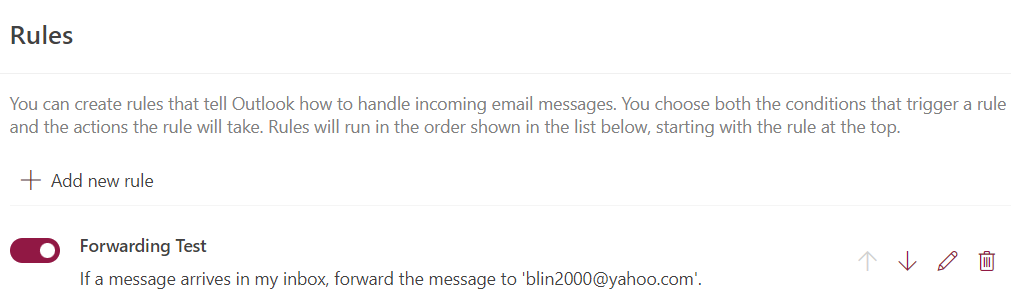
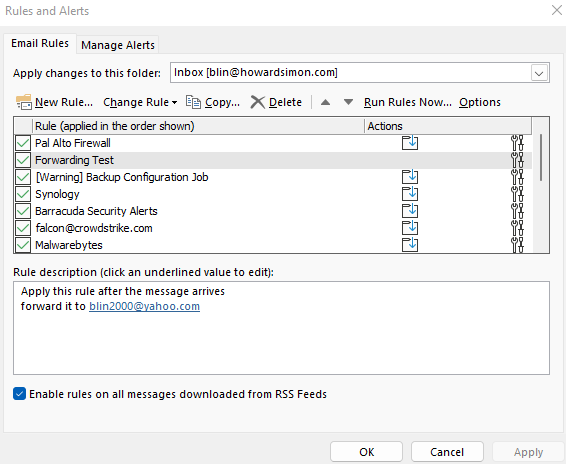
Situation: The client would like to forward any emails to an internal email address to be forwarded to an external email address. By default, Microsoft 365 Anti-spam blocks this feature. You would need to enable forwarding on Anti-Spam policy. Here is how.
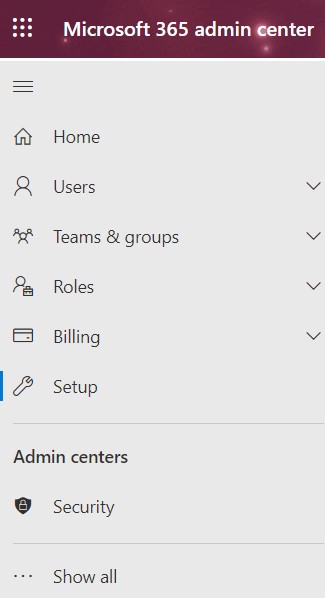
Login Microsoft 365 using administrator account.
Click on Security.
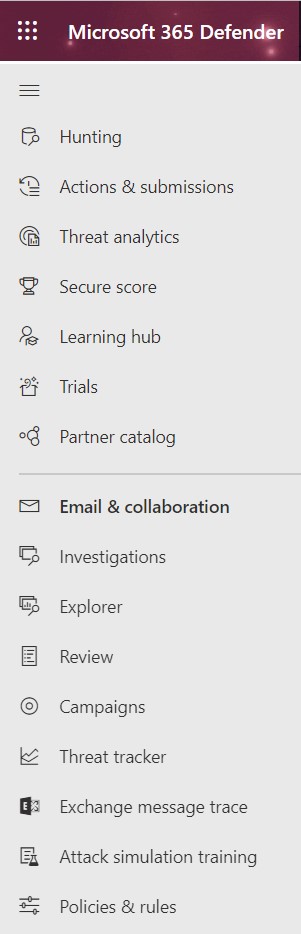
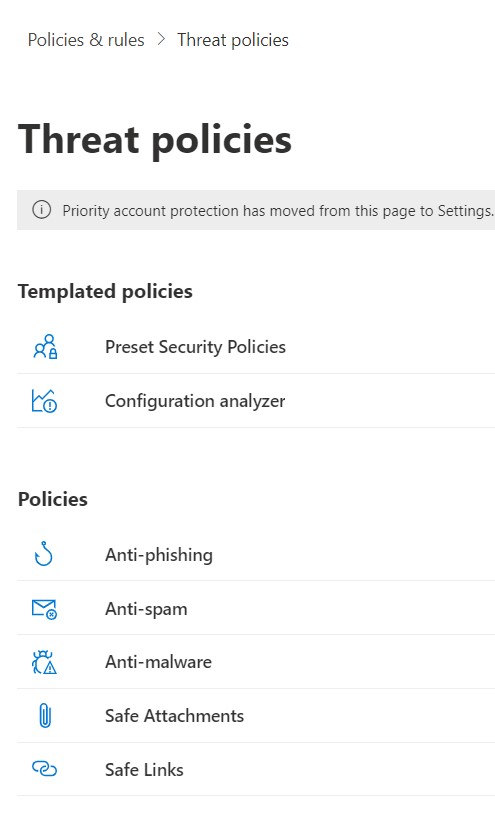
3. Under Microsoft 365 Defender, go to Policies & rules.
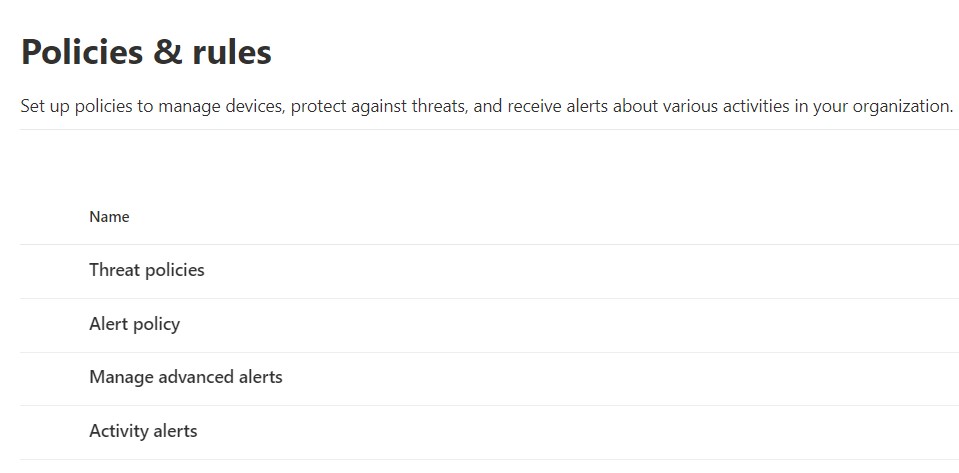
4. In Policies & rule, click on Threat policies.
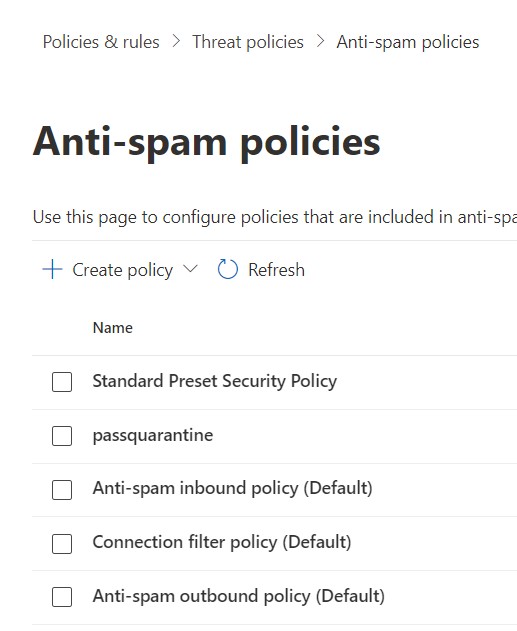
5. In Threat policies, click on Anti-spam.
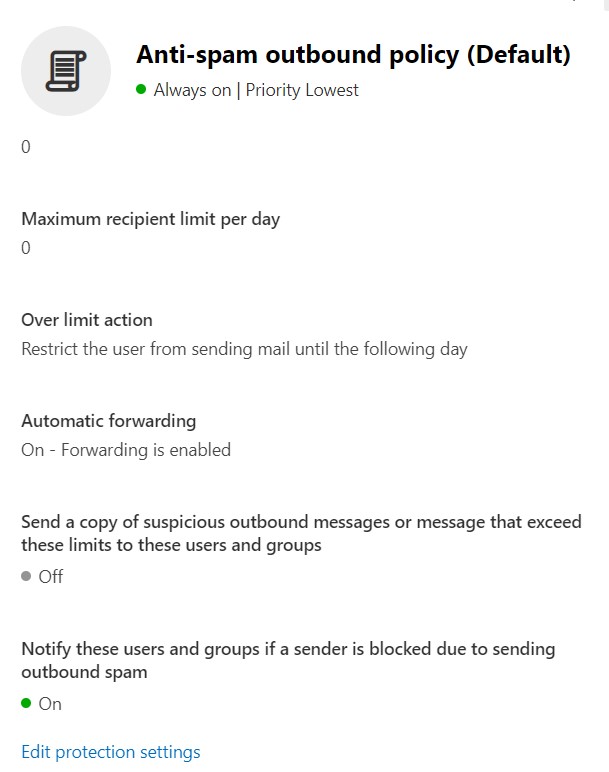
6. In Anti-spam policies, double click on Anti-spam outbound policy (Default)
7. In Anti-spam outbound policy (Default), click on Edit protection settings.
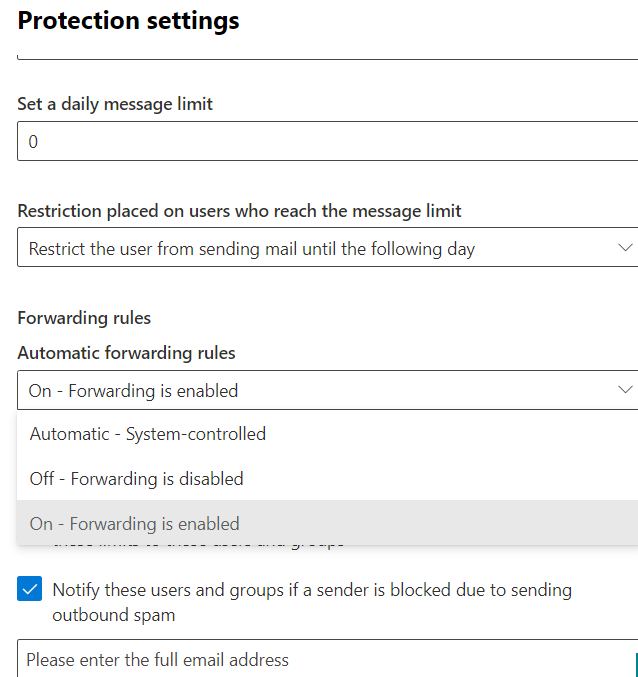
8. In Protection settings, select On – Forwarding is enabled.
9. Click Save to save the settings.
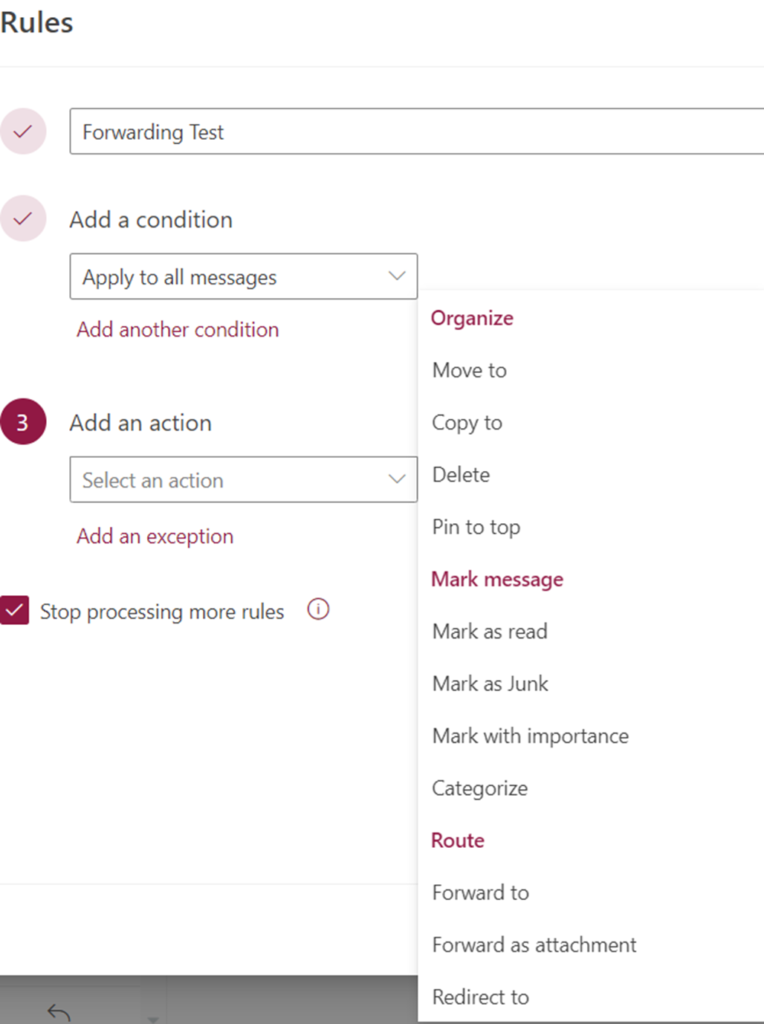
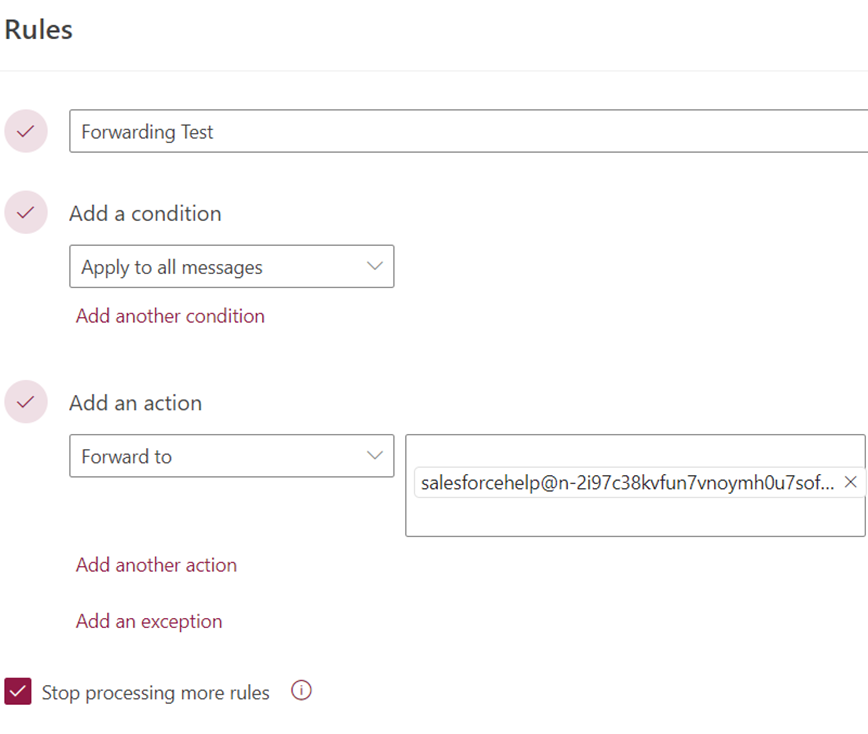
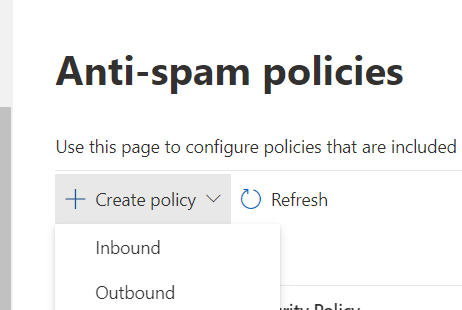
Note: If that doesn’t fix the problem, you may want to create another policy to pass by the default Anti-Spam policy. To do that,
Under Anti-spam policies, click on + to Create policy. Select Outbound.
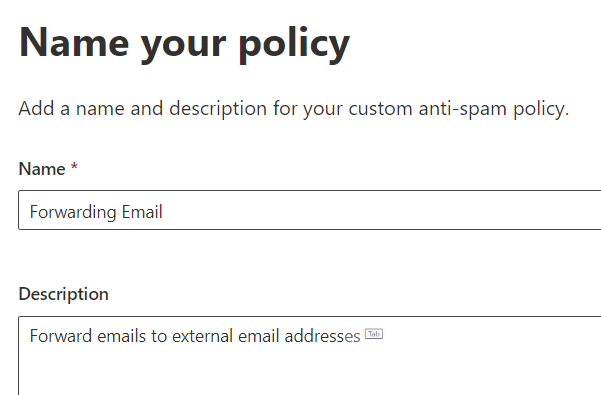
2. Enter Name and Description.
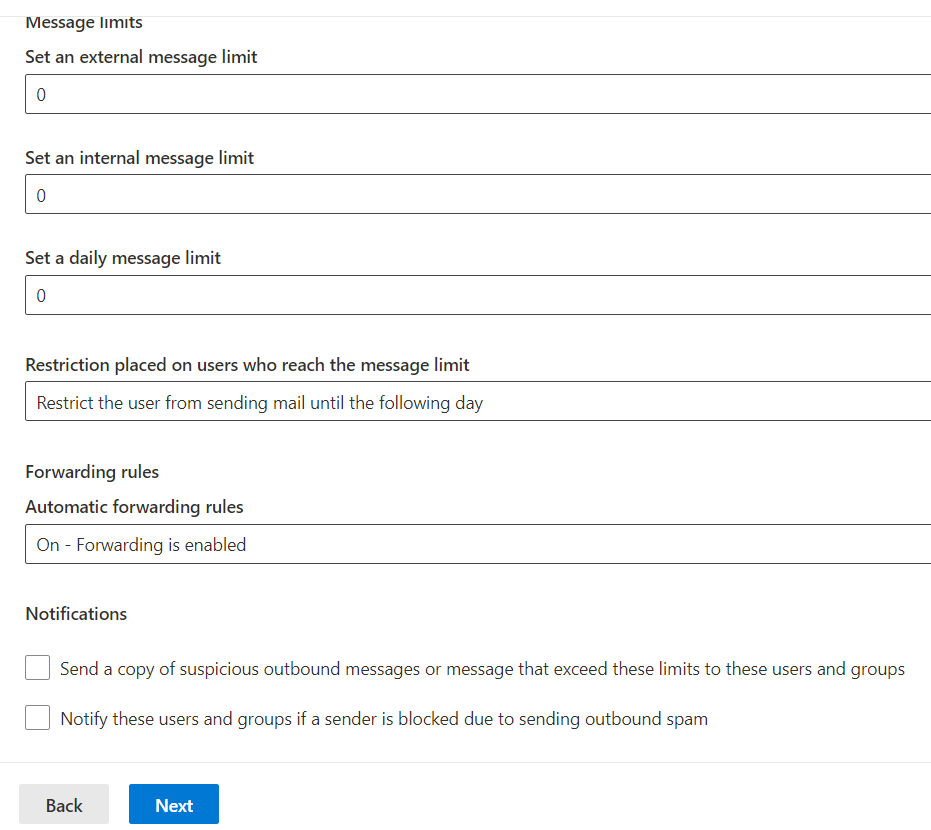
3. Enter user, or group or domain.
4. Enable Forwarding.
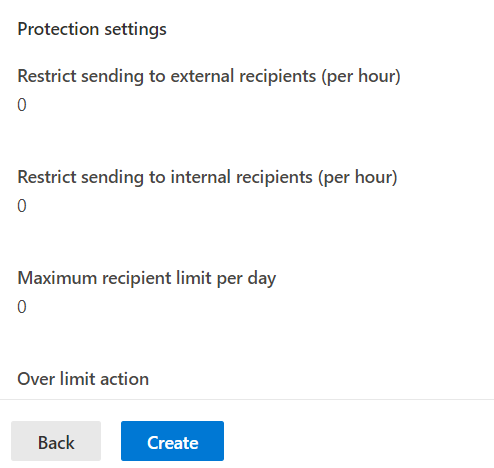
5. Click on Create to create the forwarding policy.
Situation: The client keeps receiving Event notification from his Samsung phone even though he didn’t accept the event. He would like to know how to disable any events he doesn’t accept.
To Install Agent on Windows in Microsoft System Center, you may have many options. In this article, we will show you how use the Operations console to search your environment for manageable objects and then push an agent to any object that you want to monitor.
Log on to the Operations console with an account that is a member of the Operations Manager Administrators role.
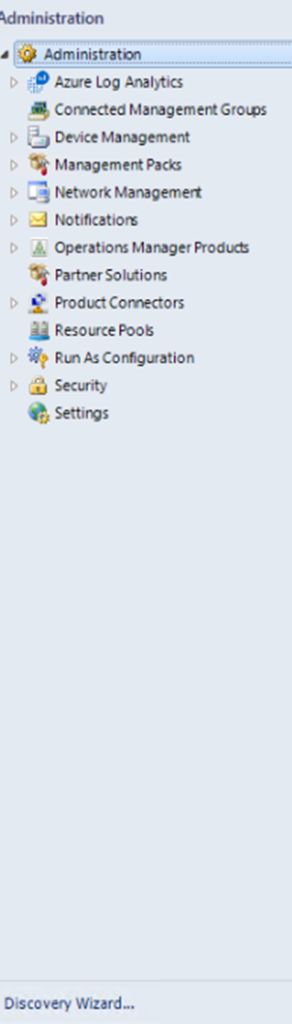
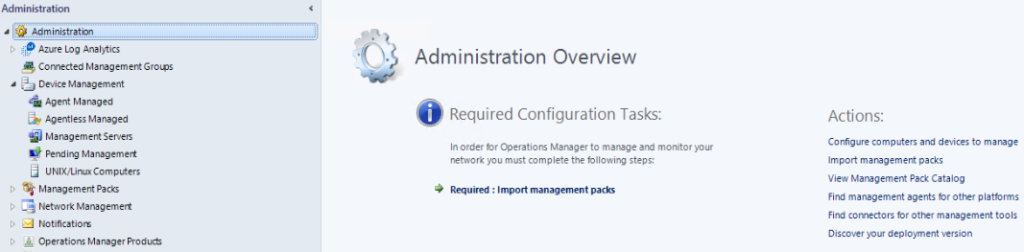
Click Administration.
Option 1: At the bottom of the navigation pane, click Discovery Wizard.
Option 2: Click on Configure computers and devices to manage in the reading pan.
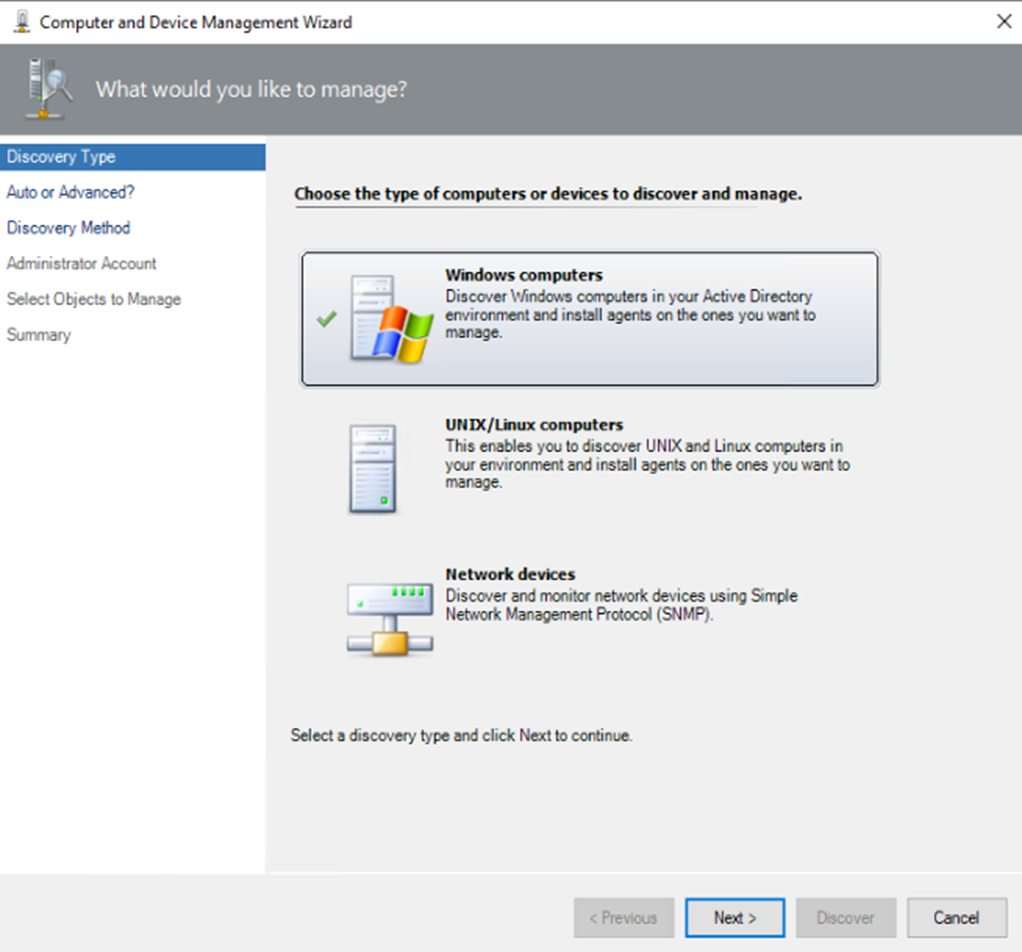
3. In the Computer and Device Management Wizard>Discovery Type page, click on Windows computers.
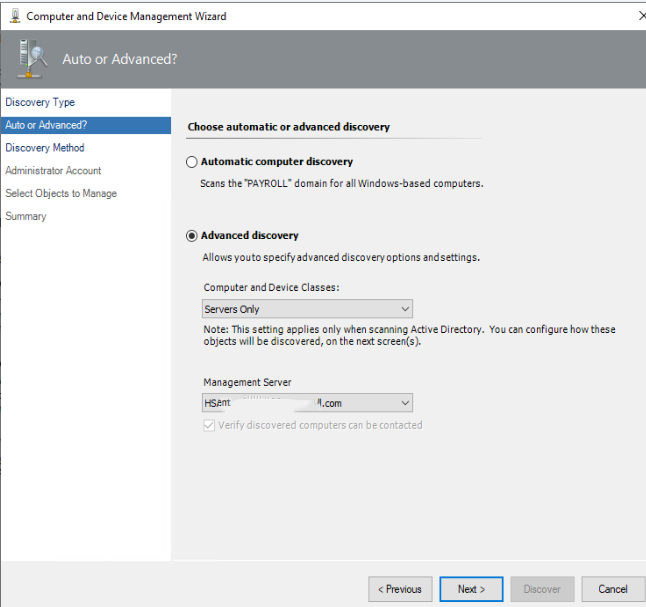
4. On the Auto or Advanced? page, you have two options: Automatic computer discovery or Advanced discovery.
If you select Automatic computer discovery, click Next, and then go to step 6. If you select Advanced discovery, continue with the following steps.
Note: Automatic computer discovery scans for Windows-based computers in the domain. Advanced discovery allows you to specify criteria for the computers that the wizard will return, such as computer names starting with Chicago.
a. Check Advanced discovery.
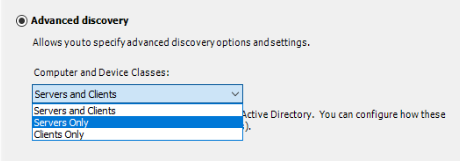
b. In the Computer and Device Classes list, you have 3 options: Servers and Clients, Servers Only, or Clients Only.
In the Management Server list, click the management server or gateway server to discover the computers.
If you selected Servers and Clients, you can select the Verify discovered computers can be contacted check box. This is likely to increase the success rate of agent deployment, but discovery can take longer.
Note: If the Active Directory catalog does not contain the NetBIOS names for computers in a domain, select Verify discovered computers can be contacted. Otherwise, the Browse, or Type In option fails to find computers. This affects computers in the same domain as the management server, in another domain with a full trust relationship, and in untrusted domains by using a gateway server.
c. Click Next.
Note: The wizard can return approximately 4000 computers if Verify discovered computers can be contacted is selected, and it can return 10,000 computers if this option is not selected. Automatic computer discovery verifies that discovered computers can be contacted. A computer that is already managed by the management group is not returned.
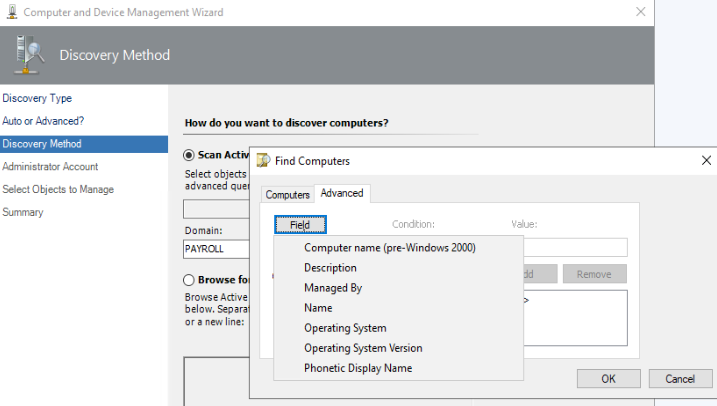
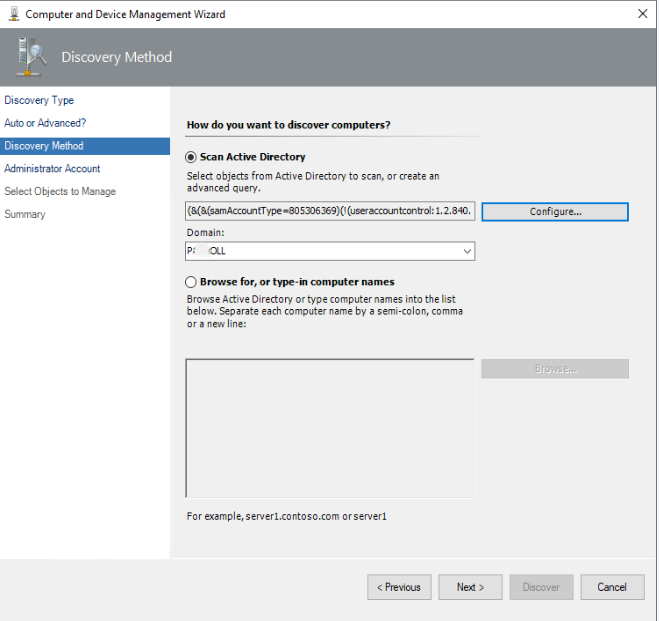
5. On the Discovery Method page, you can locate the computers that you want to manage by either scanning or browsing Active Directory Domain Services or typing the computer names.
If you want to scan, do the following: check Scan Active Directory and then click Configure.
a. In Computers, you enter the Computer name, Owner, and role.
b. in Advanced, you can select Field such as Computer name, Description, Managed By, Name. OS, OS Version, and Phonetic Display Name.
c. In the Domain list, click the domain of the computers that you want to discover.
If you want to browse Active Directory Domain Services
Select Browse for, or type-in computer names, click Browse, specify the names of the computers that you want to manage, and then click OK.
In the Browse for, or type-in computer names box, type the computer names, separated by a semi-colon, comma, or a new line. You can use NetBIOS computer names or fully qualified domain names (FQDN).
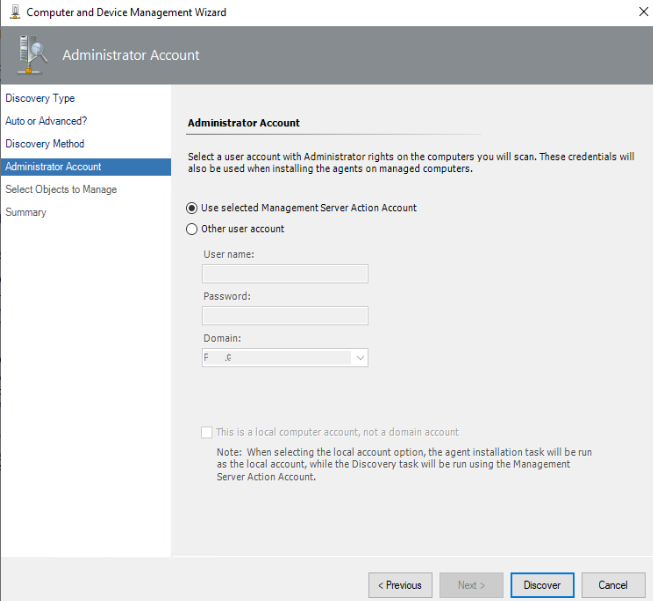
6. Click Next, and on the Administrator Account page, do one of the following:
Select Use selected Management Server Action Account if it is not already selected.
Select Other user account, type the User name and Password, and then select the Domain from the list. If the user name is not a domain account, select This is a local computer account, not a domain account.
Note: The account must have administrative privileges on the targeted computers. If This is a local computer account, not a domain account is selected, the management server action account will be used to perform discovery.
7. Click Discover to display the Discovery Progress page.
Note: Computers that are already managed by the management group will not be returned by the wizard.
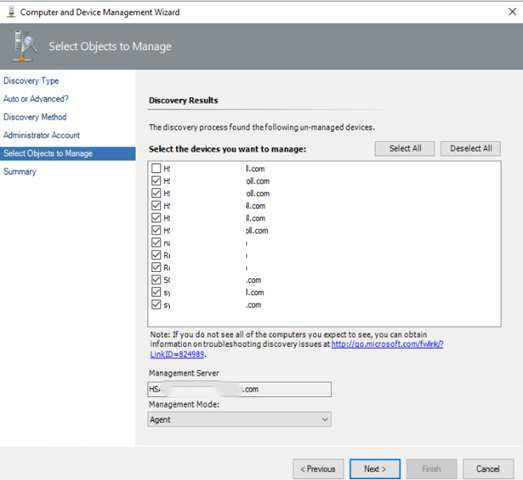
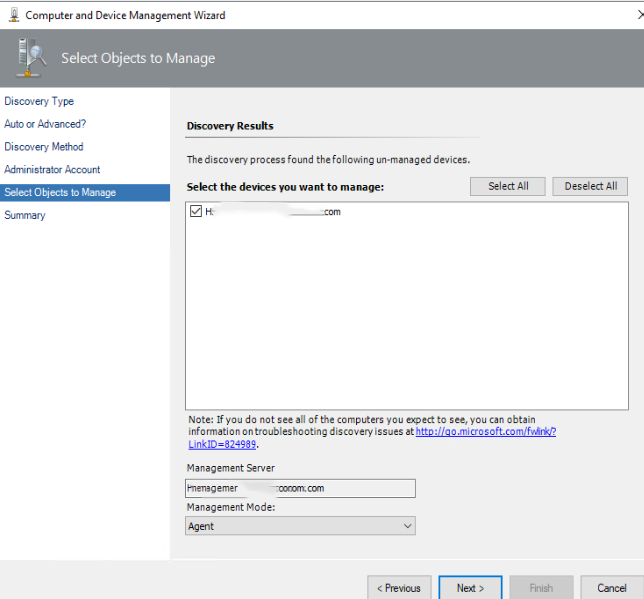
8. On the Select Objects to Manage page, do the following:
Select the computers that you want to be agent-managed computers.
In the Management Mode list, click Agent and then click Next.
Note: The discovery results show virtual nodes of clusters. Do not select any virtual nodes to be managed.
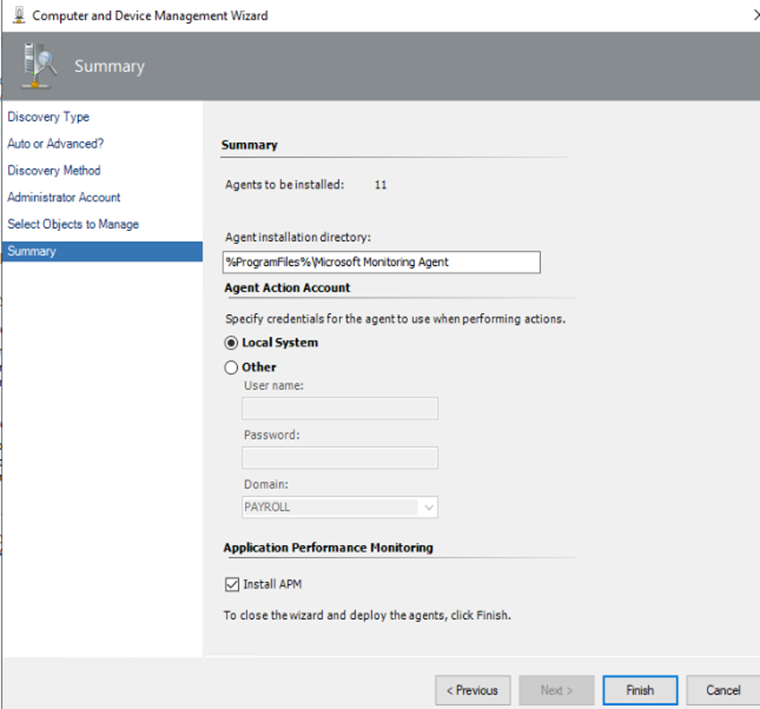
9. On the Summary page, do the following:
Leave the Agent installation directory set to the default of %ProgramFiles%\Microsoft Monitoring Agent or type an installation path.
Note: If a different Agent installation directory is specified, the root of the path must exist on the targeted computer or the agent installation fails. Subdirectories, such as \Agent, are created if they do not exist.
10. Leave Agent Action Account set to the default, Local System, or select Other and type the User name, Password, and Domain. The Agent Action Account is the default account that the agent will use to perform actions.
Click Finish.
In the Agent Management Task Status dialog box, the Status for each selected computer changes from Queued to Success; the computers are ready to be managed.
Note: If the task fails for a computer, click the targeted computer. The reason for the failure is displayed in the Task Output text box.