A malformed packet is a type of network packet that does not adhere to the expected format or structure for that particular type of packet. A network packet is a unit of data that is sent over a network from one device to another, and it includes a header that describes important information about the packet, such as the source and destination IP addresses and port numbers.
A packet can become malformed due to a variety of reasons, such as errors in the network, hardware, or software that cause the packet to be constructed incorrectly. Malformed packets can also be created intentionally by attackers as part of an attack, such as a buffer overflow attack or a denial-of-service attack.
When a device receives a malformed packet, it may not be able to interpret it correctly, which can cause issues with the network, such as slow performance, errors, or even crashes. Malformed packets can also be a security risk because they can be a sign of an attempted attack or can be used to exploit vulnerabilities in the network.
Network administrators often monitor their networks for malformed packets as part of their overall network security strategy. Network security devices such as firewalls and intrusion detection systems can detect and block malformed packets to protect the network from potential threats.
To enable password reset through self-service for Office 365, you can follow these steps:
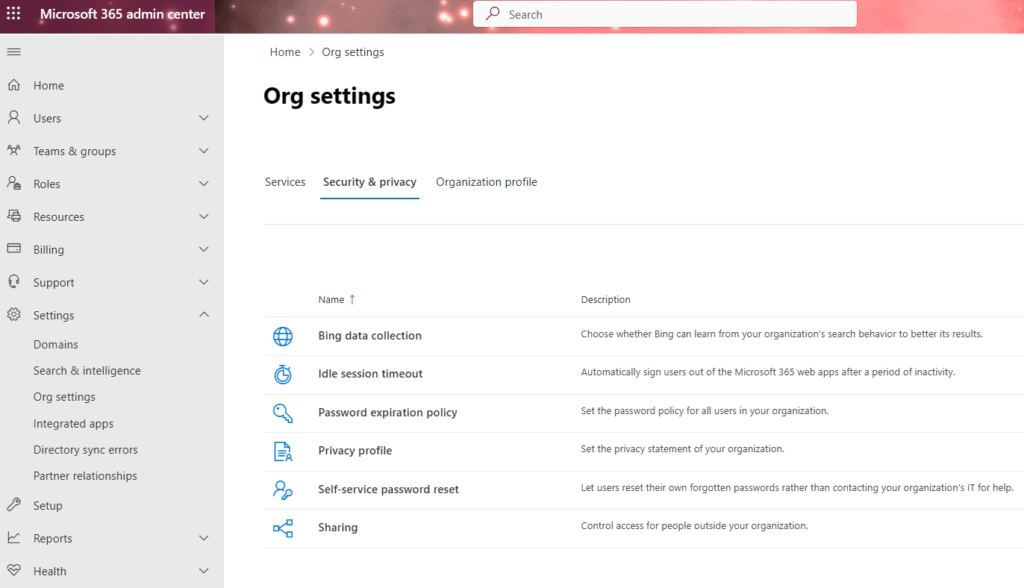
In the Microsoft 365 admin center, in the left navigation pane, select Settings > Org settings, and then Security & privacy.
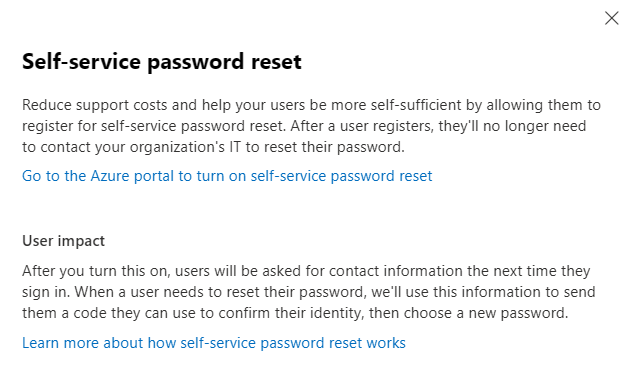
2. Under Self-service password reset, select Go to the Azure portal to turn on self-service password reset.
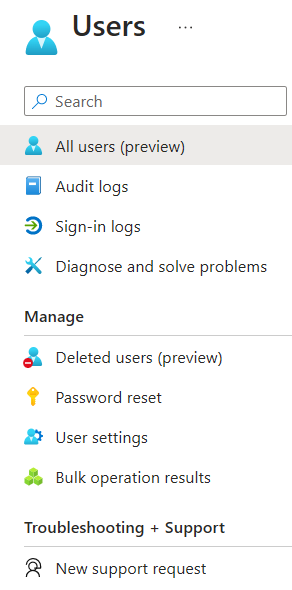
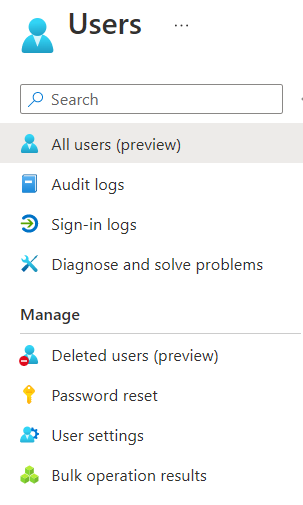
3. In the left navigation pane, select Users, and then on the Users – all users page, select Password reset.
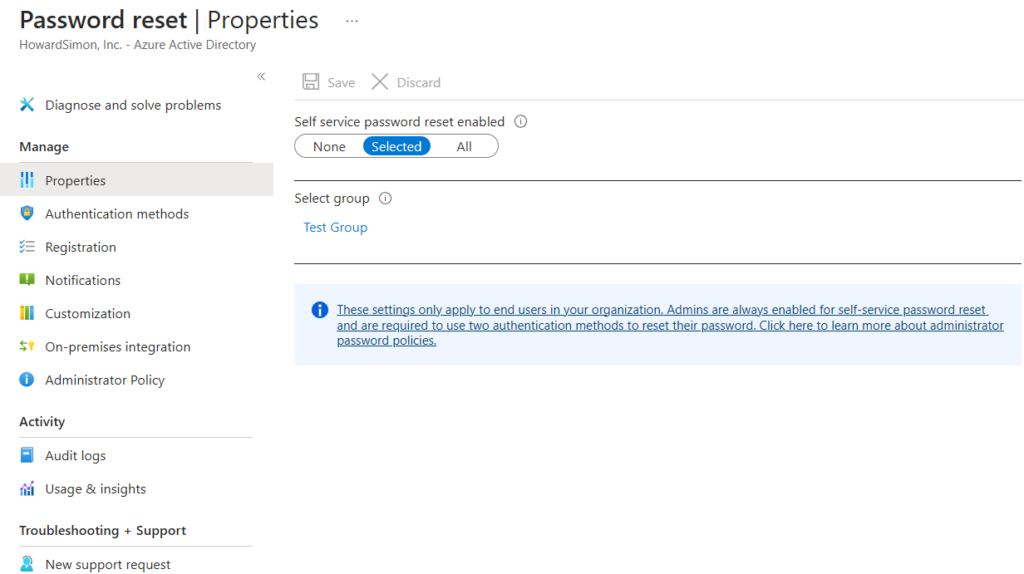
4. Select All to enable self-service password reset, and then select Save.
In the left navigation pane, select Authentication methods and select the Number of methods required to reset and desired Methods available to users, and then select Save.
Or
Sign in to the Azure Active Directory (AD) portal using an account with administrator privileges: https://aad.portal.azure.com/
In the Azure AD portal, navigate to “Azure Active Directory” > “Security” > “Authentication methods.”
Click on the “Password reset” tab.
Under the “Properties” section, ensure that the “Users can reset passwords using the reset password portal” option is turned on.
Under the “Registration” section, ensure that the “Users can register security info to use for password reset” option is turned on.
Under the “Notifications” section, configure the notification settings for password reset.
Click on the “Save” button to apply the changes.
Once you have enabled password reset through self-service, your Office 365 users will be able to reset their own passwords without needing to contact an administrator or IT support. They will need to register their security information, such as an alternate email address or phone number, in order to use self-service password reset.
Note that enabling self-service password reset requires an Azure AD Premium subscription. If you do not have a premium subscription, you may need to upgrade your subscription or contact Microsoft support for assistance.
Log in to your device using a local administrator account.
Establish the VPN.
Join Windows to the Active Directory domain.
Reboot your computer and log in with a local administrator account.
Connect to VPN and switch/logon domain user account.
Sign in under your domain user account.
Note: Some VPN like GloablProtect will be disconnected when switching a user. You may have two options. 1) Lock instead of switch. 2) Cache the domain account, for example opening an application like PanGPA.exe > shift+right clicked > Run as different user.
To check the configuration history on a Palo Alto firewall, follow these steps:
Log in to the firewall’s web interface using an administrator account.
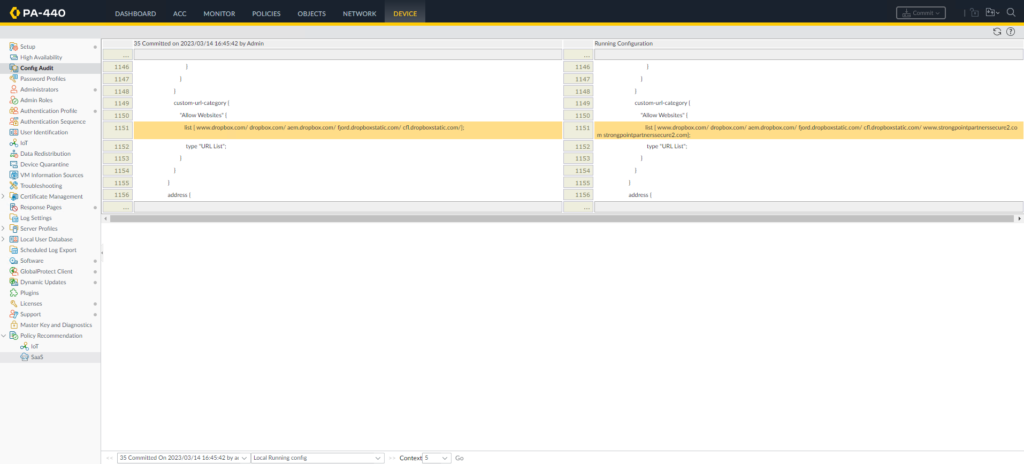
Click on the “Device” tab in the top menu bar, and then click on “Config Audit” in the left-hand menu.
Choosing 2 configurations (Local Running config and 35 Committed on 2023/03/14 in our example) to compare and click on Go.
Double pane window appears.
5. Configuration differences are clearly highlighted by different colors for review, letting the administrator view changes in the present and past configurations. It lists what admin made the change, along with what time it was performed.
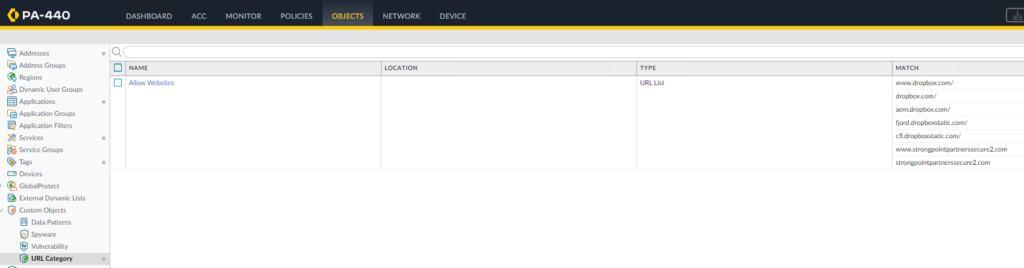
Note: in our example, we configure to allow accessing dropboc.com by going to OBJECTS>Custom Objects>URL Category. Add dropbox.com to Allow Websites.
CLI
3. From the CLI, To see the changes between the running configuration and candidate configuration, you can run the following command to see what is different from the running config to the candite config.
Situation: The client has FatPipe connecting to 3 IPSs. They would like to know how to configure FatPipe to use WAN 3 as primary gateway.
To force the use of a FatPipe WAN 3, you can follow these steps:
Configure your network devices to use the FatPipe WAN 3 as the primary gateway.
Ensure that your network devices are configured to use the FatPipe WAN 3 as the default route for all traffic.
Configure your network devices to prioritize traffic over the FatPipe WAN 3. This can typically be done using Quality of Service (QoS) settings.
Monitor your network traffic to ensure that all traffic is being routed over the FatPipe WAN 3. You can use network monitoring tools to do this.
To configure a FatPipe WAN 3 as the primary gateway, you can follow these steps:
Connect the FatPipe WAN 3 to your network. This typically involves connecting one of the WAN ports on the FatPipe WAN 3 to your router or modem.
Log in to the FatPipe WAN 3 management interface. This can typically be done by opening a web browser and entering the IP address of the FatPipe WAN 3 into the address bar.
Navigate to the “Gateway” or “Routing” section of the management interface. This will allow you to configure the FatPipe WAN 3 as the primary gateway for your network.
Configure the WAN ports on the FatPipe WAN 3. You will need to configure the WAN ports on the FatPipe WAN 3 to match the settings of your ISP. This typically involves setting the IP address, subnet mask, default gateway, and DNS server settings.
Configure the LAN ports on the FatPipe WAN 3. You will also need to configure the LAN ports on the FatPipe WAN 3 to match the settings of your local network. This typically involves setting the IP address, subnet mask, and DHCP server settings.
Test the configuration. Once you have configured the FatPipe WAN 3 as the primary gateway, you should test the configuration to ensure that it is working correctly. This typically involves checking that you can access the internet and that traffic is being routed through the FatPipe WAN 3.
To add a user to Azure administrators, you need to have the appropriate permissions to manage Azure resources. Here are the steps to add a user to Azure administrators:
Log in to the Azure portal using your credentials.
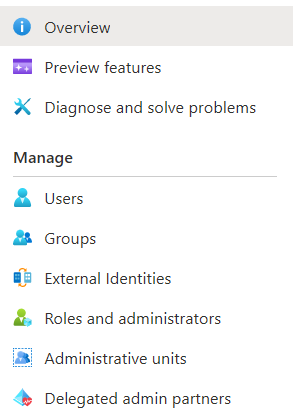
Click on “Azure Active Directory” from the left-hand menu.
Select “Users” from the options listed.
Choose the user that you want to add as an administrator.
Click on “Assigned Role” from the user’s details page.
Click on “Add role” button on the Directory role page.
Select the role you want to assign to the user. For example, you can select “Global Administrator” to give the user full administrative access to the Azure subscription.
Click on “Save” to add the user to the selected role.
After completing these steps, the user will be added to the Azure administrators with the assigned role, and they will have access to the Azure resources based on their role permissions.
To use the Office 365 self-service reset password feature, you need to follow these steps:
Go to the Office 365 login page and click on the “Can’t access your account?” link.
Select the “Work or school account” option and enter your username (email address) in the appropriate field.
Select the “Forgot my password” option and click “Next”.
Enter the characters you see on the screen in the verification field and click “Next”.
Choose the verification method you want to use to confirm your identity (such as email or text message) and follow the prompts to complete the verification process.
Once your identity is verified, you will be asked to create a new password.
Follow the password guidelines to create a strong password and confirm it.
Click “Finish” to complete the password reset process.
Once you have reset your password, you can use it to log in to your Office 365 account.
Enabling self-service in Office 365 can be done through the following steps:
Sign in to the Azure AD portal using your administrator credentials.
Go to the Azure Active Directory
3. Click on Users.
4. Click on Password reset.
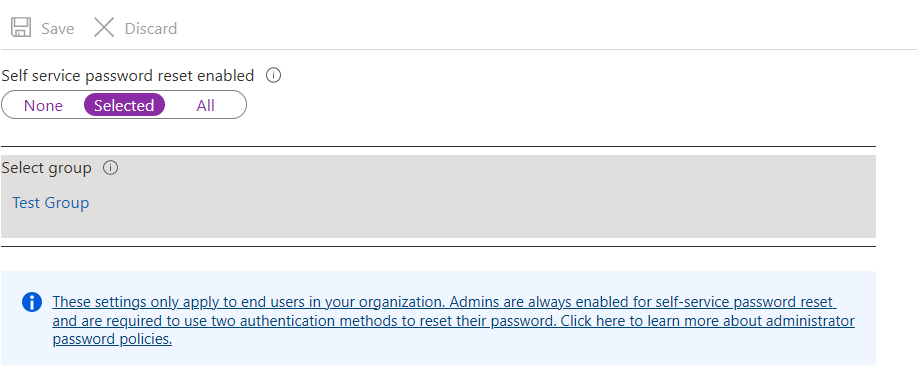
5. On the Properties page, you may choose Selected and select a specific security group or choose All option to enable SSPR for all users. Click Save to save the SSPR setup.
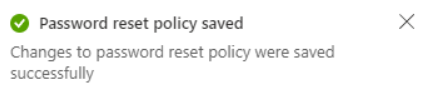
6. In the end, you’ll see the following confirmation, confirming the password reset policy is saved.
7. Configure Authentication Methods
Click Authentication methods.
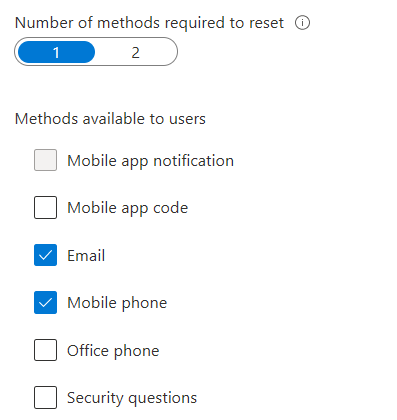
Next, choose the Number of methods required to reset a password. This means when a user attempts to reset a password; the user must pass 1 or 2 authentication methods. The default is 1, and we’ll leave it as it is.
Select the authentication Methods available to users. The default methods are Email and Mobile phone (SMS only). Note. Mobile app notification is only available as a second authentication method. In this example, let’s choose Mobile app code, Email, and Mobile phone (SMS only). Lastly, click Save.
8. Configure SSPR Registration
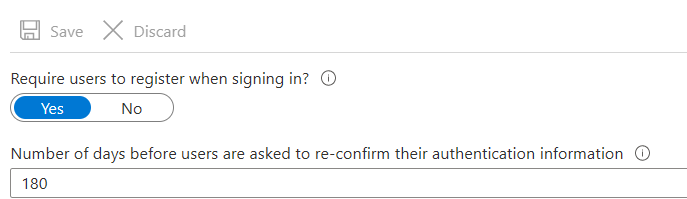
Click Registration and choose whether to require users to register their SSPR information. The default selection is Yes, which means that after you enable SSPR, the users will be required to register their authentication methods when they log in.
The Number of days before users are asked to re-confirm their authentication information value specifies the cadence when they must re-confirm their SSPR authentication methods. The default is 180 days. You may choose to adjust this value or leave it.
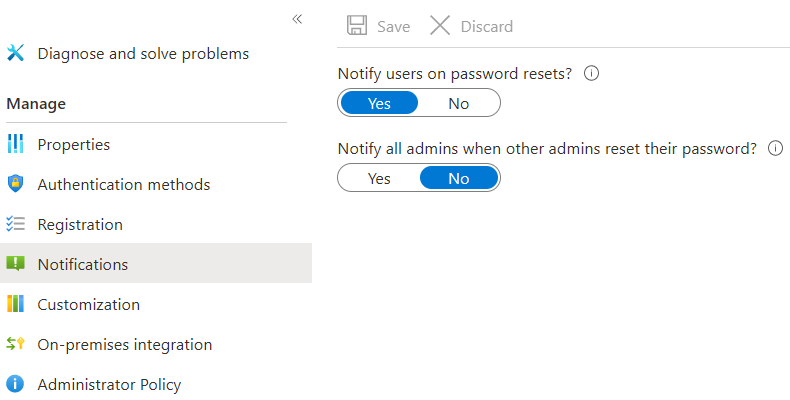
9. Enable SSPR Notifications
On the Notifications page, choose whether users get email notifications when their password is reset. The default option is Yes.
Choose whether to notify admins about other admins resetting their own passwords. The default option is No.
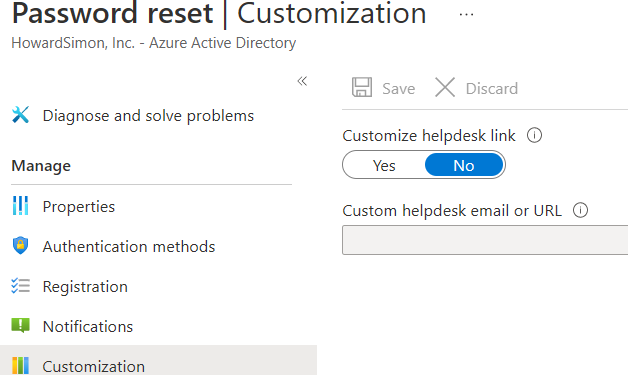
10. Customize Helpdesk Contact
On the Customization page, you can customize the Helpdesk contact information that users will see in the SSPR.
Click Yes and enter the helpdesk email or webpage URL and click Save.
11. Configure account permissions for Azure AD Connect
In your on-premises AD DS environment, open Active Directory Users and Computers with an account that has the appropriate domain administrator permissions.
From the View menu, make sure that Advanced features are turned on.
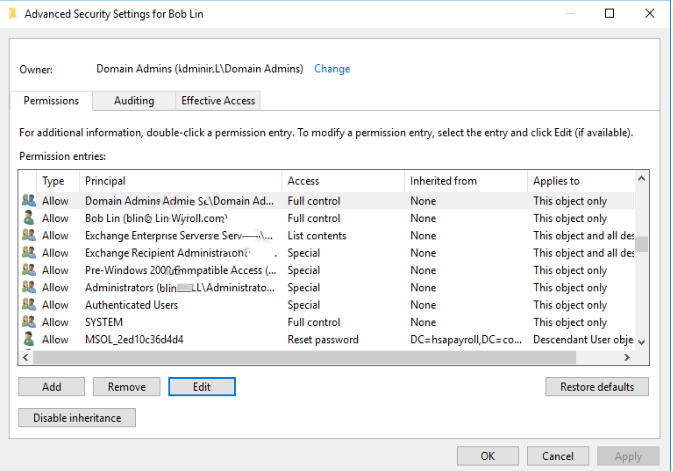
In the left panel, right-select the object that represents the root of the domain and select Properties > Security > Advanced.
From the Permissions tab, select Edit
and make sure you have Reset password.
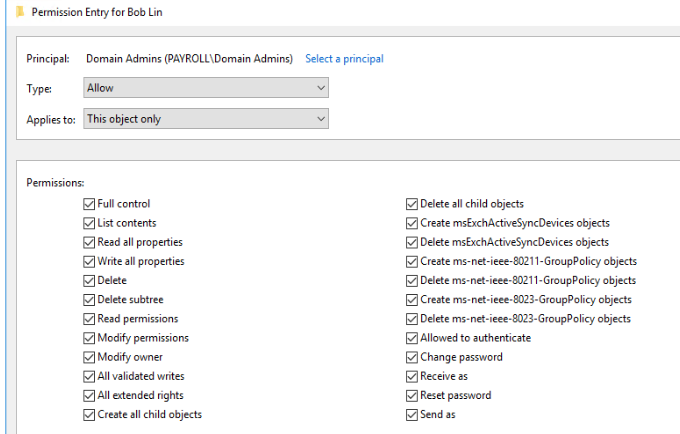
If not, please click Add to add reset password.
Under Properties, select the boxes for the following options. Scroll through the list to find these options, which may already be set by default:
Write lockoutTime
Write pwdLastSet
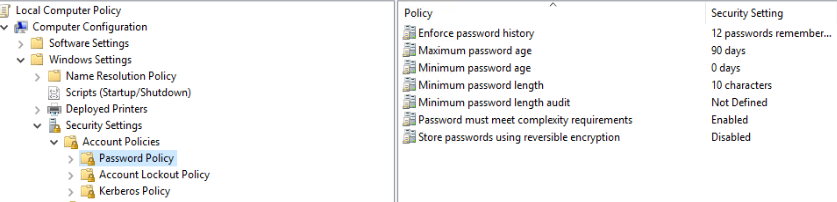
Password policies in the on-premises AD DS environment may prevent password resets from being correctly processed. For password writeback to work most efficiently, the group policy for Minimum password age must be set to 0. This setting can be found under Computer Configuration > Policies > Windows Settings > Security Settings > Account Policies within gpmc.msc.
If you update the group policy, wait for the updated policy to replicate, or use the gpupdate /force command.
Enable Password Writeback Azure AD Connect
Note. This section requires that Azure AD Connect is already installed and configured in your on-premises AD and Azure AD. If you haven’t done so, visit How to Install Azure AD Connect and Configure It.
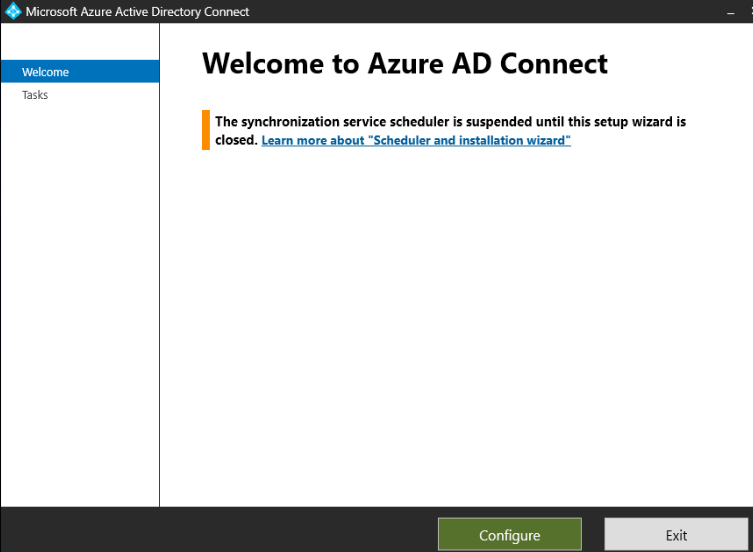
Sign in to your Azure AD Connect server and start the Azure AD Connect configuration wizard.
On the Welcome page, select Configure.
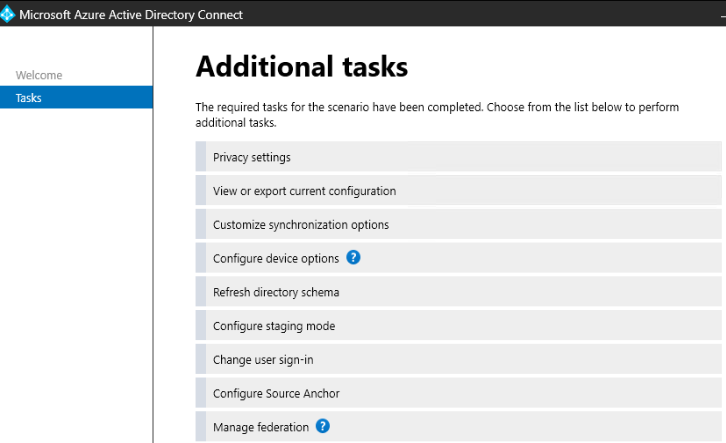
On the Additional tasks page, select Customize synchronization options, and then select Next.
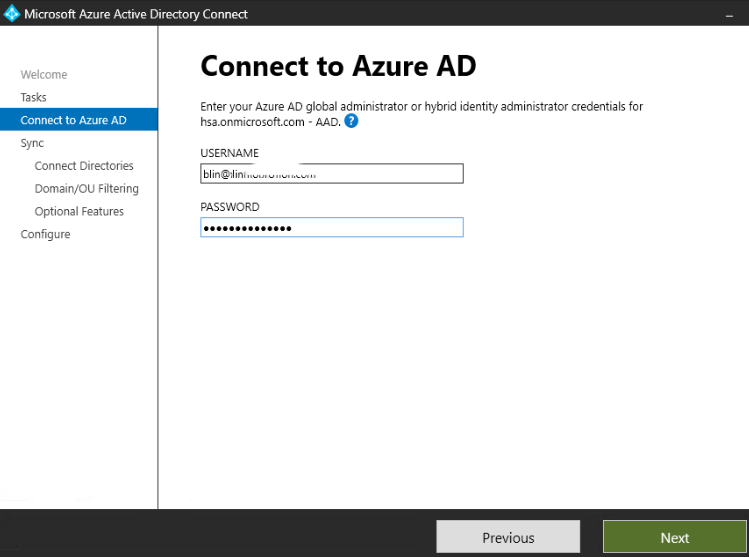
On the Connect to Azure AD page, enter a global administrator credential for your Azure tenant, and then select Next.
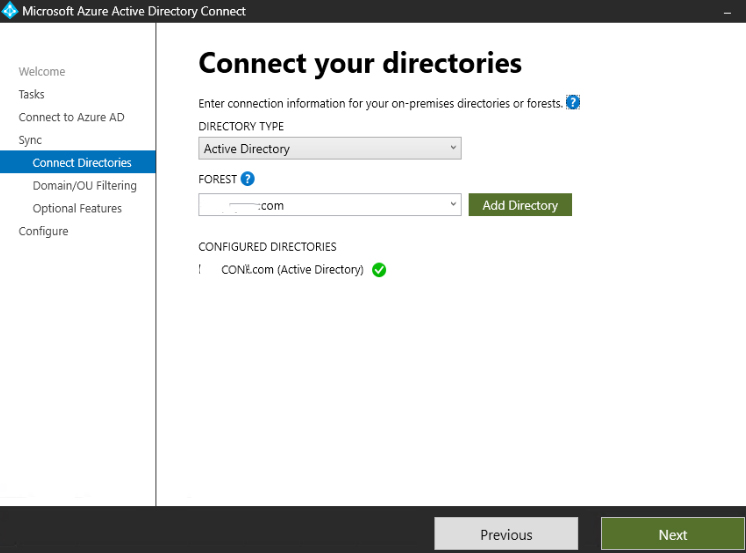
On the Connect directories and Domain/OU filtering pages, select Next.
On the Optional features page, select the box next to Password writeback and
select Next.
On the Directory extensions page, select Next.
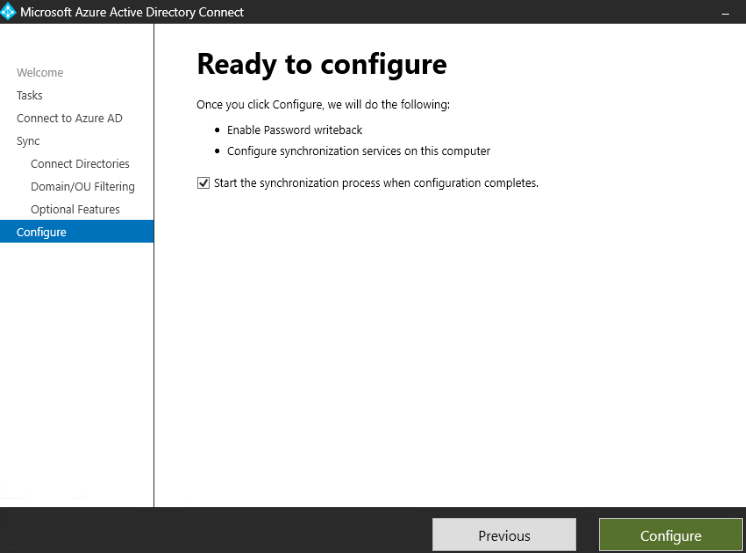
On the Ready to configure page, select Configure and wait for the process to finish.
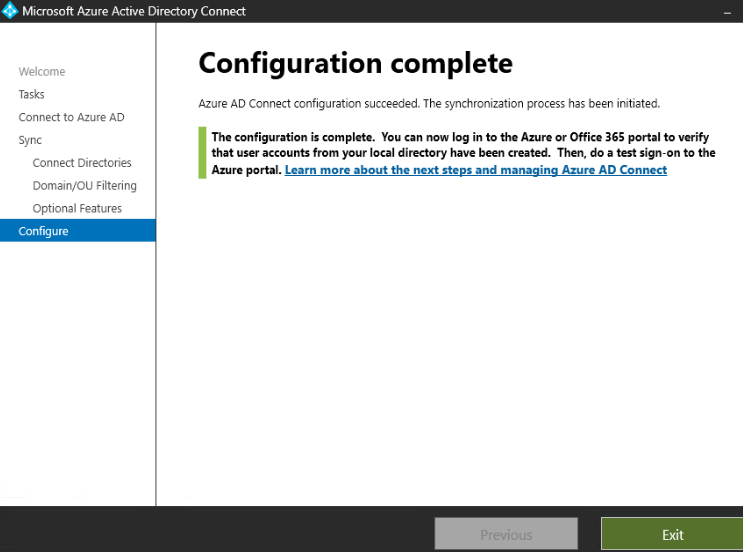
When you see the configuration finish, select Exit.
Conclusion
You can significantly improve the user experience when you enable self service password reset in your organization. Users can reset their own passwords as long as your organization has the license that allows this feature.
Moreover, users may not need to connect to the corporate network (direct, VPN, etc.) to reset their passwords in the Active Directory. Instead, they can perform the password reset in their Office 365 accounts, and the password will sync back to Active Directory.