Situation: After configuring Local Administrator Password Solution (LAPS), the client finds LAPS generates a password for all computers local administrator passwords. However, some of computers are using Local administrator to run apps and Servies. They wonder if they can disable LAPS temporarily or exclude computer administrator.
Resolution: you can disable “Link Enable” Group Policy or remove those computers from the OU policy. You may re-apply group policy by running gpupdate /force
Forcing an update of the password on a system is done through updating the next expiration time either through Powershell or through the LAPS UI client. The password will reset on the next Group Policy refresh following the expiration time.
Powershell requires the AdmPwd.ps module and the cmdlet is:
Resetting through the LAPS UI client can be done by searching for the relevant system, entering the next desired expiration time, and pressing the set button.
Note: administrators can still reset the local administrator password manually through local Administrative Tools but the new password will not be reflected in the computer object in AD and the next reset will occur as scheduled.
If this machine needs to be managed, we need to manually reset the LAPS password on the domain controller or wait for the expiration time to reset the password automatically, and then the new LAPS password can be used to log in (this is what you do in step 7).
Summary: For machines in the domain, the local administrator can still manually reset the local administrator password through the local management tool, but the new password will not be reflected in the computer object of AD. At this time, you can only log in with the reset password.
If you manually reset the LAPS password on the domain controller (I set new expiration day manually) or wait for the LAPS password expiration time to automatically reset the LAPS password, let the system reassign a password that complies with the password policy, after that you can use the new LAPS login.
Situation: The client use Microsoft 365 / Azure DirSync to synchronize their Active Directory to Azure Directory. The default setup is 15 minutes to sync. They would like to know how to force sync.
You can run Powershell command: Start-ADSyncSyncCycle -PolicyType Initial
Resolution 4: It could be add-ins issue. Go to Outlook add-in Adobe Send & Track for Microsoft Outlook – Acrobat. Disabling it.
Resolution 5: Enable Exchange cached mode.
Resolution 6: That happens because you may have a large email size so that you must wait a moment for the sync completed.
Resolution 7: This seems to be a problem only with IMAP accounts.
I fixed my problem on the IMAP account (which, ahem, started after a Microsoft update) by using Outlook’s “repair” tool:
– In Outlook, right click on the mailbox in the left-side navigation bar.
– Choose “Account Properties.”
– In a blue toolbar about 1/3 of the way down the window, “Repair” is one of the choices.
– Click Repair. It only took about 5 seconds.
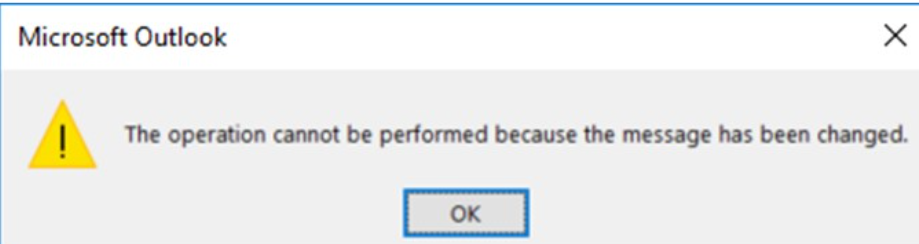
If you move the emails and receive this popup,
Open Outlook > File > Options > Mail > Under Conversation Clean up, Uncheck When a reply modifies a message, don’t move the original > Restart Outlook (it is is already unchecked, check it Restart Outlook, Uncheck it and Restart Outlook)
2. If above doesn’t work, uncheck all options under Conversation Clean Up
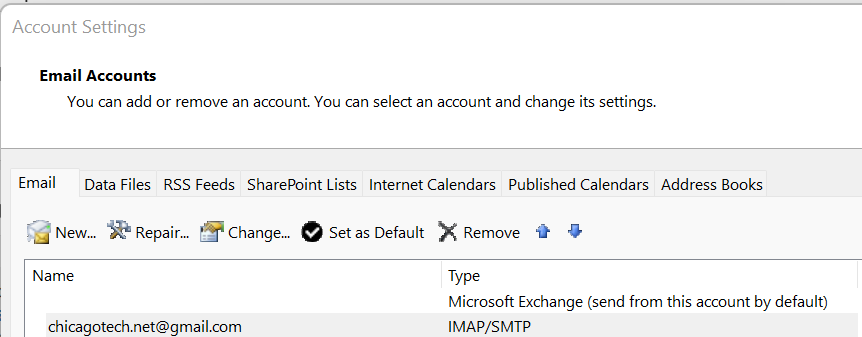
3. Account Settings > Open your account > More settings > Under Advanced tab, put INBOX in Root Folder Path. (If your all folders disappear, simply remove INBOX from here). Note: Do NOT use option # 3 above. With an IMAP account this will empty an entire folder! Really, REALLY dumb suggestion that cost me a ton of data!
4. Select Cleaned up items will go to this folder.
This is a known issue with IMAP accounts. The change (read state) needs to sync with the server before you can move it, which only takes a split second, but outlook keeps a hold on the message until you switch messages.
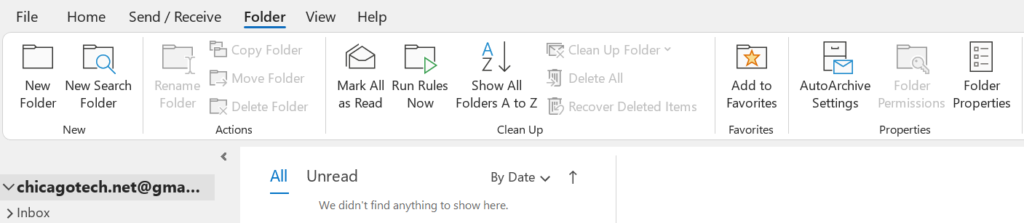
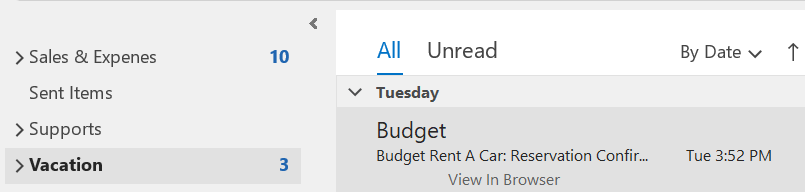
Situation: You can create a folder and use rule to organize group emails. In our example, we will move all emails from a sender, Budget in our example to a folder, Vacation in our example.
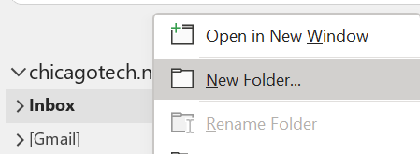
Right click on Inbox.
Click on New Folder. Note: you create the folder later.
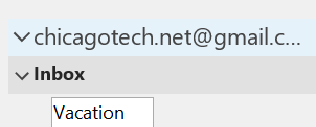
3. Enter the folder name, for example Vacation.
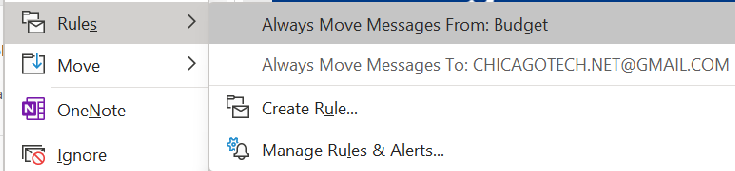
4. Rick click on the email you want to move to the folder you just create and select Rule.
5. Select Alway Move Message From:…
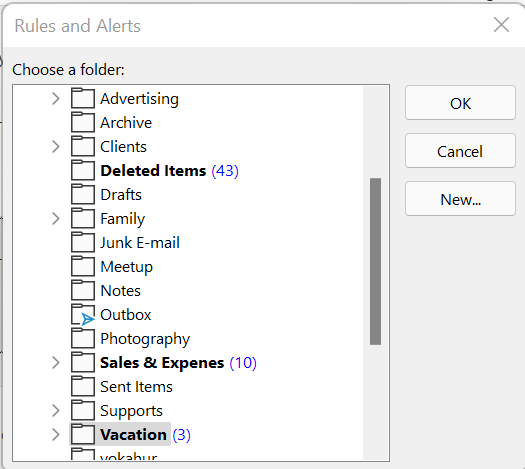
6. Select the folder you just created, Vacation. Note: you have an option to create the folder here by clicking New.
7. The click OK. All emails from Budget will be moved to Vacation Folder.
Situation: By design, an Office 365 user can’t open a case with Microsoft 365 support except you want to assign Service Administrative roles to the user or helpdesk. here is how to do so.
Login azure using your administrative account.
Go to Azure Active Directory.
3. Go to Users>All users.
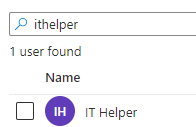
4. Type the username in Search bar.
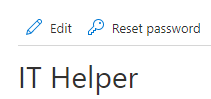
5. Click om the username, ITHelper in our example.
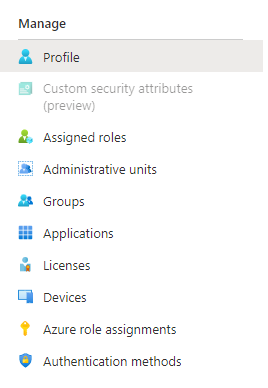
6. On the left click on Assigned roles.
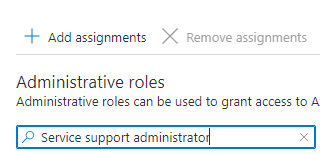
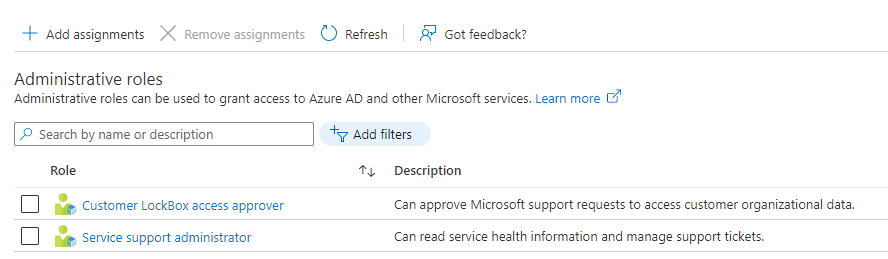
7. In the Search bar, type the role, for example, Customer LockBox access approver and Service support administrator.
8. Add these roles: Customer LockBox access approver and Service support administrator.
9. Save the settings. ITHelper should be able to open a case with Microsoft.