Advanced Settings in Xfinity modem has been moved to https://xfinity.com/myxfi . This article shows how to access xfinity Advanced Settings and configure port forwarding for Remote Desktop.
Resetting Palalto firewall to factory defaults will result in the loss of all configuration settings and logs. This article shows how to do so step by step.
1.Save
and export the current configuration.
* Login to the web interface, for example https://192.168.11.11
* Go to Device>Setup to save and
export configuration
2. Connect a serial cable from your
computer to the Console port
3. Run Purty or
any terminal emulation software (9600-8-N-1).
4. Enter
your login credentials
. Enter the following CLI command:
debug system maintenance-mode
The firewall will reboot in the
maintenance mode.
Type Y and press Enter
6. To enter the maintenance mode,
you need to type “maint” and press Enter.
Then press ENTER to select.
7. Select Factory Reset and then press Enter
8. A warning message will be shown
along with factory reset option. Highlight Factory reset and
press Enter.
9. The reset is progressing in percentage
10. When the reset finishes, you
have options to Back or Reboot.
Select Reboot and press Enter
11. After the booting,
the firewall in default login. Enter the default username and password:
admin/admin to login.
12. You have an option to change the default password
13. Now, you are ready to
re-configure the Paloalto firewall.
Your initial configuration on PA firewall may use MGT interface to access external services such as DNS server, content updates, and license retrieval. If you do not want to enable external network access to your management network, you must set up an in-band data port to provide access to required external services. This article shows how to do so.
1. Login to the web interface, for
example https://192.168.11.11
2. Delete default virtual wire
interface.
The PA firewall comes preconfigured
with a default virtual wire interface between ports Ethernet 1/1 and Ethernet
1/2 (and a corresponding default security policy and zones). We will delete
them.
* Delete the default security
policy by selecting Policies>Security,
select the rule, and click Delete
* Delete the default virtual wire,
select Network>Virtual Wires byselecting
the virtual wire and click Delete
* Delete the default trust and
untrust zones, select Network>Zones by selecting each zone and click Delete.
* Delete the interface
configurations, select Network>Interfaces and
then select each interface (ethernet1/1 and ethernet1/2) and click Delete.
* Commit the changes
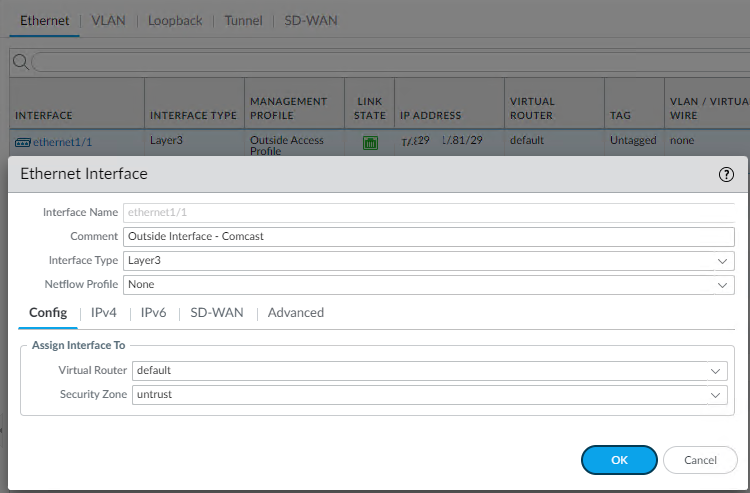
3. Configure the interface for external access to management services. * Select Network>Interfaces>Ethernet and then the interface that corresponds to the port you want to use to access external services, ethernet1/1 in our example.
* Select the Interface Type, Layer3 in our example.
*
In the Config tab,
expand the Security Zone drop-down and select New Zone.
* In the Zone dialog, enter a Name for new zone, for example untrust, and
then click OK.
* Select the IPv4 tab, select the Static radio button, and click Add in the IP section.
* Enter the IP address and network mask to assign to the interface, for example 192.168.11.12/24.
* Select Advanced>Other Info, expand the Management Profile drop-down, and select New Management Profile.
•A Name for the profile, such as Managing, and then select the services you want to allow on the interface.
•Note: in most cases, you probably only need to enable Ping.
•Click OK.
* To save the interface configuration, and then Commit.
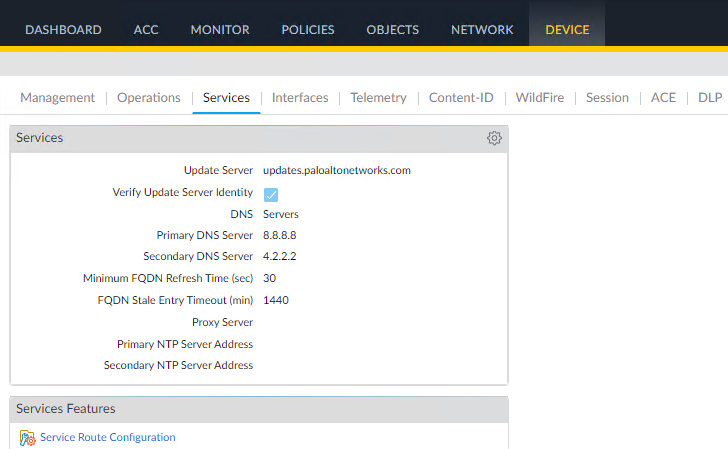
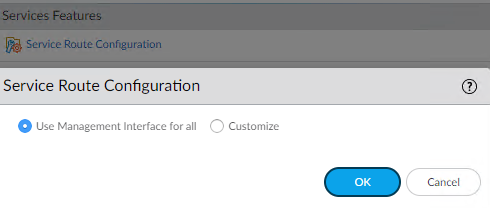
4. Configure the service routes such as DNS, Palo Alto Networks Services, URL Updates, and AutoFocus – this is option only if you don’t want to use Management profile.
• Select Device > Setup > Services and click Service Route Configuration.
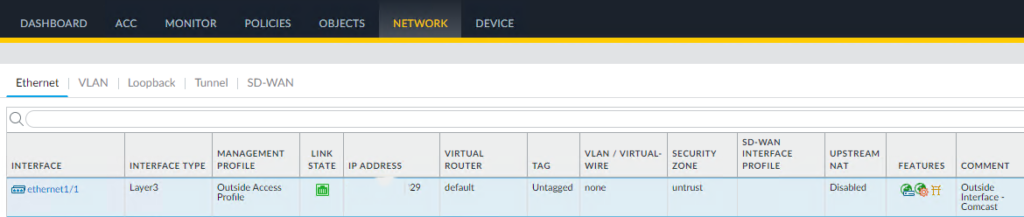
5. Configure an external-facing interface and an associated zone.
•Select Network>Interfaces and then select the external-facing interface, ethernet1/1 in our example.
•Select Layer3 as the Interface Type
•On the Config tab, create the associated Security Zone, such as untrust.
Click on IPv4 and add the IP address
• Close the interface configuration and it looks like this.
6. Create a security policy rule to
allow the firewall to send service requests from the internal zone to the
external zone, Trust to Internet in our example.
7. To save
the configuration, click
on Commit.
8. Test by accessing Update Server Connectivity
•Select Device>Troubleshooting
•Select Update Server from the Select Test drop-down.
•Execute the Palo Alto Networks Update Server connectivity test.
* Also Access the firewall CLI, and
use the following command to retrieve information on the support entitlement
for the firewall from the Palo Alto Networks update server:
request support check
* If the configuration is correct,
the update server will respond with the support status for your firewall.
Because your firewall is not registered, the update server will return the
following message:
If you have connectivity, the update
server will respond with the support status for your firewall. Because your
firewall is not registered, the update server will return the following
message:
It depends on your expertise and network environment. For home business and small business without Domain controller, we recommend to run DHCP/DNS on the Router.
If the company has Domain Controllers, we recommend to use Windows Server as DHCP/DNS server because it is quicker and easier to administer and troubleshoot as you can go through logs and Event Viewer. Also, if you have two Windows domain controllers, you can configure two DHCP servers for redundancy.