Configure Palo Alto GlobalProtect Gateway for MFA

Step 1: Add the Duo RADIUS server

  1. Log in to the Palo Alto administrative interface.
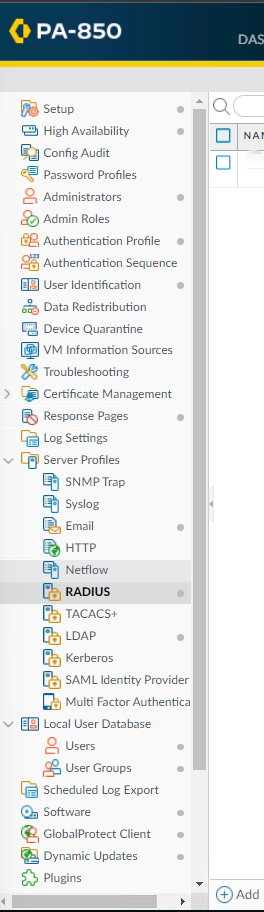
  2. Click on the Device, and navigate to Server Profiles, then RADIUS.

2. Click the Add button to add a new RADIUS server profile.

3. Enter the information such as Name, Timeout, Retries, Authentication Protocol.

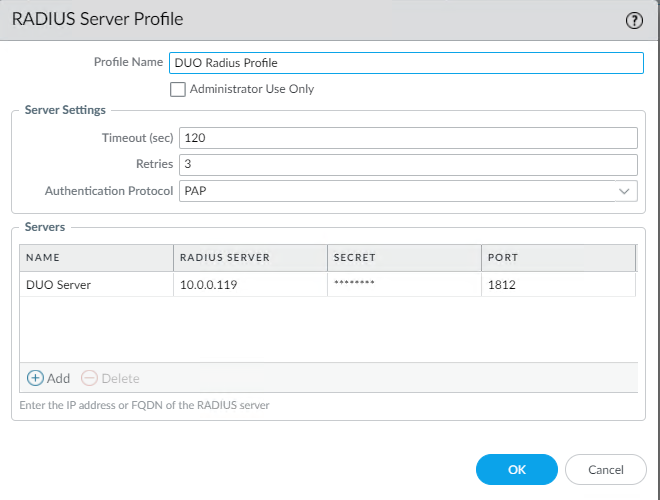
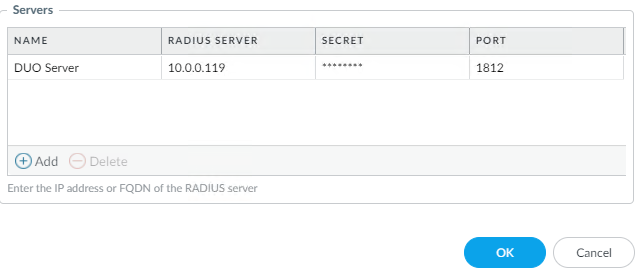
4. Under the “Servers” section, click the Add button to add a RADIUS server, and enter the information such as Name, RADIUS SERVER IP, SECRET, PORT.

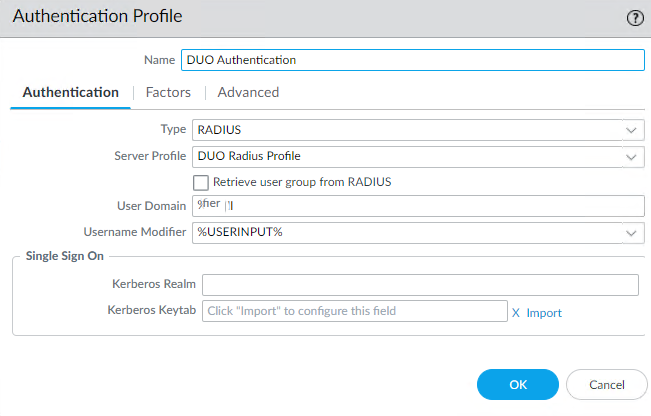
Step 2: Add an Authentication Profile

  1. On the Device, navigate to Authentication Profile.

2. Click the Add button to add a new authentication profile, and enter the following information:

3. Enter the information such as Name, Type, Server Profile, User Domain, Username Modifier.

4. Click the Advanced tab. In the “Allow List” section click the drop-down and select the all group (or, if you want to restrict which users may authenticate with the Duo profile, select the group of your choice).

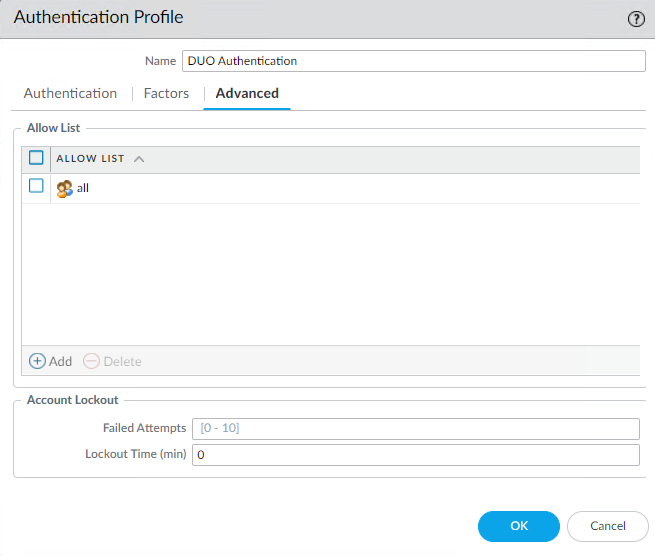
5. Click OK to save the authentication profile.

Step 3: Configure GlobalProtect Gateway

  1. On the Network tab, navigate to GlobalProtect then Gateways.

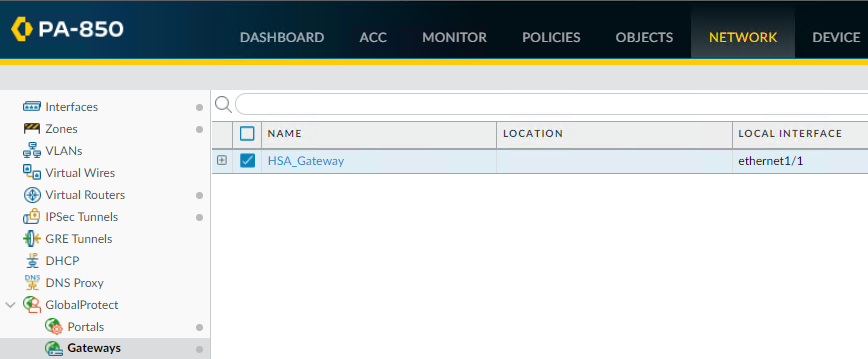
2. Click on Add to create a Gateway.

3. Enter the information such as Name, Interface, IP Address Type, IPv4 Address.

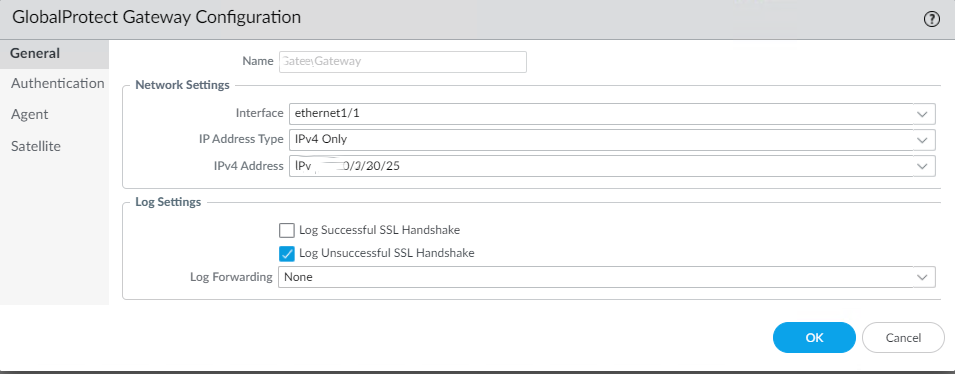
4. Click on the Authentication and then Add to add the Duo authentication profile created before.

5. Click OK (twice if you also enabled authentication override cookies) to save the GlobalProtect Gateway settings.

Step 4: Configure GlobalProtect Portal

If the GlobalProtect Portal is configured for Duo two-factor authentication, users may have to authenticate twice when connecting the GlobalProtect Gateway Agent. For the best user experience, Duo recommends leaving your GlobalProtect Portal set to use LDAP or Kerberos authentication, or if you do add Duo to your GlobalProtect Portal that you also enable cookies for authentication override on your GlobalProtect portal to avoid multiple Duo prompts for authentication when connecting.

Note that if Duo is applied only at the GlobalProtect Gateway then users may not append a factor or passcode to their password when logging in.

If your organization would like to protect the GlobalProtect Portal with Duo follow these instructions.

  1. Click on the Network tab, navigate to GlobalProtect then Portal.

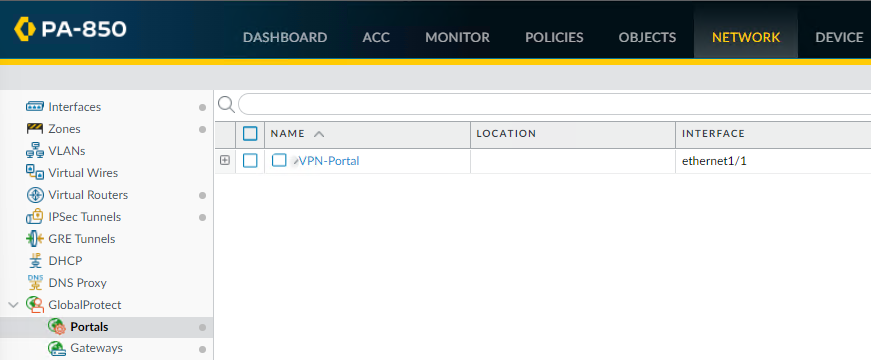
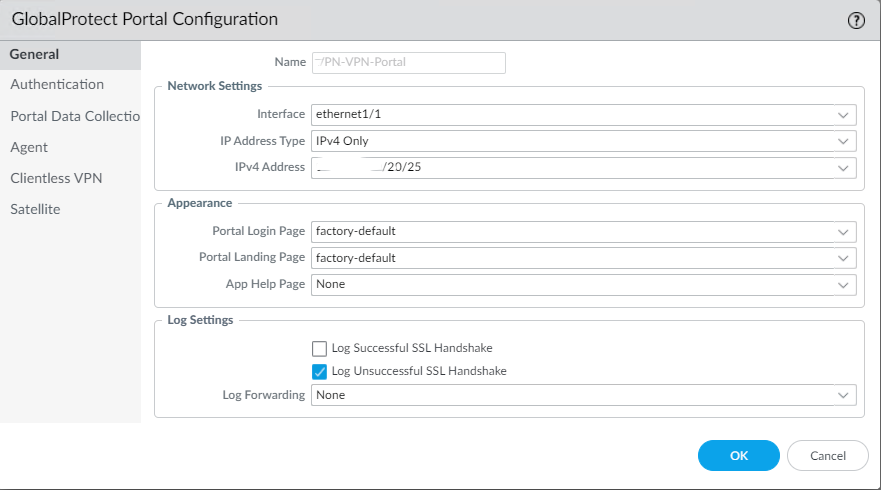
2. Click on your configured GlobalProtect Portal to bring up the properties window.

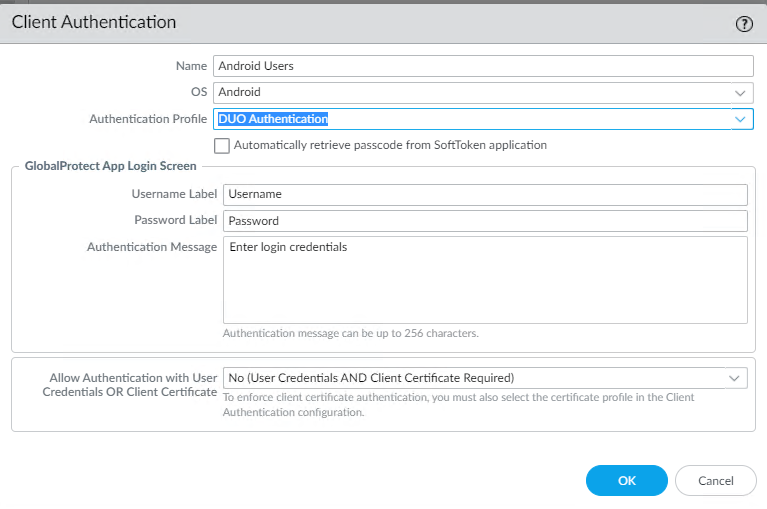
3. On the Authentication tab of the GlobalProtect Portal Configuration, select the Duo authentication profile created before.

Step 5: Commit to save the Settings and test

  1. Commit

2. Test

Please view this step by step video:

Download and install DUO Proxy Server on Windows Server

Step 1: Create a DUO account and Protect an Application

  1. Visit https://signup.duo.com/
  2. Create your DUO account.

3. Now, log in to the Duo Admin Panel and navigate to Applications.

4. Click on Protect an Application and locate Palo Alto GlobalProtect

5. Click Protect on the far-right to configure the application and get your integration keysecret key, and API hostname.

Step 2: Download and install the Duo Authentication Proxy (on Windows Server)

  1. Download the most recent Authentication Proxy for Windows from https://dl.duosecurity.com/duoauthproxy-latest.exe.

2. Launch the Authentication Proxy installer on the Windows server which will be DUOP Proxy Server. Click Yes in the popup: Do you want to allow this app to make changes to your device?

3. Click Next.

4. In Choose Components page, check Proxy Manager and click on Install.

5. When completed, click Next

6. Click Finish.

Step 3: Configure the Proxy

  1. Open the Duo Authentication Proxy configuration file authproxy.cfg which is located in C:\Program Files\Duo Security Authentication Proxy\conf\authproxy.cfg
  2. Enter these info in ad_client:

host=IP address of your domain controller

service_account_username=member username of domain admins

service_account_password=The password corresponding to service_account_username

search_dn=The LDAP distinguished name (DN) of an Active Directory/LDAP container or organizational unit (OU) containing all of the users you wish to permit to log in.

For example:

[ad_client]
host=10.0.0.58
service_account_username=blin
service_account_password=mypassword
search_dn=DC=chicagotech, DC=net

3. Enter configuration info you get from the step 1 and your PA firewall info in radius_server_auto session. For example.

ikey=DSDMN97603NBHYE
skey=vtHYe8ps44cnQ9iLnMuwH89h4eULSWOzHnlmgr9,3m
api_host=api-795KGTY473.duosecurity.com
radius_ip_1=PA firewall management IP
radius_secret_1=secret
failmode=safe
client=ad_client
port=1812
client_ip_attr=paloalto

4. Now, run Duo Authentication Proxy Manager on the Window Server

How to configure Palo Alto GlobalProtec login using AD credentials with MFA

You may have multiple option to configure Palo Alto GlobalProtect MFA. This article shows you how to configure Palo Alto GlobalProtect to use Active Directory (AD) accounts with Multi-Factor Authentication (MFA) step-by-step:

Step 1: Create an Active Directory (AD) group for the users who will be using GlobalProtect.

Step 2: Download and install DUO Proxy Server – We use DUO as example.

Step 3: Create a new Authentication Profile in the Palo Alto Networks firewall

  1. Log in to the firewall’s web interface.
  2. Go to the Device tab, then select Authentication Profile.
  3. Click the “+” button to create a new profile.
  4. Give the profile a name, then select the Active Directory option for the “Authentication Method” field.
  5. Provide the necessary information for the AD server and the group you created in step 1.
  6. Click OK to save the profile.

Step 4: Enable Multi-Factor Authentication (MFA) for the Authentication Profile

1. Select the profile you created in step 3.

2. Click on the “MFA” tab.

3. Select the MFA provider you want to use (e.g. RADIUS, Okta, Microsoft Azure).

4. Provide the necessary information for the MFA provider.

5. Click OK to save the changes.

Step 5: Assign the Authentication Profile created in step 2 to the GlobalProtect Gateway

1. Go to the Network tab, then select GlobalProtect.

2. Select the Gateway, then click on the “Auth” tab.

3. Select the Authentication Profile you created in step 2 from the list.

4. Click OK to save the changes.

Step 6: Assign the Authentication Profile created in step 2 to the GlobalProtect Portal

1. Go to the Network tab, then select GlobalProtect.

2. Select the Portal, then click on the “Auth” tab.

3. Select the Authentication Profile you created in step 2 from the list.

4. Click OK to save the changes.

Step 7: Verify that the users in the AD group can successfully log in to GlobalProtect using their AD credentials and MFA

1. Try logging in to GlobalProtect using the AD credentials of a user in the group you created in step 2.

2. Verify that the user is prompted for MFA before being granted access.

How to use PING on PA firewall CLI

You can use ping on two planes: the Management Plane (MP) and the Data Plane (DP). You have the ability to use the Ping command from both depending on how you use the Ping command.

If you ping from MP, use this command:

ping host ip address

for example

If you ping from DP, use this command:

ping source ip address host ip address

for example

How to restore PA firewall configuration from backup

  1. Login PA Firewall web utility
  2. Go to DEVICE>Setup>Operations.

3. Click Import named configuration snapshot.

4. Browse the configuration xml file. Then OK.

5. After imported, click on Load named configuration snapshot.

6. Browse the xml file you just imported and then click OK.

7. Reboot the Firewall.

Note: You must have a good back or exported name configuration file to restore. Please refer to this post:

How to export and import Palo Alto Firewall configuration

How to download and install PA Firewall Software and Dynamic Update manually

  1. Login Palo Alto Networks support portal.
  2. Click Updates in the left pane.

3. Click on Please Select under Dynamic Update. Select Apps + Threat, or Antivirus, or Apps.

4. Click on Download to download the software or Dynamic Update.

5. Transfer the downloaded file to your local computer.

6. In the Firewall web page, go to DEVICE>Dynamic or Software. Click on Uplaod.

7. Click on Install to install it.

How to Activate Licenses and Subscriptions on Paloalto Firewall

You must activate PA licenses for each of the services you purchased before you can start using the firewall to secure the traffic on your network. This article shows how to do so.

Step 1: Register Device

•Log into the Customer Support Portal.  HTTPS://support.paloaltonetworks.com •Navigate to Assets>Device

* Click on Register New Device

•You have two options: Register device using Serial Number or Authorization Code and Register usage-based VM-Series models (hourly/annual) purchased from public cloud Marketplace or Cloud Security Service Provider (CSSP) •Check the option you want and click Next.

* Enter the Device information such as Serial Number, Device Name, and Device Tag.

•Enter Location Information and then click on Agree and Submit.

Step 2: Run day 1 Configuration

 * After registering the device, you have an option to Run Day 1 config.

* Please enter the Serial Number of the device you just registered to create a Day 1 Configuration

Note: Placing a Day 1 Configuration on your firewall will replace any other configurations currently in place

* Click Confirm Serial Number to continue.

* Enter the Setup information such as S/N, Device Type, PAN-OS Version, and Hostname.

•Enter the Management Type and info.

•Enter Logging info.

* Click General Config file.

Step 3: Active the PA support license
* Login PA Firewall web interface
* Device>Support


* Click Activate support using authorization code.

* Enter your Authorization Code which you receive email “Order Summary for Cloud Harmonics SO#” from Palo Alto networks.

and then click OK

* Now, Support page shows Support ExpiryDate, Level, and Description.

Step 4: Activate purchased license

•Go to Device>LicensesRetrieve license keys from license server—Use this option if you activated your license on the Customer Support portal.

•Enter authorization code to activate other features.

* This is what look like after activate the license and features, which confirms that the license is successfully activated