Summary:
A typical migration workstream has the following stages:
- Discover: Find out what you currently have in your environment.
- Pilot: Deploy new cloud capabilities to a small subset of users, applications, or devices, depending on the workstream.
- Scale out: Expand the pilot to complete the transition of a capability to the cloud.
- Cut over (when applicable): Stop using the old on-premises workload.
Migrating from on-premises Active Directory (AD) to Azure AD involves several steps. Here’s a high-level overview of the migration process:
- Assess your current environment: Before you start the migration process, you need to assess your current environment, including the number of users, groups, and applications that rely on AD.
- Set up Azure AD Connect: Azure AD Connect is a tool that allows you to synchronize your on-premises AD with Azure AD. You need to download and install Azure AD Connect on a server in your on-premises environment.
- Configure Azure AD Connect: Once Azure AD Connect is installed, you need to configure it to synchronize your on-premises AD with Azure AD. You can choose to synchronize all of your AD objects or only a subset of them.
- Verify synchronization: After you configure Azure AD Connect, you need to verify that synchronization is working as expected. You can do this by checking the Azure AD Connect synchronization status or by verifying that changes made in AD are being reflected in Azure AD.
- Test user sign-in: Once synchronization is working, you need to test user sign-in to Azure AD. You can do this by signing in to Azure AD with an on-premises AD account.
- Switch to Azure AD authentication: After testing, you can switch your applications and services to use Azure AD authentication instead of on-premises AD authentication. You may need to update application configurations to use Azure AD authentication.
- Decommission on-premises AD: Once all applications and services have been migrated to Azure AD authentication, you can decommission your on-premises AD.
Keep in mind that the migration process may vary depending on the complexity of your environment and the applications and services you’re using. It’s recommended that you thoroughly plan and test the migration before making any changes in production.
case 1
Please help me to see if this are the correct steps
* Sync On Premise AD to Azure AD through Azure AD Connect
* After Sync Create Azure AD DS and Sync to Azure AD (for Which VM needs to be created which will have role of Domain Services
* Part of above process we need to create a Virtual Network and 2 Subnets one for Azure AD DS and other for VM server.
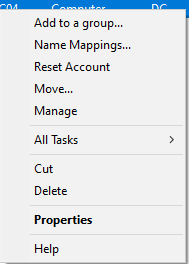
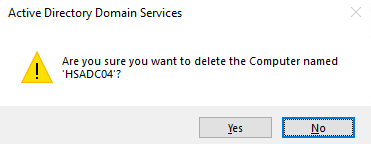
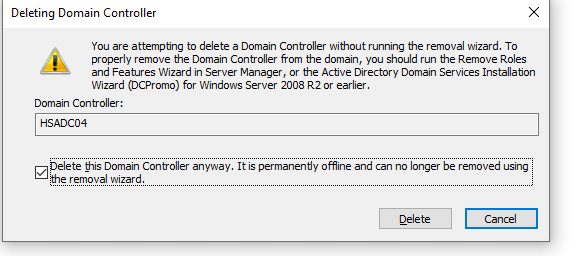
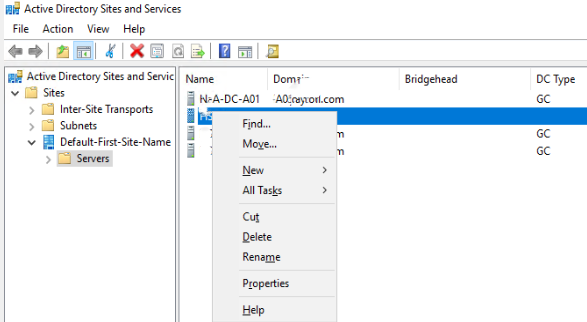
4) Does it mean we can remove the on premise Domain Services after that process.
Yes, the steps you have mentioned are correct. Just to add to the text in red below, the VM will just have the binaries to manage Active Directory, it won’t be promoted as a Domain Controller.
When Azure AD DS is deployed, 2 domain controllers are deployed in the backend and access to the VMs of those domain controllers is not provided.
Note: In case of Azure ADDS, you won’t have Enterprise administrator privileges, due to which you might not be able to perform all the tasks that you can perform in on-premises AD.
Also, keep in mind that schema extension and geo-distributed deployment is not supported with Azure AD DS.
Case 2: Has anyone fully migrated to Azure AD and have any advice or know of any “gotcha’s”? What capabilities do you lose? Have you found any issues with deploying Group Policies (most of ours are password requirements related, screen lock timers for PC’s and Bit Locker)? I feel like the more I read about AAD there seem to be more capabilities but I have not found anything that shows what it doesn’t have which can be more important than what it does.
Azure Active Directory is not designed to be the cloud version of Active Directory. It is not a domain controller or a directory in the cloud that will provide the exact same capabilities with AD. It actually provides many more capabilities in a different way.
That’s why there is no actual “migration” path from Active Directory to Azure Active Directory. You can synchronize your on-premises directories (Active Directory or other) to Azure Active Directory but not migrate your computer accounts, group policies, OU etc.
As you can see here Azure Active Directory is an identity and access management solution for hybrid or cloud-only implementations. It can extend the reach of your on-premises identities to any SaaS application hosted in any cloud. It can provide secure remote access to on-premises applications that you want to publish to external users. It can be the center of your cross-organization collaboration by providing access for your partners to your resources. It provides identity management to your consumer-facing application by using social identity providers. Cloud app discovery, Multi-Factor Authentication, protection of your identities in the cloud, reporting of Sign-ins from possibly infected devices, leaked credentials report, user behavioral analysis are a few additional things that we couldn’t even imagine with the traditional Active Directory on-premises.
Even the recently announced Azure Active Directory Domain Services are not a usual DC as a service that you could use to replicate your existing Active Directory implementation to the cloud. It is a stand-alone service that can offer domain services to your Azure VMs and your directory-aware applications if you decide to move them to Azure infrastructure services. But with no replication to any other on-premises or cloud (in a VM) domain controller.
If you want to migrate your domain controllers in the cloud to use them for traditional task you could deploy domain controllers in Azure Virtual Machines and replicate via VPN.
So to conclude, if you would like to extend the reach of your identities to the cloud you can start by synchronizing your Active Directory to Azure AD. This is how you can do it in 4 clicks and a few minutes
You can see other demo videos with more capabilities here
Five states of transformation – please review this article:
https://learn.microsoft.com/en-us/azure/active-directory/fundamentals/road-to-the-cloud-posture