1.Make sure you have a good backup and have latest Windows updates.
2. Check the health of the domain controllers on DC by command: dcdiag
3. Check where are located FSMO roles by these Powershell commands:
Get-ADDomain | Select-Object InfrastructureMaster, RIDMaster, PDCEmulator
Get-ADForest | Select-Object DomainNamingMaster, SchemaMaster
Example:
Windows PowerShell
Copyright (C) 2013 Microsoft Corporation. All rights reserved.
PS C:\Users\Administrator> Get-ADDomain | Select-Object InfrastructureMaster, RIDMaster, PDCEmulator
InfrastructureMaster RIDMaster PDCEmulator
——————– ——— ———–
TestSvr.test.local TestSvr.test.local TestSvr.test.local
PS C:\Users\Administrator> Get-ADForest | Select-Object DomainNamingMaster, SchemaMaster
DomainNamingMaster SchemaMaster
—————— ————
TestSvr.test.local TestSvr.test.local
PS C:\Users\Administrator>
4. Add your Active Directory account to Enterprise Admins and Schema Admins groups. It is required by the adprep cmdlet. When the migration is finished, remove your account from these groups.
5. Currently there is a bug in the adprep command from Windows Server 2019 17338 build. A certificate must be installed on all servers in order that adprep is allowed to run. Mount the Windows Server 2019 ISO on a machine with a GUI. Navigate to <ISO Drive>:\Support\adprep. Right click on schupgrade.cat and select properties. Then open Digital Signatures tab and click on Details. Next click on view certificate. Click on Certification Path and select the Root CA certificate (the top one). Click on View Certificate. In the Details tab, click on Copy to file. Save the certificate in a location of your choice. Then add the certificate to trust root certification authorities store of each domain controller.
Note: #5 should be applied for Windows Server 2019 preview only. If you install latest version of 2019, you should not to do so.
6. Mount the ISO of Windows Server 2019 on the Schema Master owner. Then navigate to <ISO letter>:\support\adprep. Run the following command:
7. Once the schema is upgraded, run the following command (this command should be run on all domain controllers):
Adprep /domainprep
8. Migrate first domain controllers by running setup.exe from Windows server 2019 DVD.
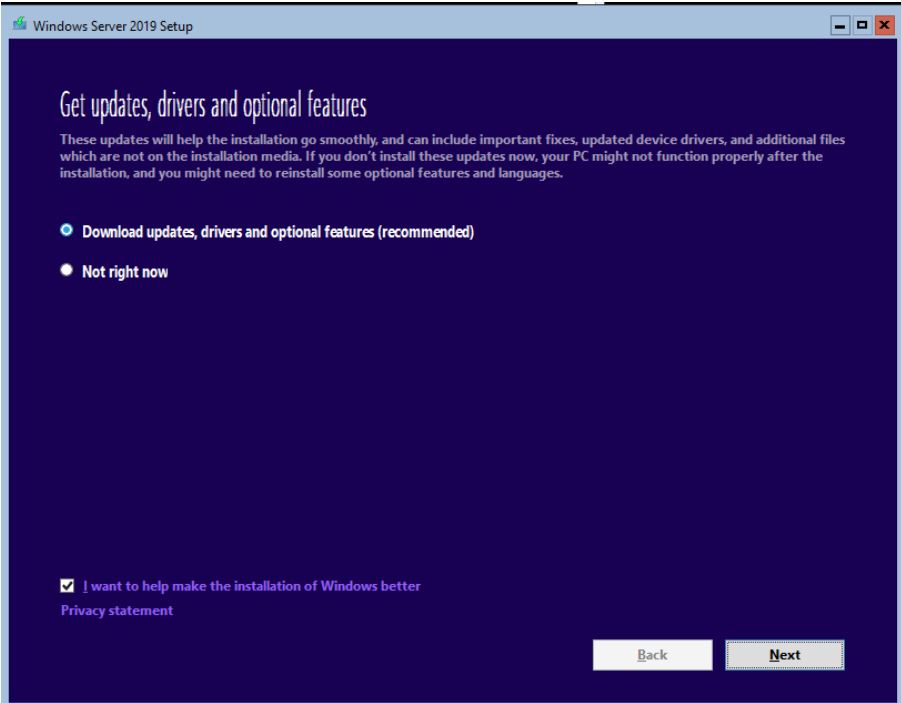
9. Next choose whether download updates right now or not.
10. Follow the instruction, enter the Product key.
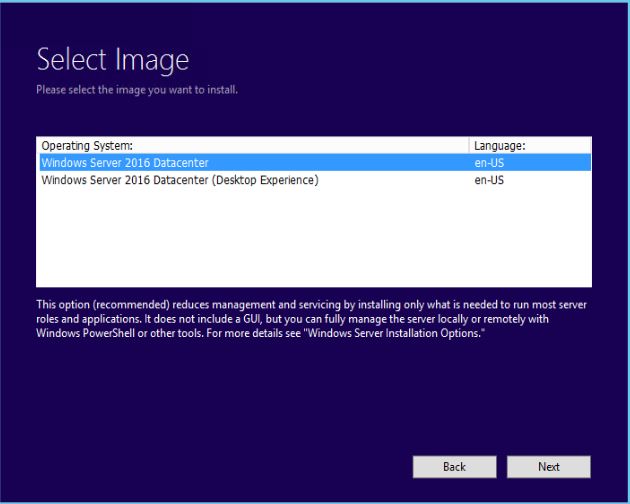
11. Select the Windows Server 2016/2019 edition you want, in our case 2016 Standard (Desktop Experience).
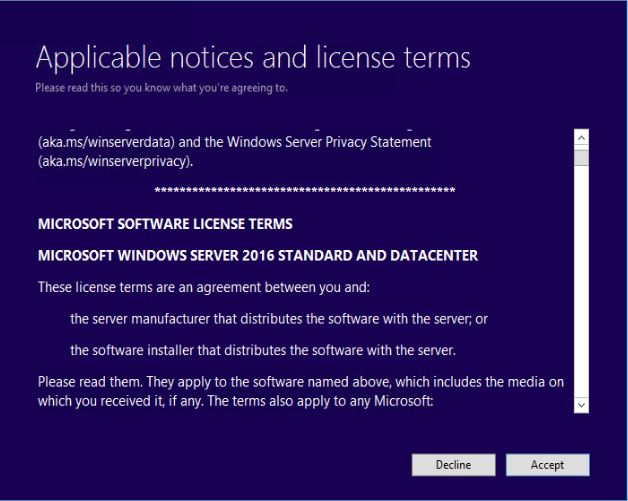
12. Accept the license agreement and click on next.
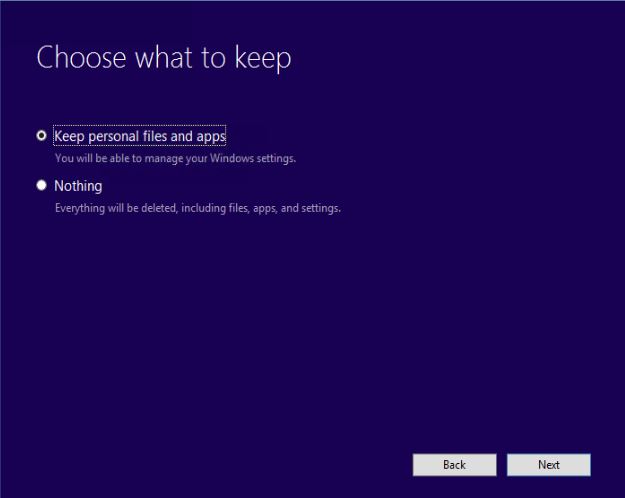
13. Select Keep personal files and apps since we run an In-Place upgrade.
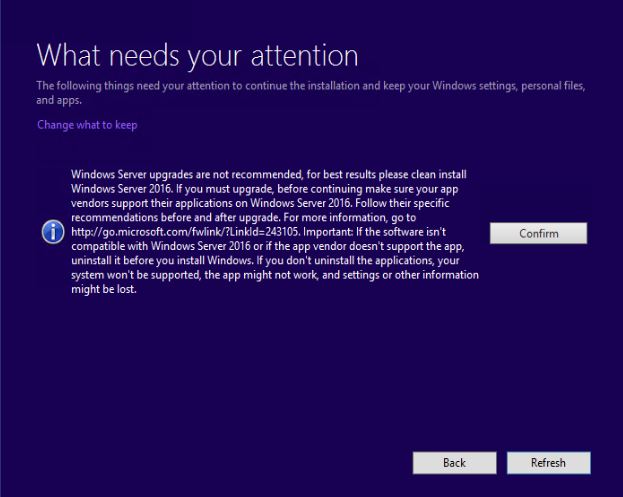
14. In What needs your attention page, click Confirm.
15. In Ready to install page, click Install. It may take one hour.

16. You will see Installing Windows Server 2016 processing.

17. After complete the installation, check DNS, FSMO roles, DC health, and other DC objects.
18. test from the workstations such as login, join domain, create users. network sharing, network printer.