As you may know, Homegroup has been discontinued with the release of Windows 10 1803 and later version. This video will show you how to setup home network to share files.
1.Setup network
Assuming you have an internet router/modem with DHCP/DNS. It is ready to assign IP address to each computer and connect to the Internet. If you see the network icon in the bottom right, your computer is ready to access home network resources and the Internet.
2. Setup the same workgroup on all home computers.
- Type “this pc” in the search bar.
- Click on Open.
* Right click on This PC and select Properties.
* Make sure all computers’ workgroup name is the same. If not, click on Advanced System Settings.
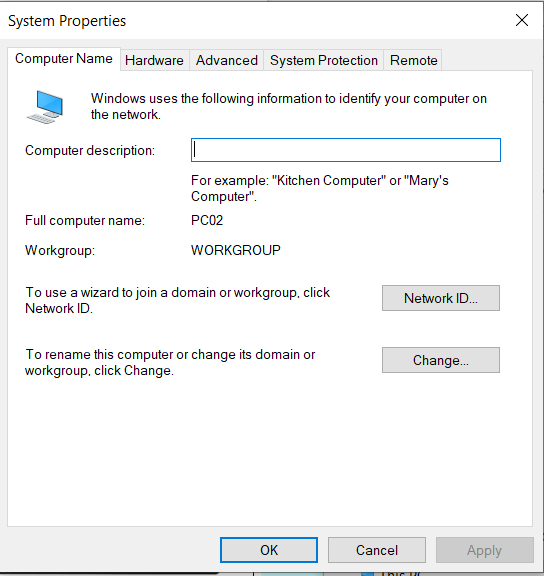
* Click on Computer Name. Then Click Change.
* Change the Workgroup name to match all other computers’ Workgroup name, for example workgroup. Then click all OKs to save the settings and close the System Properties.
3. Create a user with the same password on all home computers. It is recommended to create a user account with the same password in all home computers so that you can share files.
Click Star>Settings.
In Settings, click Accounts.
To add a new account, click on Family & other users.
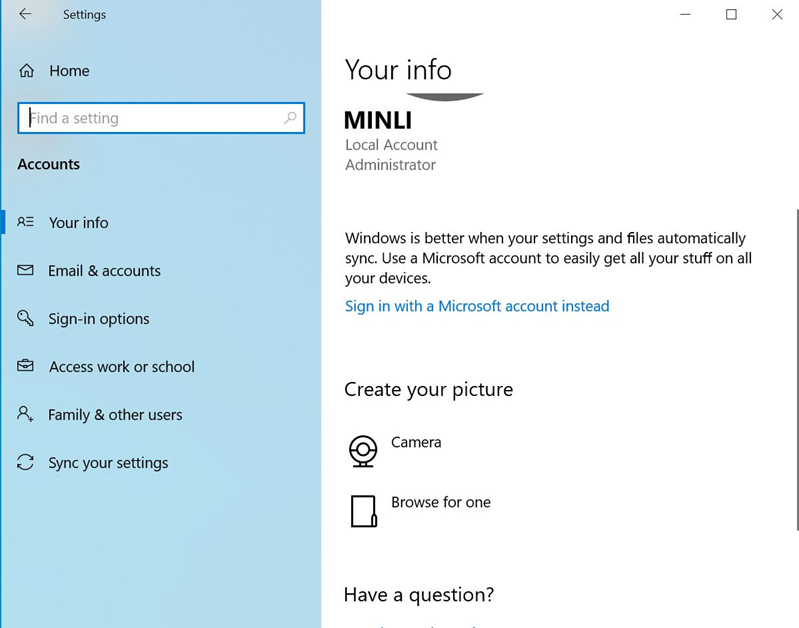
In Family & other users, you have options to add a family member to Sign in with a Microsoft account and Add other users to sign in this PC without a Microsoft account.
Alternatively, you can reset the Administrator’s password for all computers. To reset the password, hold and press Ctrol+Alt+Del keys. Click change a password.
4. Share a folder or drive with other computers.
With File Explorer open, right click on the folder or drive you want to share and click on Properties.
Click on Sharing tab and then Advanced Sharing.
Check “Share this folder” and click on Permissions.
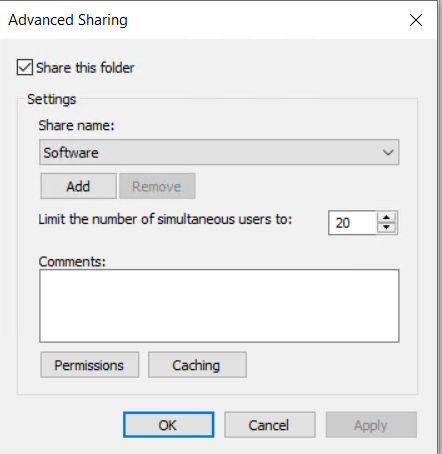
Highlight Everyone and check Change and Read.
Click all Oks to save the settings.
5. Access shared folders or drives.
You may have many ways to access shared folders.
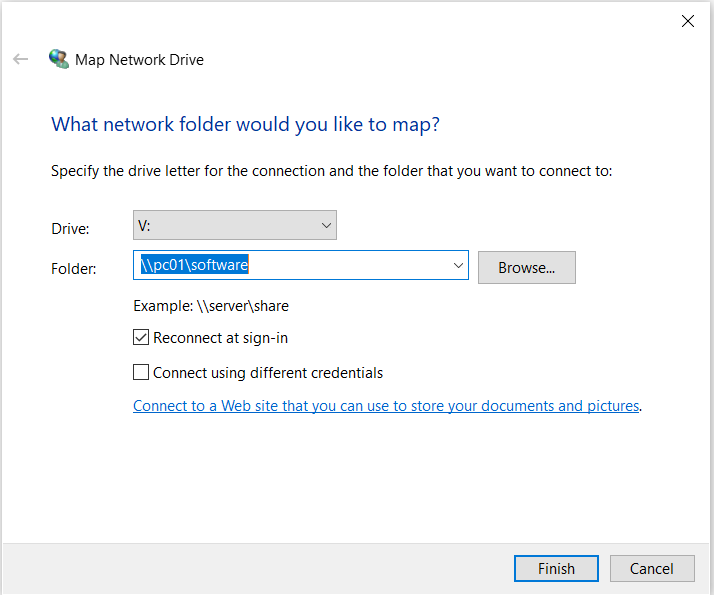
Map network drive. Right click on “This PC” and select Properties.
In Map Network Drive, choose Drive, for example V, Folder, \\pc01\software in our example. You may check Reconnect at sign-in. Click Finish.
If you login the same username and password you created, it will map the shared drive. If you login a different user account, windows will popup for the credentials. Enter the username and password you created before. You may want to check remember my credentials so that it won’t popup next time. Click OK.
Now, you should be able to access the shared software folder.
Alternatively, you can type the remote computer name to see all shared folders. For example type \\pc02 in the Search bar. Then click Open.
You will see all shared folders or drives.
Note: to access a shared folder and shared printer, all computers, printers must be in the same network, for example 192.168.0.# network. If your wired computer and Wi-Fi laptops are in the different IP range, they may not be able to see each other.
Troubleshooting tips for home network. ● 1.Most computer issues can be fixed by restarting the computer. 2.Are all home computers in the same group, for example workgroup? 3.Are all computes in the same IP range? Use ipconfig /all command to check the IP address. 4.Can all computers see each other? Use PING command. 5.If the computer can’t access the Internet, make sure it is connecting to the network with correct IP address and DNS. Use ipconfig /all command. 6.If you have a problem to access a shared folder, it could be permission issue. 7.If you can access shared folder but not internet, reset modem/router may fix the problem. 8.If you can ping the
please view this step by step video;