How to backup and restore WeChat on a computer

There are many ways to save WeChat data and chat info. This article will show you how to run WeChat on a computer and backup it. It will also show you how to restore it.

1. Download and install WeChat in a computer running windows or Mac.

2. Run WeChat on the computer and QR code popup if this is the first time to login. 

3. On your phone, with the WeChat open, tap  + on the top right and tap scan.

4. After scanning, tap Log in on the phone.

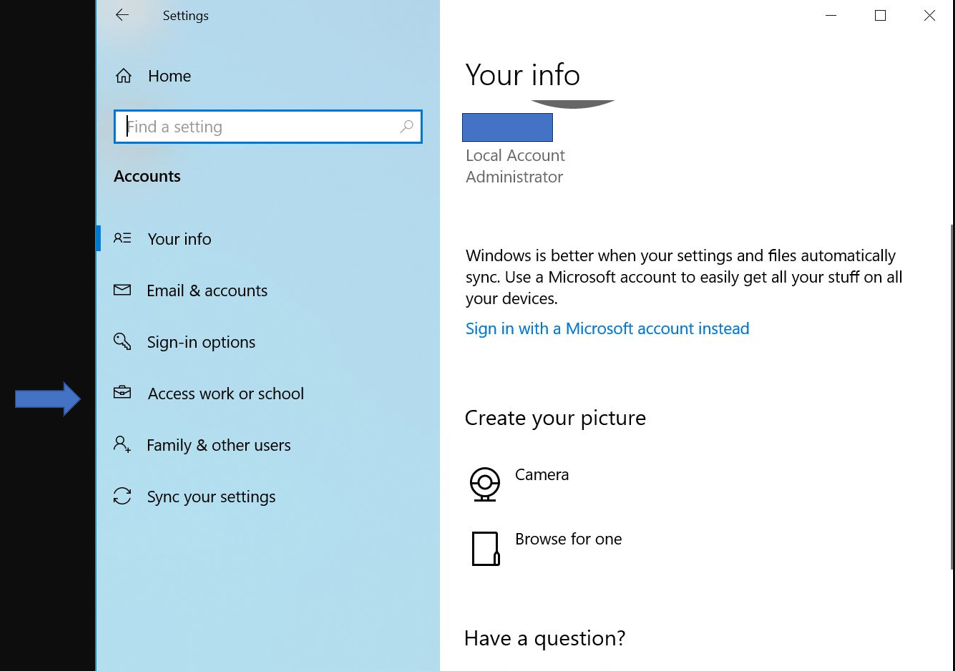
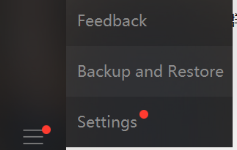
5. After login WeChat in the computer, click left bottom More icon and select Backup and restore.

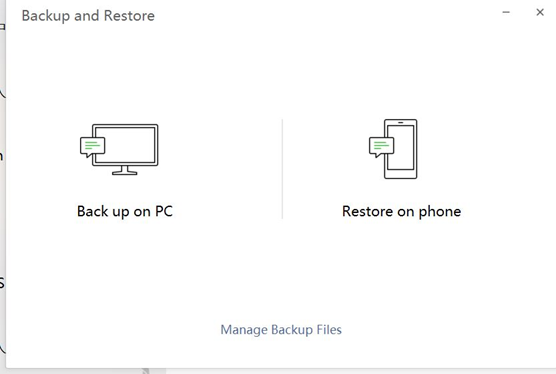
6. In backup and Restore page, click on “Back up on PC“

7. If the Windows Security Alert popup, click Allow access.

8. In Back up on PC page, it shows “Conform on phone to start backup”. 

9. On the phone, you may see this message:  “Back up chat history to computer”. Tap Backup All to start the backup.

10. On the computer, you will see the backup is processing

11. On the phone, you also see the backup processing.

12. When the backup computes, both phone and computer will show “completed” with how many chats are backed up.

13. You have an option to Manage Backup Files.

14. In Manage Backup Files page, you can view the backup name, backup time and delete the backup

15. To check the backup file location, go to download folder. You may copy it to a different location.

To Restore, in Backup and Restore page, tap Restore. 

You have option to select chat logs, Select date and Text messages only to restore.

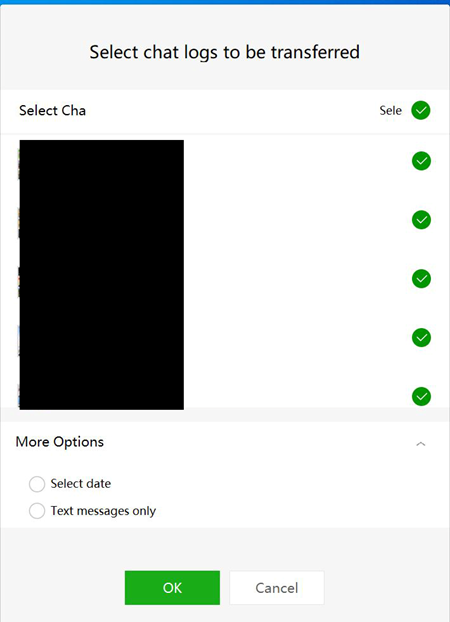
Now, click on OK to start the restore.

Please view this step by step video:

How to create a user account without a Microsoft account in Windows 10

By default, Windows setup asking for a Microsoft account to login. This article will show you how to create a user account without a Microsoft account in Windows 10.

  1. Click Star>Settings.
  2. In Settings, click Accounts.
  3. To add a new account, click on Family & other users.
  4. In Family & other users, click on “Add someone else to this PC”.
  5. Now, you have an option to create a user without a Microsoft account by clicking on “I don’t have this person’s sign-in information”.
  6. If you click on “I don’t have this person’s sign-in information”, you have an option to Add a user without a Microsoft account.  
  7. Now, under Create an account for this PC, enter User name, Password. Click Next.

Please view this step by step video:

How to create and mange user accounts in Windows 10 Home

Creating and managing user accounts in Windows 10 Home edition is different from Windows 10 Pro & Enterprise. This article will show you how to do so.

  • Click Star>Settings.
  • In Settings, click Accounts.
  • To add a new account, click on Family & other users.
  • In Family & other users, you have options to add a family member to Sign in with a Microsoft account and Add other users to sign in this PC without a Microsoft account.
  • If you click on Sign in with a Microsoft account, enter the Microsoft account email, phone, or Skype. If you don’t have an account, click on Create one! If you forgot username, click on Forgot username. Then follow the wizard to login.
  • If you click on Add someone else to this PC, you will have two options: sign in using phone or email. You also have an option to create a user without a Microsoft account by clicking on “I don’t have this person’s sign-in information”.
  • If you click on “I don’t have this person’s sign-in information”, you have an option to Add a user without a Microsoft account.  
  • Now, under Create an account for this PC, enter User name, Password. Click Next.
  • If you want to create a user using Microsoft account, enter the email address in Create account page. Then Next to add the user. 
  • You also have an option “Use a phone number instead”.
  • The Microsoft account is added and click Finish to complete the setting.
  • If you click on Use a phone number instead, its popup for you to enter the phone number. You may select your country code. And click next to complete to add the user using phone number.
  • If you doesn’t have email, you can create a new email account.
  • In Family & other users page, you can remove the user by click on the user name. Then select Remove.
  • In Delete account and data? Click Delete account and data to remove the account.
  • If you click on Change account type, you can switch between Administrator and Standard User.
  • In Account window, you can edit Your info. Sign in with Microsoft account, Create your picture.
  • In Email & accounts window, you can Add an account or Accounts used by other apps.
  • In Sign-in options, you can manage how you sign in to your device such as Windows Hello Face, Windows Hello Fingerprint, Windows hello PIN, Security Key, Password, Picture Password. Dynamic lock can be paired to your PC to know when you’re away and lock your PC.
  • In the Access work or school window, you can access domain resources such as email, apps, security and the network.
  • In Sync your settings window, you have options to sync with work account or individual settings. Note: Some Windows’ features are only available if you are using a Microsoft account or work account.

Please view this step by step video

How to Generate and Upload a Tech Support File for paloalto firewall support

To troubleshoot paloalto firewall issues, paloaoto support engineer may want to check tech support file. This article will show you how to generate and upload a tech support file using the WebGUI.

1. Login paloaoti firewall using an Internet browser, for example https://10.0.0.1. Type username and password. Then click Log in.

2. Click on Device and then Support.

3. Now, Click Generate Tech Support File.

4. Click Yes  in the popup of “Proceed to generate tech support file.

5. After generating the file, click Download Tech  Support File to download it.

6. Upload the tech Support File.

* Log in to the Palo Alto Networks Customer Support Portal at https://support.paloaltonetworks.com

* Click Support Cases on the left-hand side.

* Click the Case number for which you want to upload a Tech Support file for troubleshooting.

* In Case #, click Case file. Then Upload file(s).

* Browse to the file you just downloaded. Click Done when it completes. Now, you should see the file listed and you may receive a confirmation email from paloalto.

Please view step by step video:

Enable or disable Boot to UEFI Mode or Legacy BIOS Mode

The computers use either of the UEFI mode boot or BIOS mode boot. When installing an OS, the hard drive must be configured for the booting mode. Otherwise, we may not be able to install the OS. This article shows you how to switch the booting mode on Dell computer.

1. Press F12 when turning on the Dell computer. Select BIOS Setup.

2. If you want to use Legacy BIOS mode boot, you must disable Secure boot.

3. Go to boot sequence, check Legacy under boot List Option.

4. Go to Advanced Boot Options, check Enable Legacy Option ROMs.

5. Apply and exit to Save the settings.

Please view this step by step video:

How to access and manager Chrome Remote Desktop

With Chrome Remote Desktop, you can use a computer or mobile device to access a remote computer such as Mac, Windows, or Linux, it’s files and applications over the Interne. This video shows you how to access and manage Chrome Remote Desktop.

On your computer, open Chrome and access the website: remotedesktop.google.com/access. If your computer hasn’t installed the Chrome Remote desktop, you will have an option to install it.

To access Chrome Remote Desktop, please follow these steps.

1. Assume you already an installed device in Chrome remote Desktop, click n the Online device.

2. Enter the PIN for the remote computer.

3. You will see remote computer screen.

4. If it doesn’t show the login screen, click on any places the screen. Enter the username and password to login.

5. Now you are accessing the remote computer. If you click on the right arrow icon, you will have more options.

•You can Disconnect.

•You can screen size.

•You can enable clipboard sync.

•You have input control.

•You have accessing application option.

•You can select mouse mode.

•You can select display resolution.

•You can transfer files.

•You can add device.

•You have support options.

To manage remote device, in the Chrome remote Desktop homepage, you can click on edit icon to change the device settings. You can change the device name.

To remove the device, click on delete icon.

Please view this step by step video:

How to install Chrome Remote Desktop

With Chrome Remote Desktop, you can use a computer or mobile device to access a remote computer such as Mac, Windows, or Linux, it’s files and applications over the Interne. This article shows you how to install Chrome Remote Desktop.

1.On your computer, open Chrome and access the website: https://remotedesktop.google.com/access. If your computer hasn’t installed the Chrome Remote desktop, you will have an option to install it.

2. If you click on install, another page popup. Click Install to continue.

3. In Set up remote access, click download icon.

4. Under Remote Access, click ACCEPT & INSTALL.

5. In Open download page, click Yes.

6. “Please wait  while windows configures Chrome remote Desktop Host” page popup.

7. In “Do you want to allow this app to make change to your device?”, click Yes.

8. In Choose a name, enter a name for your computer.

9. In Choose a PIN, enter a PIN with at lease 6 numbers.

10. When “Do you want to allow this app to make changes to your device?” popup, click Yes.

11. You may have an option to save the password/PIN.

12. You also have an option to install Chrome Remote Desktop Extension.  In chrome web store, click on Add to Chrome.

13. In Add “chrome Remote Desktop”, click Add extension.

14. To get your extensions on all computers, turn on sync.

15. Now, you complete the Chrome Desktop installation. The computer just installed is listed on Your chrome remote desktop account.

Please wee this step by step video:

Enable or disable Boot to UEFI Mode or Legacy BIOS Mode

The computers use either of the UEFI mode boot or BIOS mode boot. When installing an OS, the hard drive must be configured for the booting mode. Otherwise, we may not be able to install the OS. This video shows you how to switch the booting mode on Dell computer.

1. Press F12 when turning on the Dell computer. Select BIOS Setup.

2. If you want to use Legacy BIOS mode boot, you must disable Secure boot.

3. Go to boot sequence, check Legacy under boot List Option.

4. Go to Advanced Boot Options, check Enable Legacy Option ROMs.

5. Apply and exit to Save the settings.

Please view this step by step video:

How to download and install Windows 10 Update Assistant

If you have a problem to install Windows 10 updates automatically, you may onside to Download Windows 10 Update Assistant from Microsoft website and install it manually. Here is how.

  1. Search “Windows 10 Update Assistant ” in an Internet browser.
  2. In Windows 10 Update Assistant page, click on download the Update Assistant.
  3. Click on Download Now.
  4. Save it to your local computer or run it.
  5. Follow the Wizard to install the update.

please view this step by step video: