This article shows how to create a distribution group including two or more external email addresses on Microsoft 365.
Step 1: Step 1: Create members’ email addresses
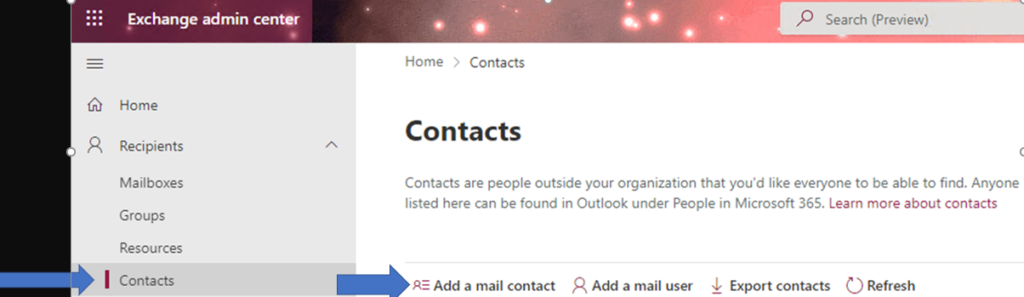
- Login Microsoft 365 admin center.
- Navigate to Exchange.
- Click on Contact and then Add a mail contact.
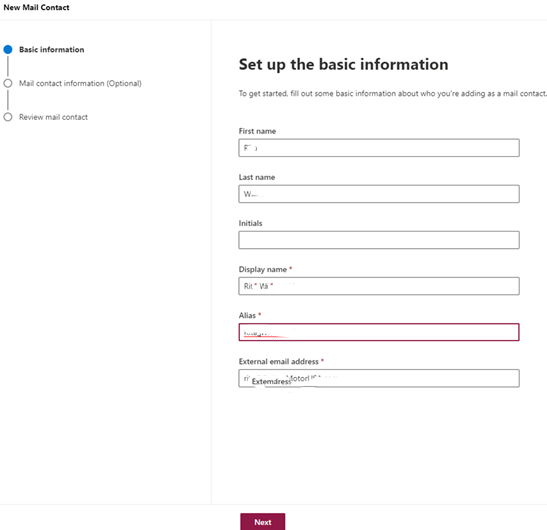
4. Enter the contact information.
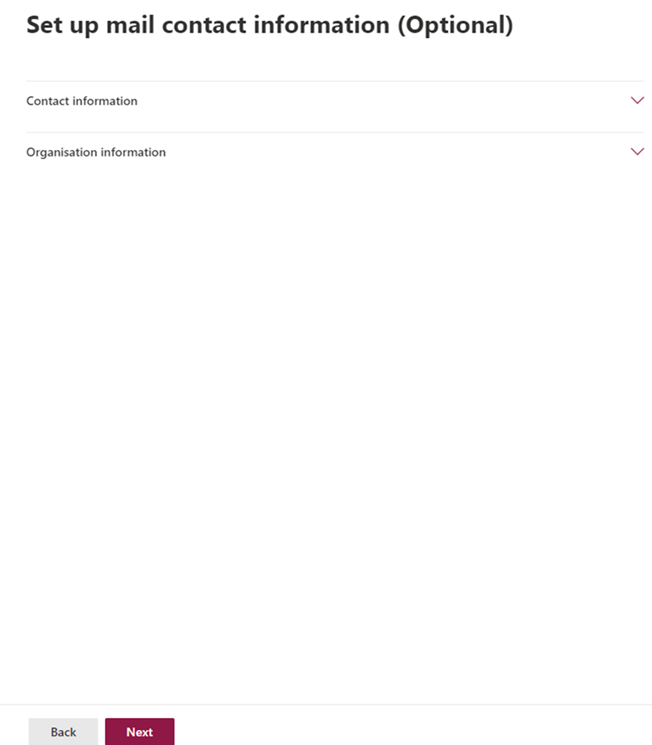
5. Click Next in Set up mail contact information (Option).
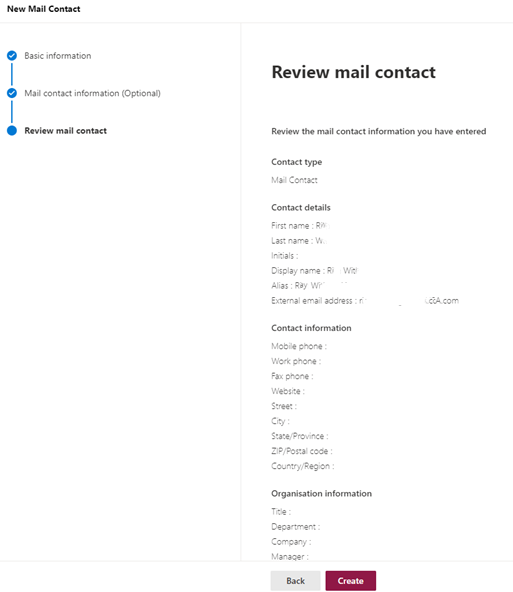
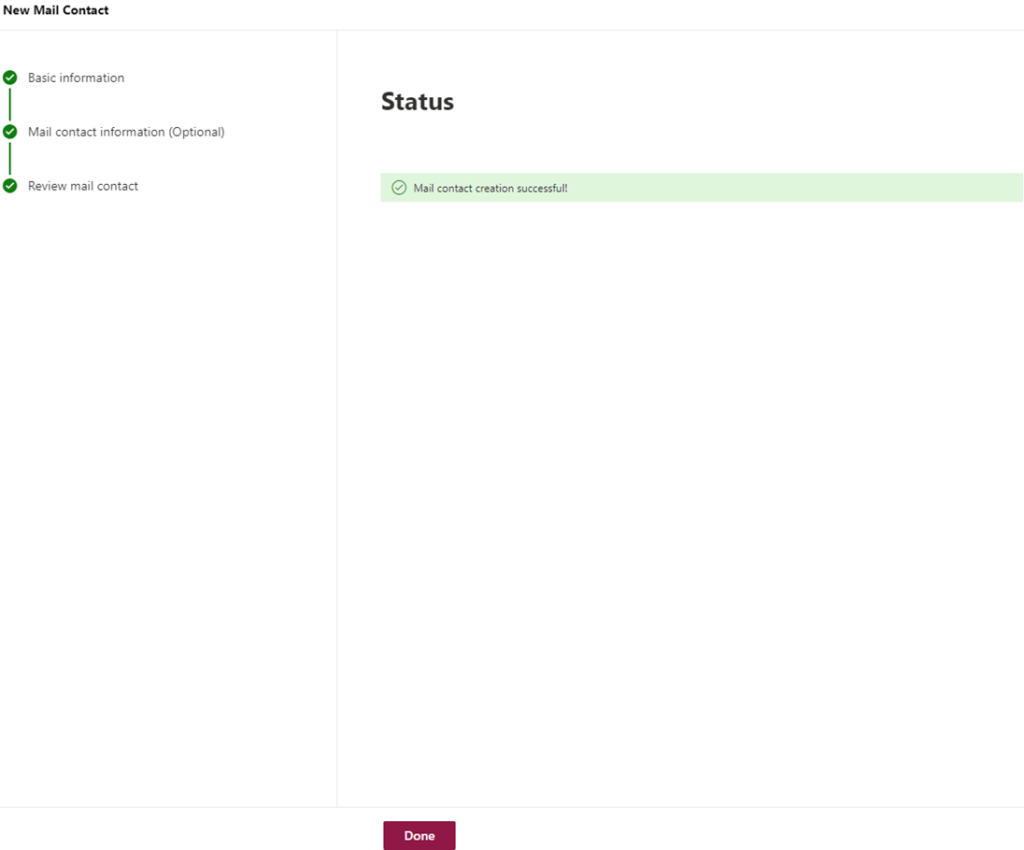
6. Review mail contact and then click Create.
7. Click Done!
Step 2: Create a distribution group
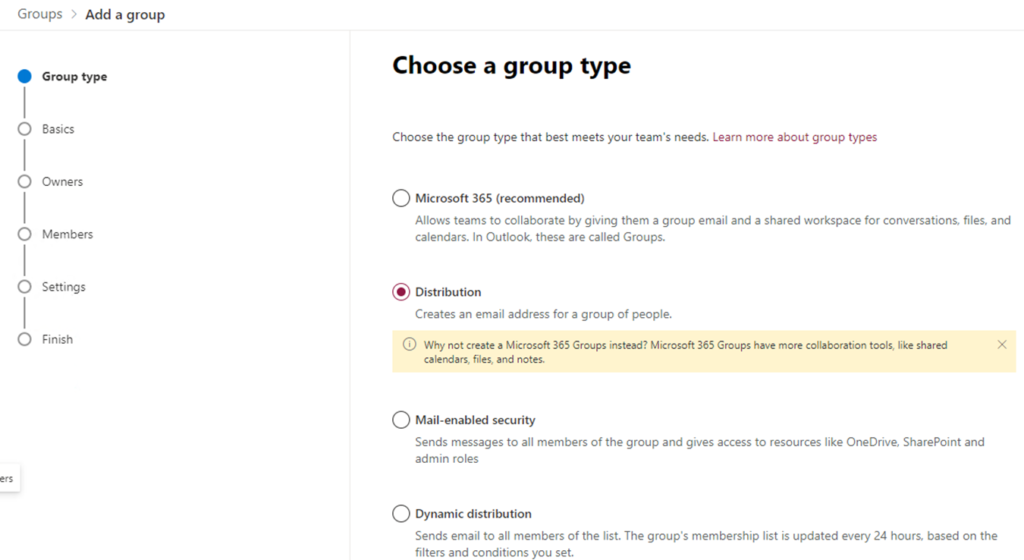
- Click on Group and then Distribution. Click on Add a group.

2. Check Distribution and then Next.
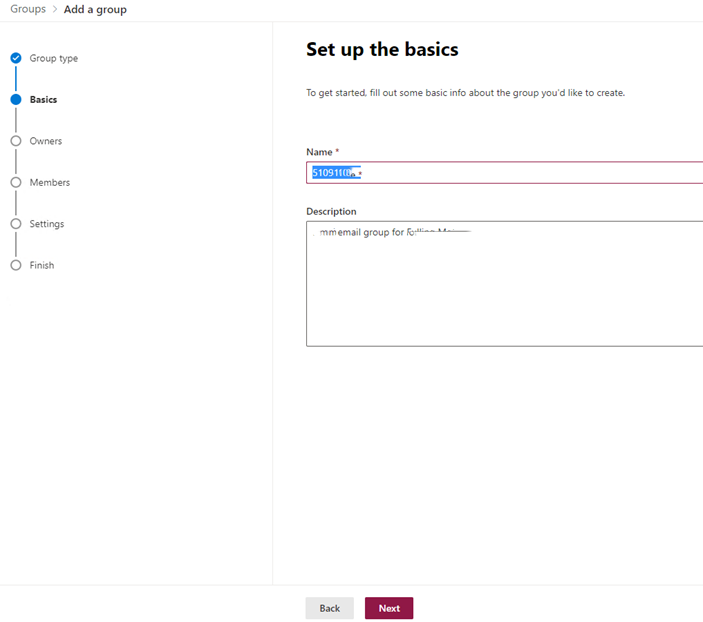
3. In Set up the basics, enter the group name and perhaps Description.
4. Click Assign owner.
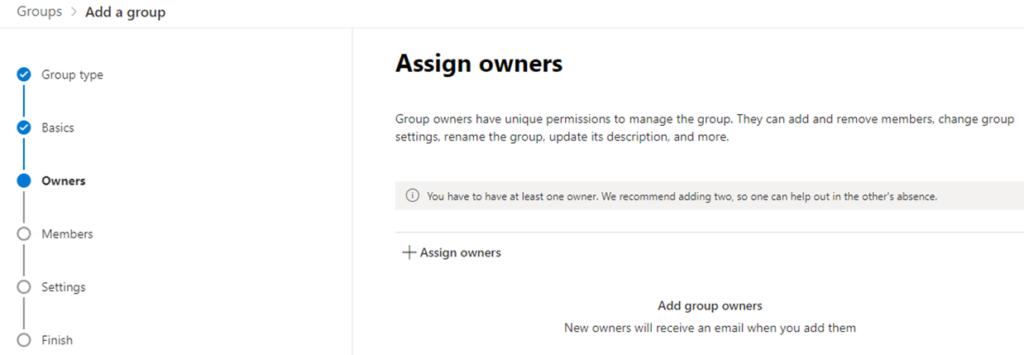
5. Normally, I will assign the creator as the owner.
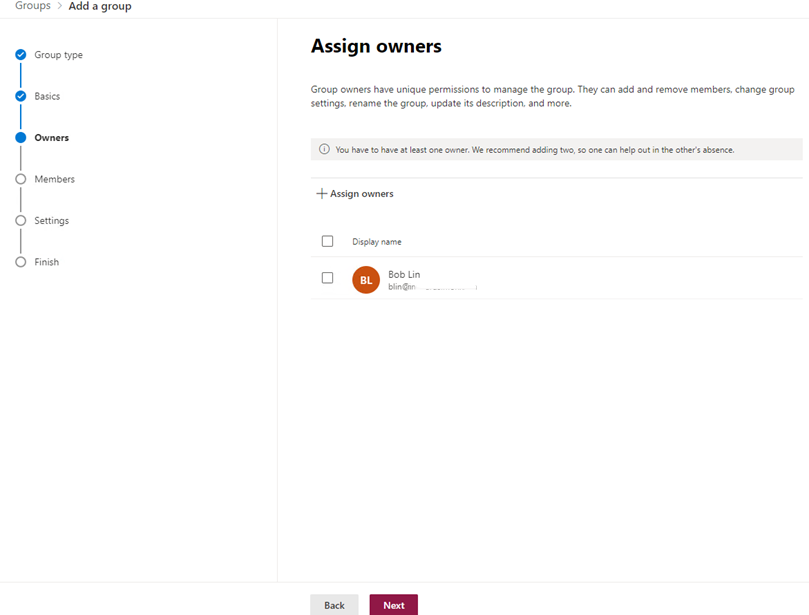
6. Click Add members

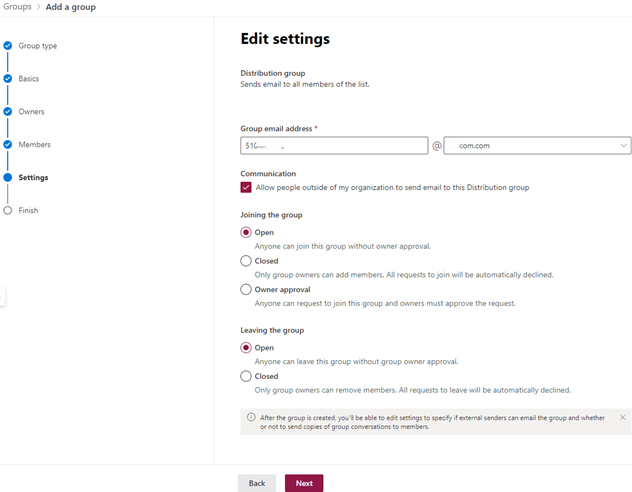
7. In Edit settings, check Allow people outside of my organization to send email to this Distribution group and keep other settings as default.
8. Review and finish adding group by click on Create group.

Please review this YouTube video: