Step 1: Download and install Omada Software Controller
- Download Omada Software Controller from https://www.tp-link.com/support/download/omada-software-controller/.
- Then run the file and follow the wizard to install and launch the Omada Software Controller on a computer.
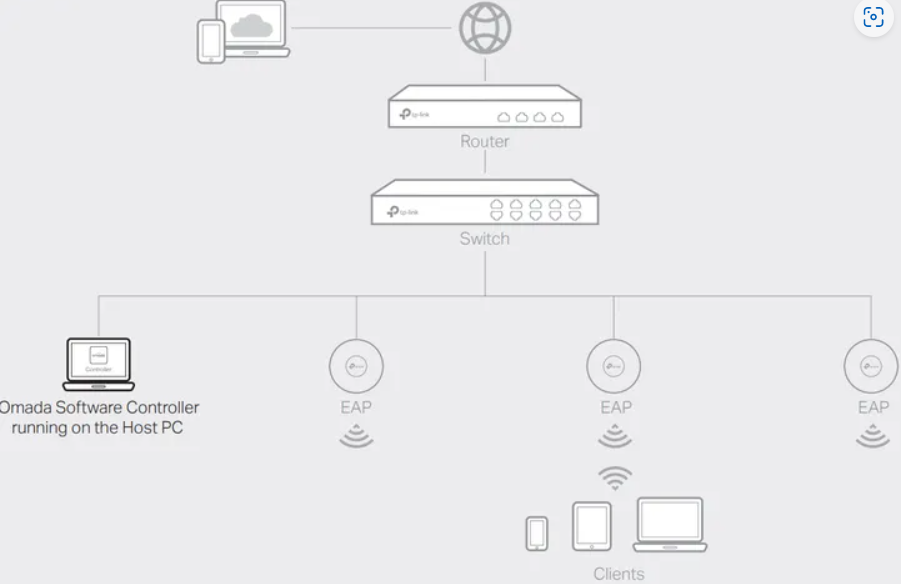
Step 2: Download and install the TP-Link Omada App on your mobile device. It can be downloaded from App Store or Google Play:

Step 3: Connect your mobile device to the EAP
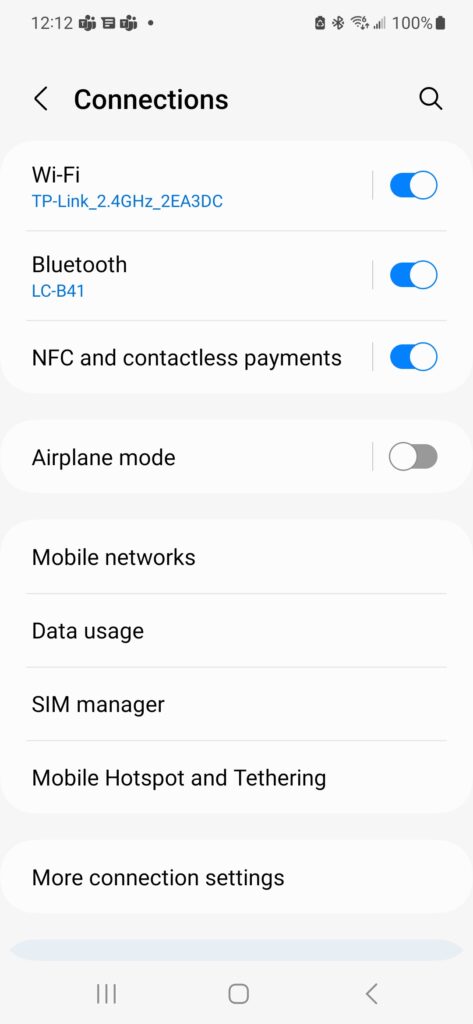
- Connect your mobile device to the EAP by using the default SSID (format: TP-Link_2.4GHz/5GHz_XXXXXX) printed on the label at the bottom of the product.
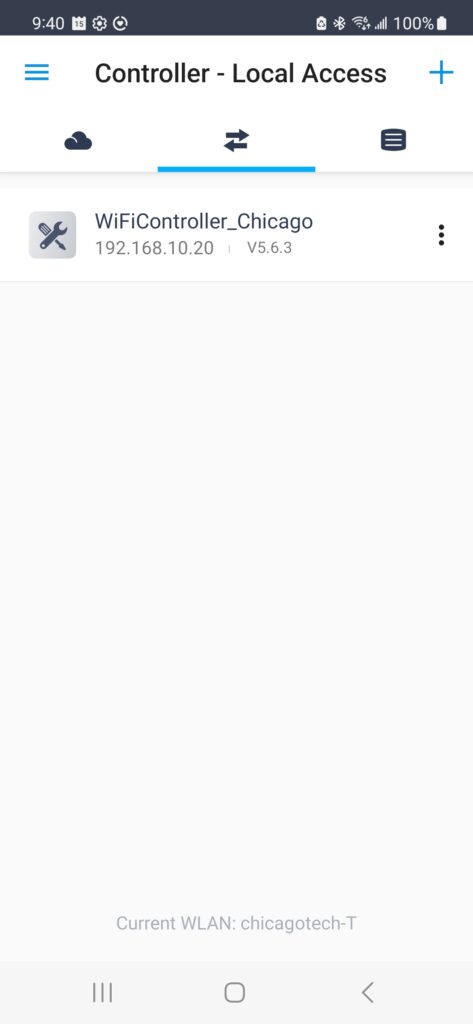
- Launch Omada App and go to Local Access, tap the + button on the upper-right corner to add the controller. Then you can further configure the controller.
- Option: Remote Management. 1) Make sure that Cloud Access is enabled on your controller and your controller has been bound with your TP-Link ID. 2) Launch Omada App and log in with your TP-Link ID. Then go to Cloud Access. Tap the +button on the upper-right to add your controller. Then you can further configure the controller.
- Manage from Web Browser. 1) Open the Omada Controller’s web page. For Omada Software Controller, launch the Omada Software Controller on your PC. After the initiation process, the controller automatically opens its web page. If not, click Launch a Browser to Manage the Network. 2) On the Omada Controller’s web page, follow the wizard to complete the quick setup. 3) After the quick setup, the login page appears. Enter the username and password you have created and click Log in. Then you can further configure the controller. 4) You can remotely access and manage your controller via Omada Cloud Service.
- Manage from Omada Software Controller. 1) Make sure that Cloud Access is enabled on your controller and your controller has been bound with your TP-Link ID. On the Omada Controller’s web page, go to Settings > Cloud Access to enable Cloud Access and bind your TP-Link ID. If you have set it up in the quick setup, skip this step. 2) Launch a web browser and enter https://omada.tplinkcloud.com in the address bar. Enter your TP-Link ID and password to log in. A list of controllers that have been bound with your TP-Link ID will appear. Then you can click Launch to further configure the controller.