Situation: The client has a Palo Alto Firewall and configure GloablProtect MFA using DUO. Here are the steps to activate GloablProtect DUO for using MFA.
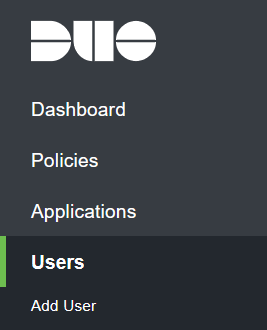
Login DUO.com and click on Users.
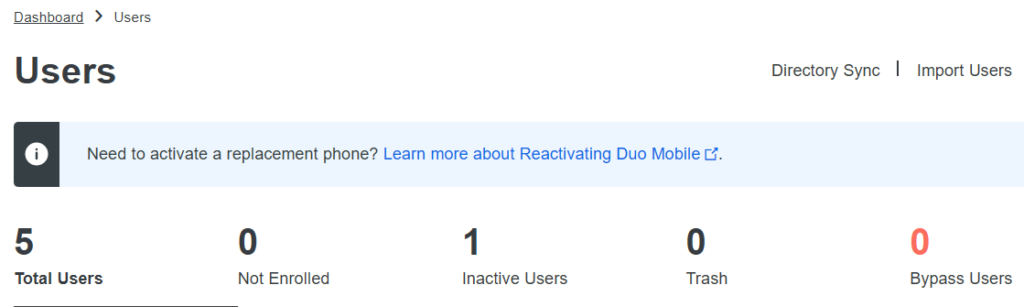
2. Click on Inactive Users (assuming you already created the users).
3. Add Phone and click on Activate Duo Mobile.
4. Click on Generate Duo Mobile Activation Code.
5. The user’s phone receive a text message with link. Click on the link to Activate (assuming you have DUO app on the phone). On DUO website, it shows Reactive DUO Mobile.
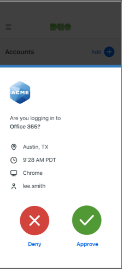
6. Now, try to login Gl;oablProtect. the user’s phone DUP app should have a popup. Tape Approve and you should be able to login.
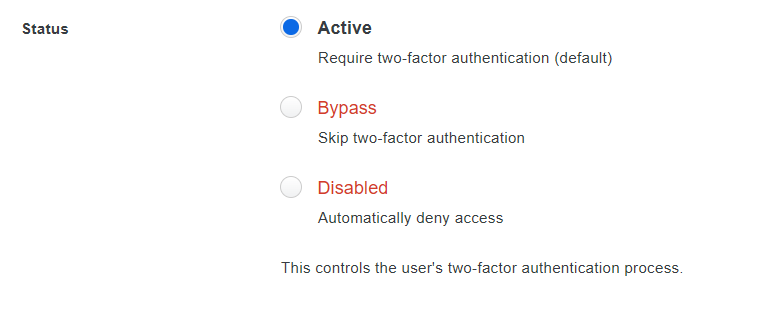
Note: If it doesn’t work, you can check Bypass in User’s Status to test if you can login GloabalProtect without MFA. If you login with Bypass enabled, it is MFA issue. If you can’t, it is possible GloablProtect has a configuration issue.
I downloaded the 2016 Exchange server eval – Download the latest version of Exchange. For more information, see Updates for Exchange Server.
Ran the command to update AD Schema
Manually syncd ad/o365 afterwards and hoped for the best.
It turns out that nothing changed for any users already syncd with office365, so id call that a success.
However, you will need to go in to the Azure ad sync tool on your DC and manually tell it what to export from AD to the cloud that is now new…. Such as the hide from address book attribute for example. If you set it in AD, it won’t sync that attribute until you edit the export in the ad sync tool.
I ended up getting it all to work just as intended fairly quickly being there was zero documentation that I could find regarding this part of it.
A guest account in Windows OS allows users to access the computer, share folders and printers from remote computers. There are many ways to enable or create a Guest accounts.
Option 1: Enable guest account via Local Users & Groups
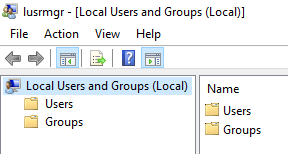
1. In the Start menu or taskbar search box, type Lusrmgr.msc and then press Enter key to open Local Users and Groups.
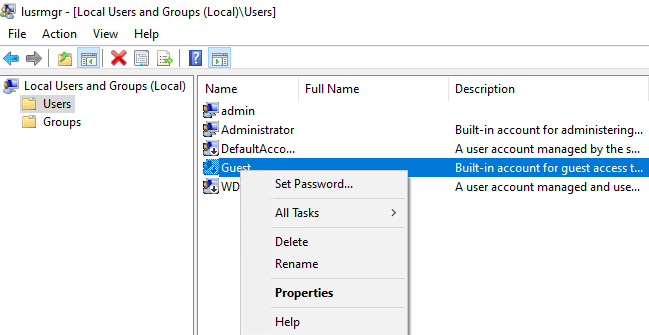
2. Click Users under Local Users and Groups (local).
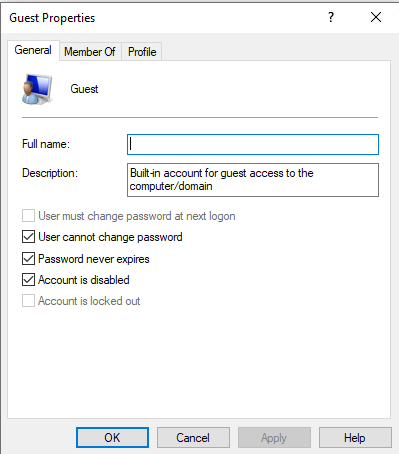
3. Right-click the Guest and then click Properties or double-click on Guest to open its properties.
4. Uncheck Account is disabled.
Option 2: Enable Guest account via Command Prompt
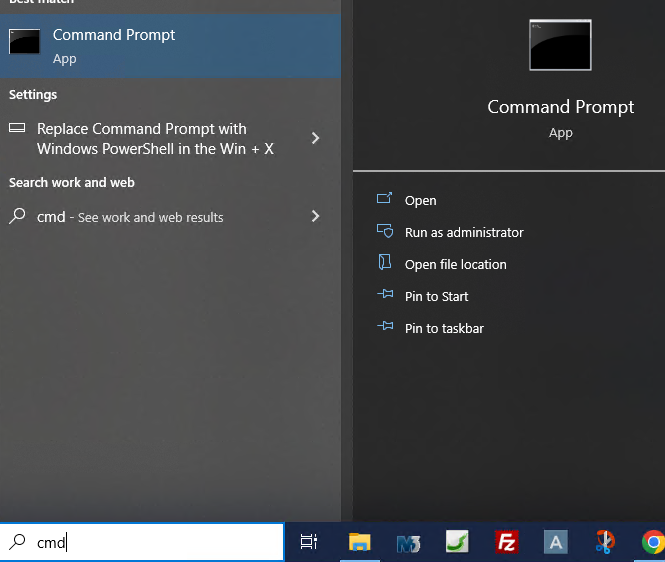
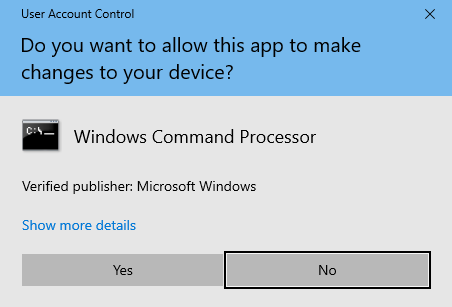
Type CMD in the Start menu or taskbar search box, and then Run as administrator.
2. Click Yes when you see the User Account Control prompt.
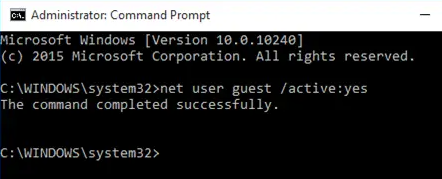
3. Type the following command and then press Enter key.
net user guest /active:yes
Option 3: Enable Guest account via Group Policy
Note that Group Policy is not part of the Home edition of Windows 10. So, this method doesn’t work on Windows 10 Home edition.
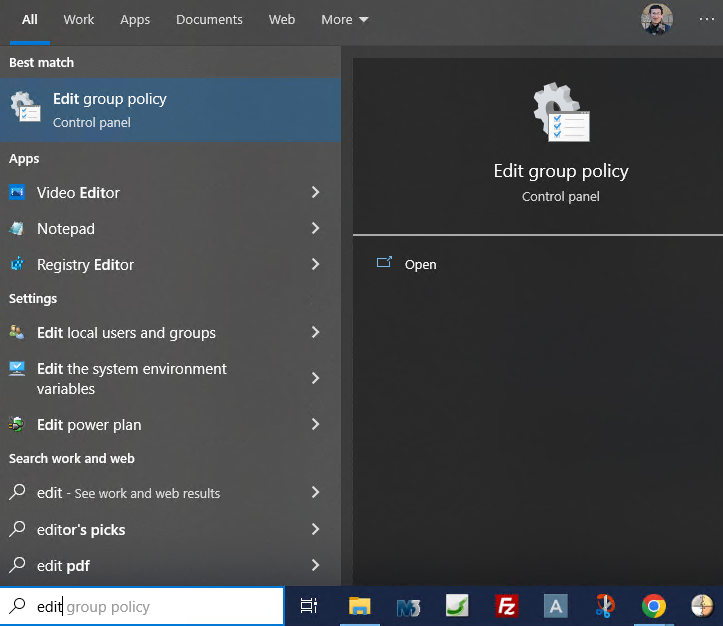
1. Open Group Policy Editor by typing Edit Group Policy in the Start or taskbar search box and then pressing Enter key.
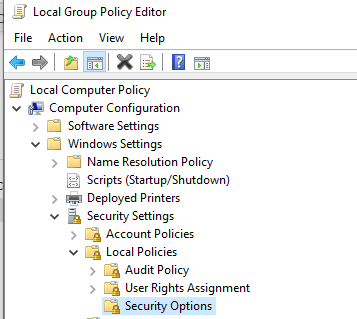
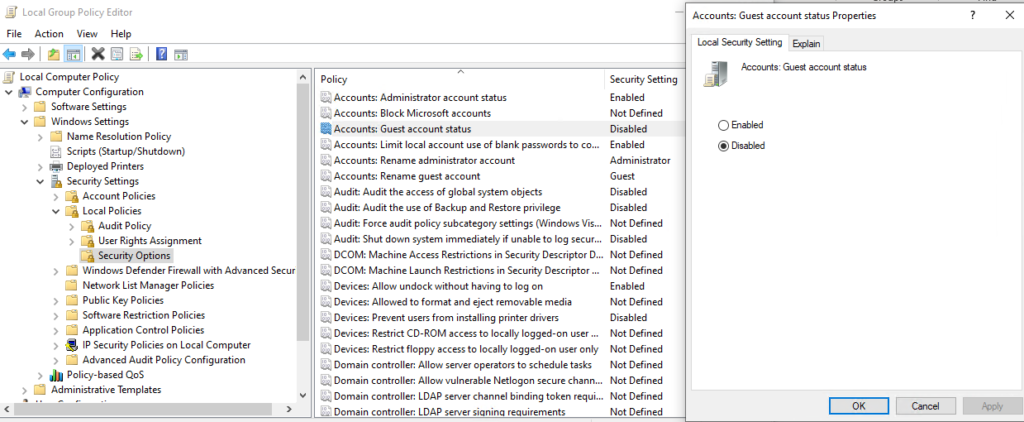
2. In the Group Policy Editor, navigate to the following policy: Computer Configuration > Windows Settings > Security Settings > Local Policies > Security Options.
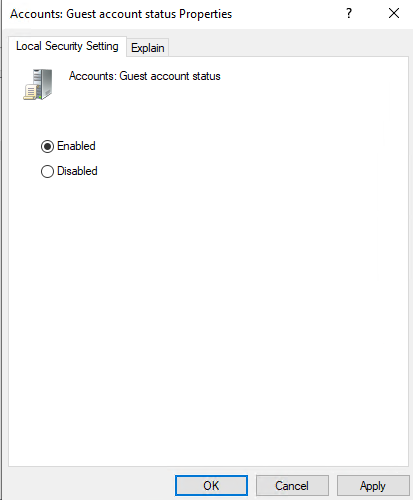
3. On the right-side, double click on Accounts: Guest account status to open its Properties.
4. Check Enable.
5. Click OK to save the settings.
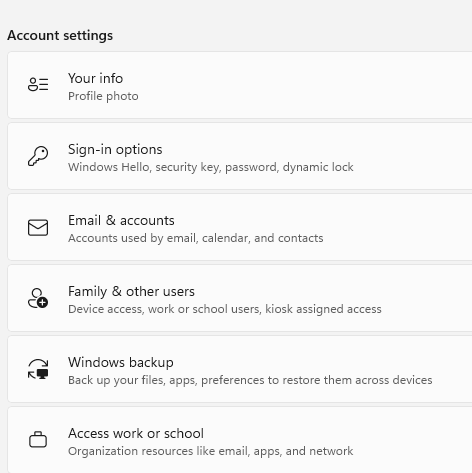
Option 4 Create a regular user accountusing GUI
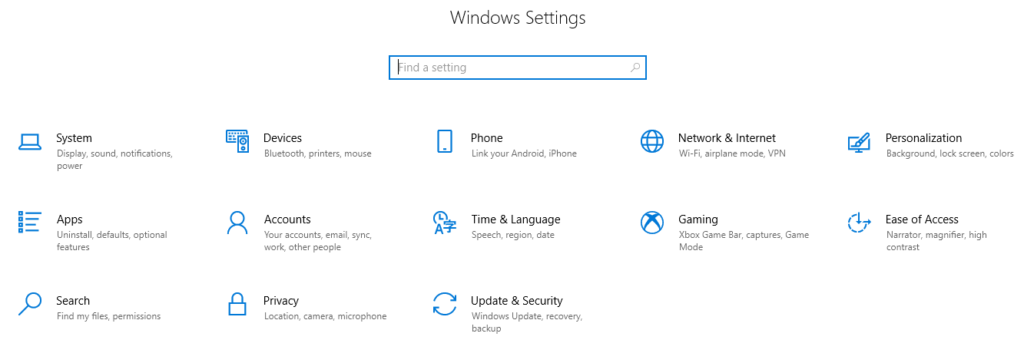
Open the Start menu and click on the Settings icon.
2. In the Settings window, click on Accounts.
3. Select Family & other users from the left-side panel.
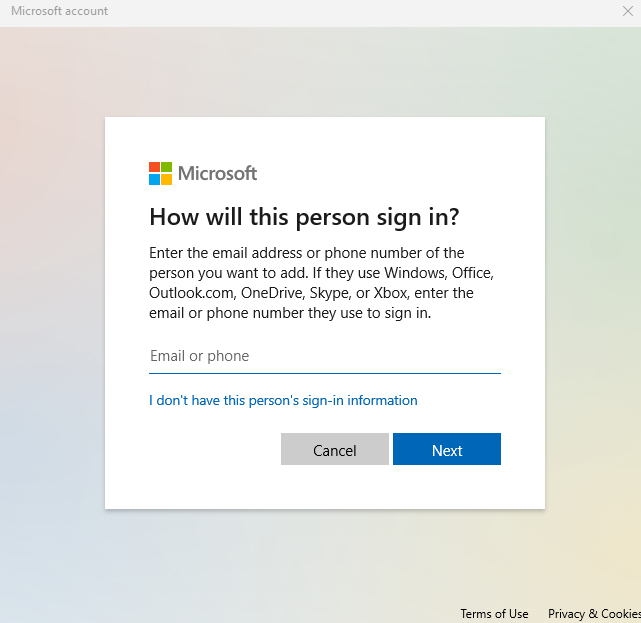
4. Click on Add account in Other users.
5. Click on I don’t have this person’s sign-in information in How will this person sign in?.
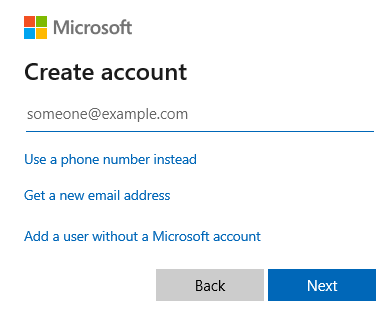
6. Click on Add a user without a Microsoft account.
7. Click on Add a guest.
The Guest account will be enabled and you can use it to log in to the computer without affecting the main user account’s settings and files.
Update: Microsoft has hidden the Guest account from Windows 10 and 11. Also, Microsoft has moved almost all user account settings to the new Settings app, but there is no option under the Accounts section of Settings to enable the guest account. The Settings app only allows you to create standard local or Microsoft accounts.
To enable the guest account in Windows 10 and 11, we may have Mutiple options.
Option 1: Enable guest account via Local Users & Groups
1. In the Start menu or taskbar search box, type Lusrmgr.msc and then press Enter key to open Local Users and Groups.
2. Click Users under Local Users and Groups (local).
3. Right-click the Guest and then click Properties or double-click on Guest to open its properties.
4. Uncheck Account is disabled.
Option 2: Enable Guest account via Command Prompt
Type CMD in the Start menu or taskbar search box, and then Run as administrator.
2. Click Yes when you see the User Account Control prompt.
3. Type the following command and then press Enter key.
net user guest /active:yes
Option 3: Enable Guest account via Group Policy
Note that Group Policy is not part of the Home edition of Windows 10. So, this method doesn’t work on Windows 10 Home edition.
1. Open Group Policy Editor by typing Edit Group Policy in the Start or taskbar search box and then pressing Enter key.
2. In the Group Policy Editor, navigate to the following policy: Computer Configuration > Windows Settings > Security Settings > Local Policies > Security Options.
3. On the right-side, double click on Accounts: Guest account status to open its Properties.
When the process completes, click Open Folder to view the collected log package (GlobalProtectLogs.zip), which you can email to the ITS Service Desk for troubleshooting
To modify the AuthOrig attribute in Active Directory (AD), you can use the following steps:
Open the Active Directory Users and Computers console.
Locate the object you want to modify and right-click it.
Select “Properties”.
Go to the “Attribute Editor” tab.
Locate the AuthOrig attribute and double-click it.
For this example, let’s say you want to add user named Bob in Chicagotech.net to the AuthOrig attribute. Enter CN=Bob,OU=Users,DC=Chicagotech,DC=Net in the value field and click “OK”.
Click “OK” again to close the properties of the object.
Close the Active Directory Users and Computers console.
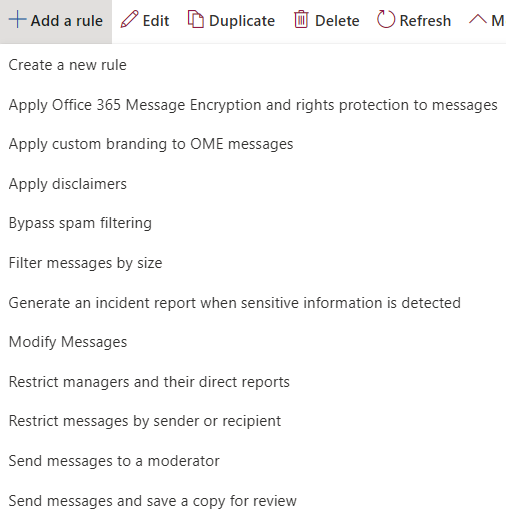
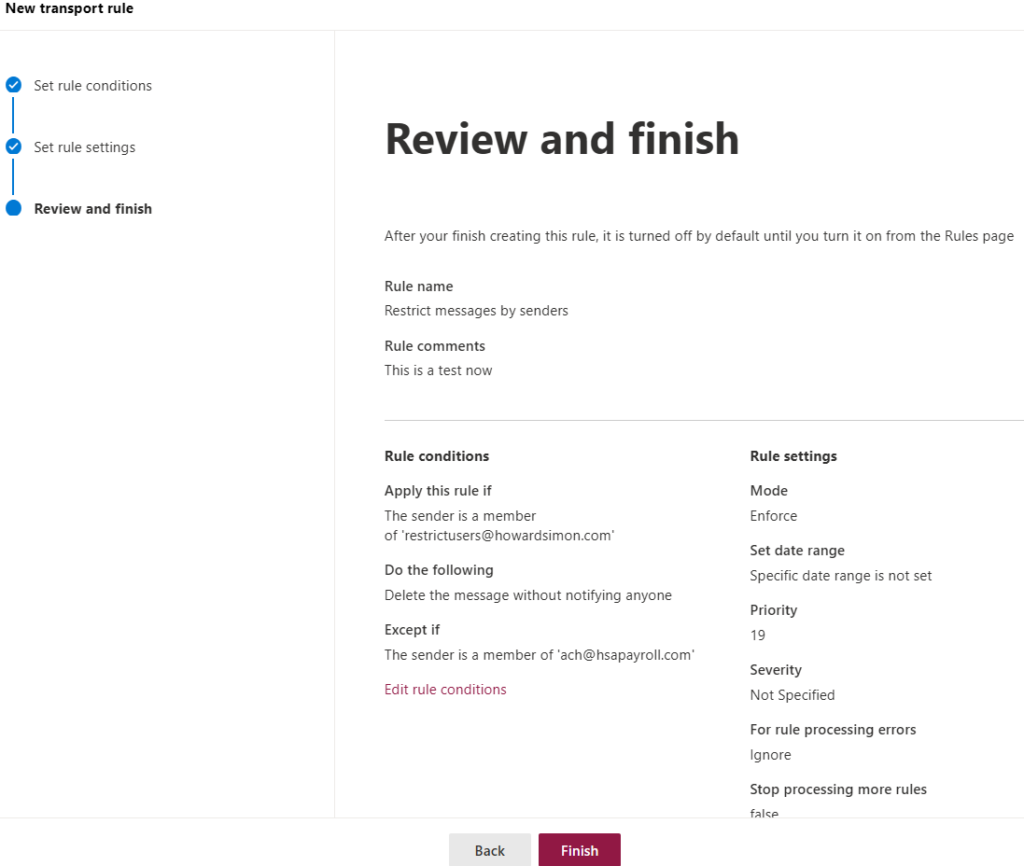
4. Select Restrict messages by sender or recipient.
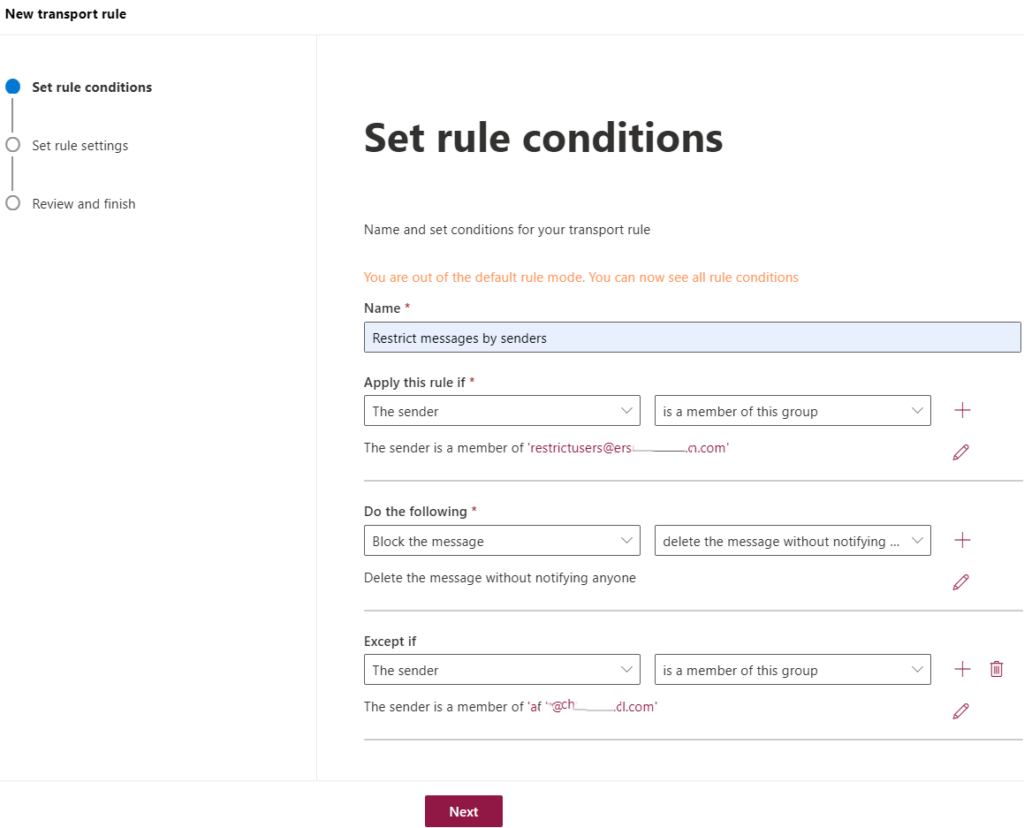
5. In Set rule conditions, Apply this rule if: The sender is…-> a member of…-> select distribution group address. Do the following: Block the message and Delete the message without notifying anyone. Except if: the sender is a member of…:
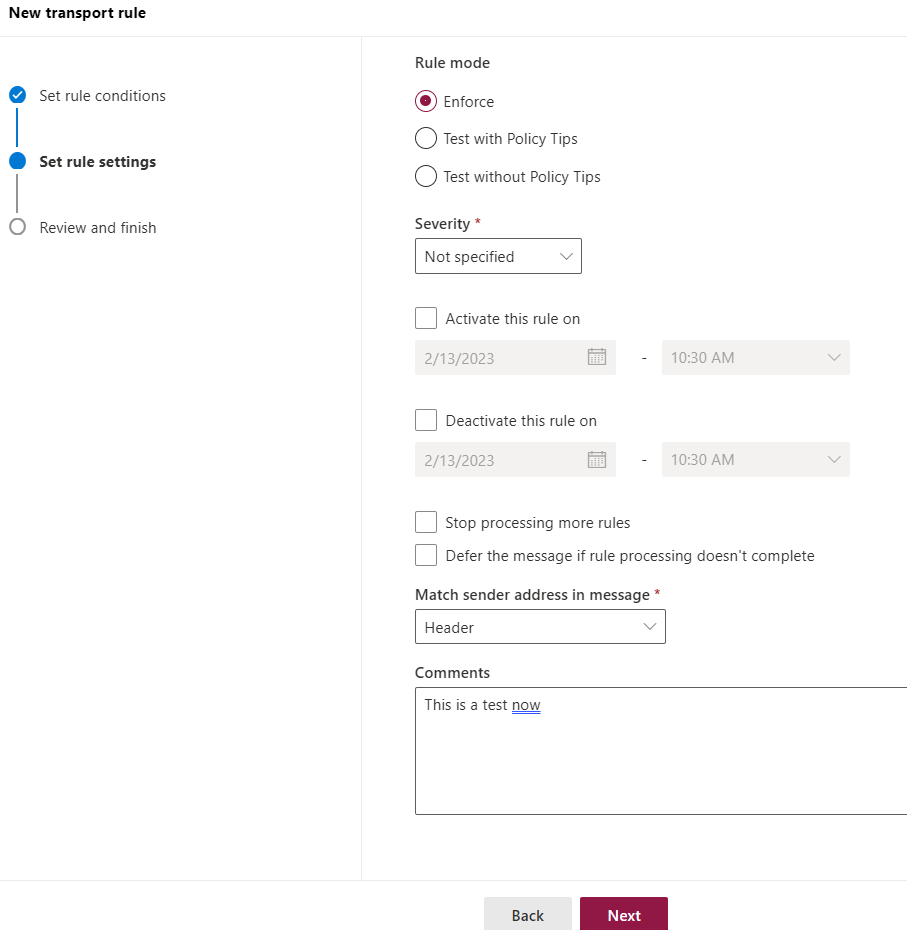
6. Click on Next in Set rule settings.
7. Click Finish on Review and finish.
Option 2: Modify “delivery management” setting:
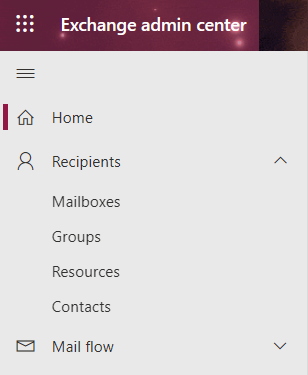
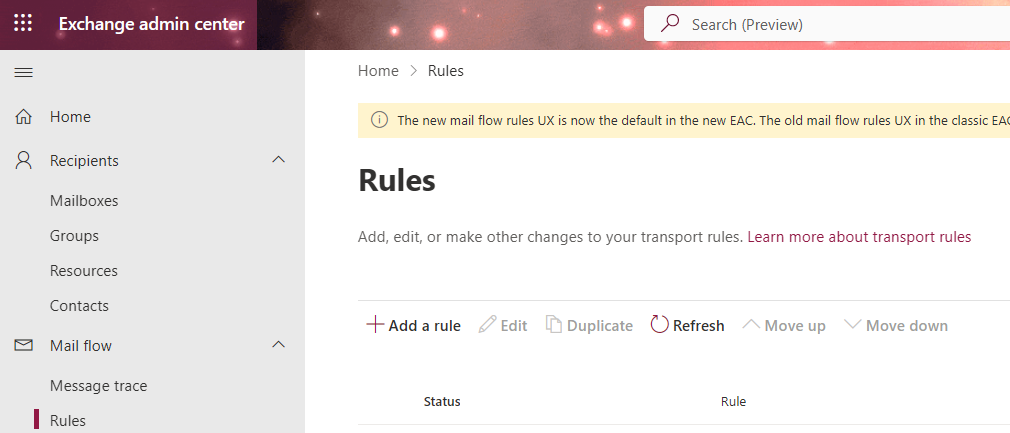
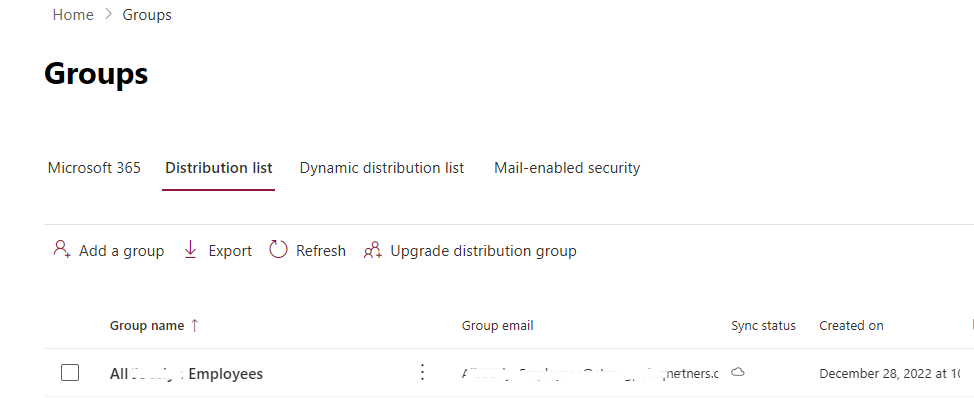
1. Go to Exchange admin center->recipients->groups
2. Double-click the Distribution group to edit it.
2. Select “delivery management”->and add specific senders as well as groups that are allowed to send message to the group, by which way messages sent by anyone else will be blocked.
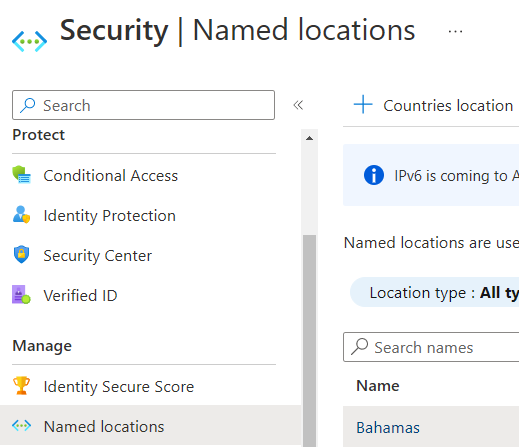
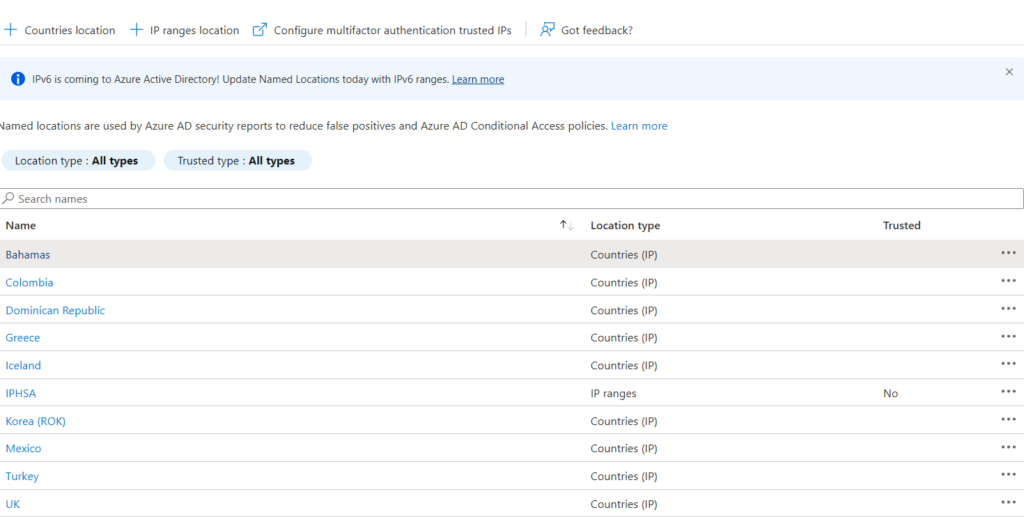
After you configure Azure Conditional Access policy which block all out of country access, you may want to add trusted location by country or IP addresses to access Microsoft 365. Here is how.
Login the Azure portal and go to Azure Active Directory > Security > Conditional Access > Named locations.
2. You have options configure Countries location or IP ranges location.


