There are many ways to install and manage Fonts in Windows 10
Option 1: Settings
- To access Fonts page, click Start>Setting>Fonts
- Or type fonts I the Search bar., and then click on font settings.
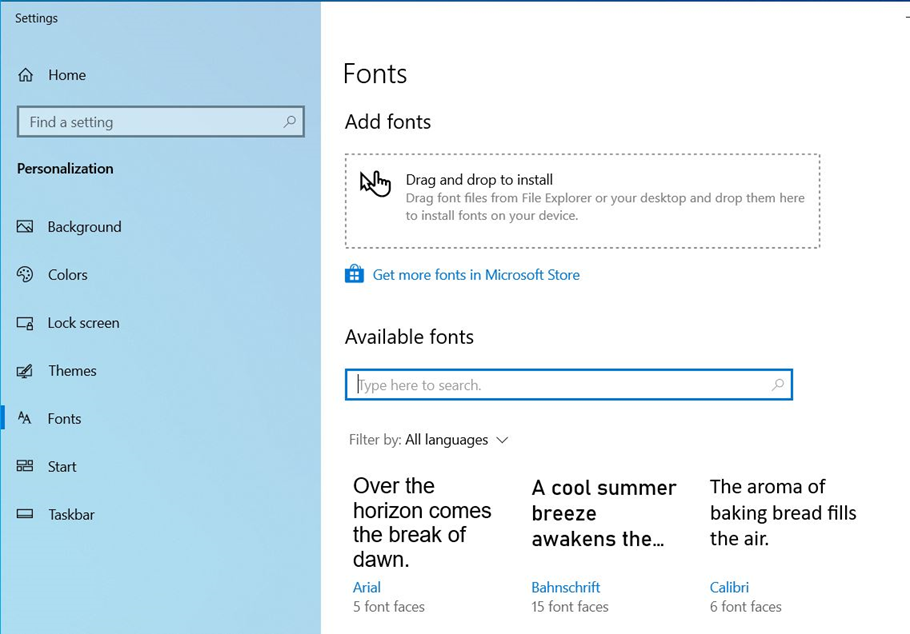
- With the Fonts page open, you can drag and drop a downloaded font into “Add fonts”
- To add more fonts, click on “Get more fonts in Microsoft Store”.
- To Manage fonts, click on available fonts.
- You will have options to change font size, Uninstall.
Option 2: Manage fonts in Control Panel
- Type control in search bar and click on Control Pane to open it.
In Control Panel, go to All Control Panel>Fonts.
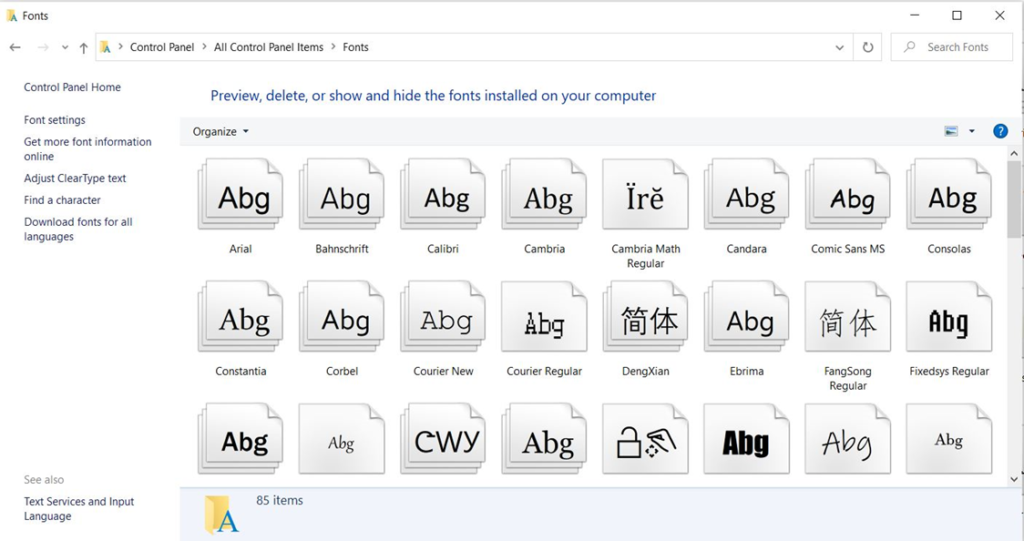
- You have options to Preview, delete, or show and hide the fonts installed on your computer.
- If you click on Font settings, you can Hide fonts, Restore default font settings, and Installation settings.
- You can Get more font information online.
- You can Adjust ClearType text
- You can Find a character.
- You can download fonts for all languages.
Option 3: Download and install fonts.
- Search the font online you want to use and save is in download folder. Right click to install. If you don’t see the install option, you can open it.
- Click Install to add the font into the Windows.
Please view this step by step video: