In some situations, you may need to export and import certificate of CA. For example, when you install Microsoft System Center Operation Manager (SCOM) Agent on untrusted computers, you need to add the certificates to SCOM, gateway servers (communication between management servers and untrusted computers), untrusted computers so that they can trust each other. This video shows how do so.
Step 1: Deploy Microsoft Windows Server Active Directory Certificate Services (AD CS) Certificate Authority (CA) on a domain server. Please refer to this video: How to install a Trusted Root CA certificate on Windows – https://www.youtube.com/watch?v=Ddsrk68TGI0 or How to install Certification Authority in Windows Server 2019
Step 2: Export Certificates of CA
1. Login the server which acts as Issuing CA.
2. On the Server Manger, click Tools and then Certification Authority.
3. Right click on the Certification Authority name and select Properties.
4. In the Certification Authority Properties page click View Certificate button.
5. In the Certificate properties page, click on Details tab.
6. Click Copy to file… button
7. In the Welcome to the Certificate Export Wizard click Next.
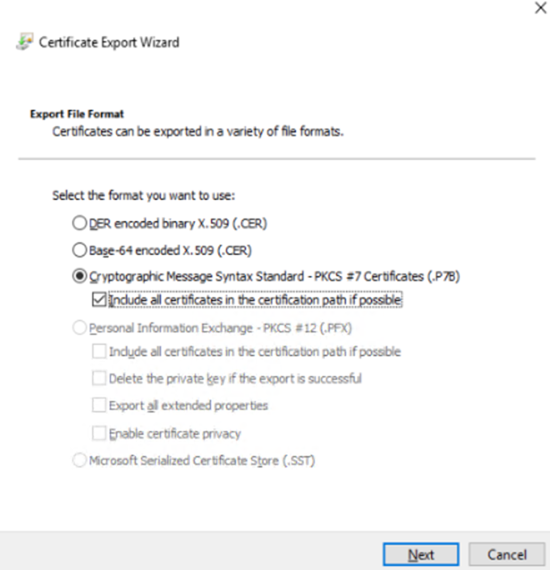
8. In the Export File Format page, check Cryptographic Message Syntax Standard – PKCS #7 Certificate (.P7B) and Include all certificates in the certification path if possible.
9. In the File to Export page, specify path and file name you want to export, and then click Next.
10. In the Completing the Certificate Export Wizard page, review your export settings. If they are correct, click Finish.
11. In Completing the Certificate Export Wizard, click Finish.
12. If exporting is successful, you will see The export was successful. Click Ok to close Certification Authority.
Step 3: Import Certificates of CA
Note: You need to import the Certificate of CA to each managed and untrusted computers.
1.Login managed or untrusted computer.
2.Type mmc in Search bar and click mmc icon to open it .
3. In the Console1 page, click File, and then Add/Remove Snap-in.
4. Highlight Certificates, and then click Add.
5. Check Computer account, and then click Next.
6. With Local computer: (the computer this console is running on) selected, and then click Finish.
7. Click OK to close Add or Remove Snap-ins.
8. In the Console1 page, navigate to Certificates (Local Computer)>Trusted Root Certification Authorities.
9. Right-click Certificates, select All Tasks, and then click Import.
10. In the Certificate Import Wizard, click Next.
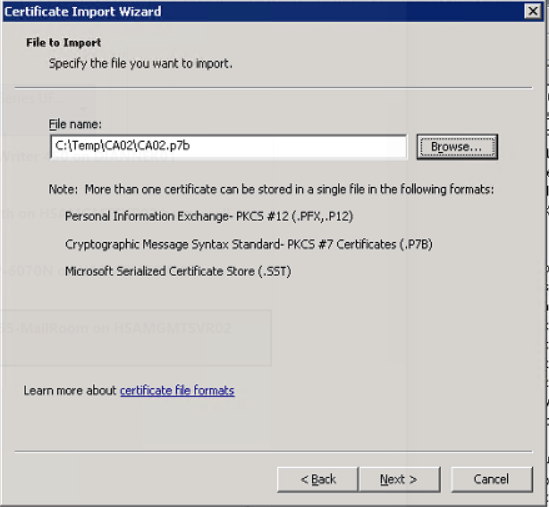
11. On the File to Import page, browse the CA certificates file you exported before, and then click Next.
12. On the Certificate Store page, check Place all certificates in the following store and make sure that Trusted Root Certification Authorities appears in the Certificate store box, and then click Next.
13. On the Completing the Certificate Import Wizard page, click Finish.
14. When The Import was successful message popup, click OK.
Note: You may not see the CA under Trusted Root Certification Authority immediately. It takes a few minutes or re-open MMC to see it.
15. Re-open MMC to check the status of the CA.
16. You ca double click on it to check the certificate status.
Please view this step by step video: