Most Cisco Catalyst Switches have two modes of operation, Install mode and Bundle mode.
Prerequisites for Install Mode Versus Bundle Mode All the switches in the switch stack should be running at the same license level as the active switch.
Restrictions for Install Mode Versus Bundle Mode The Install mode and the Bundle mode of operation have the following restrictions:
Booting from a USB driver or TFTP in Install mode is not supported. Booting the switch in Bundle mode consumes more memory than the Install mode because the packages are extracted from the bundle and copied to the RAM. Auto-upgrade feature is disabled by default and is not available in the Bundle mode.
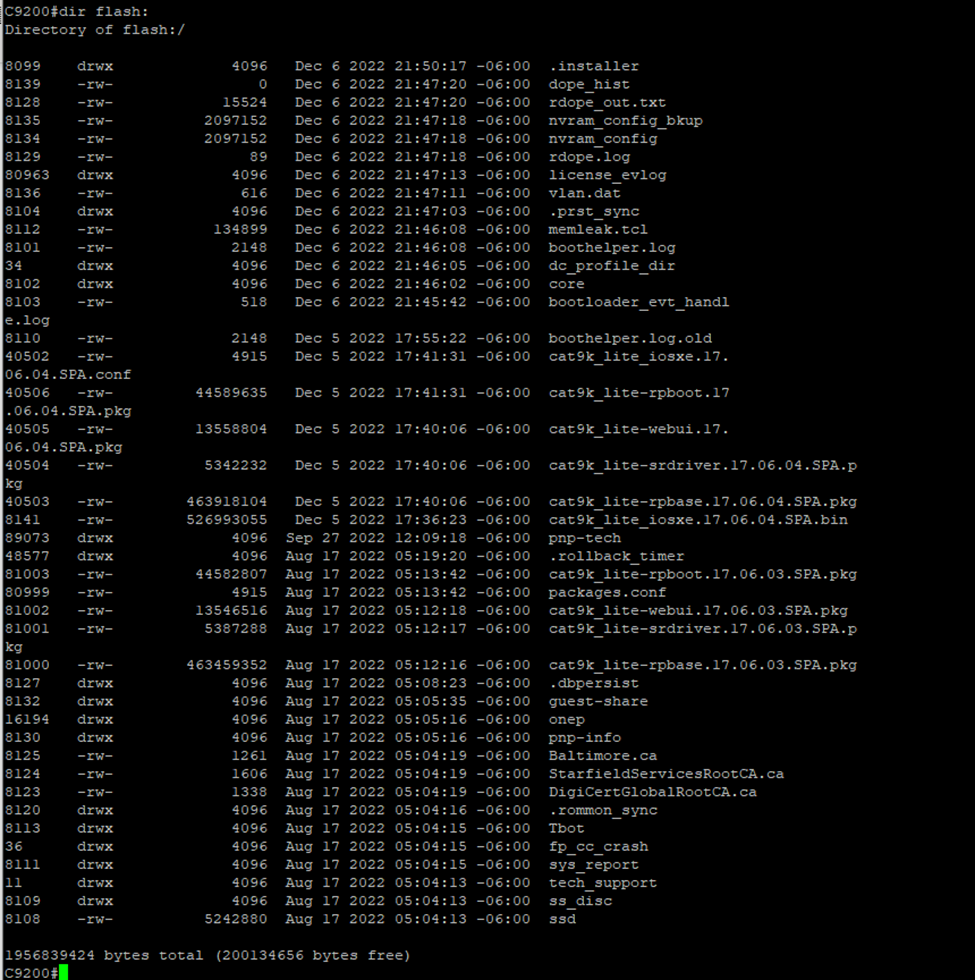
Install Mode The Install mode uses a package-provisioning file named packages.conf in order to boot a switch. In addition, there are a number of .pkg files in the flash drive. We recommend that you do not alter the packages.conf and .pkg files unless directed by a Cisco Technical Assistance Center (TAC) engineer. Install mode is the newer and recommended mode to run. This breaks the .bin file up into smaller .pkg files that must be loaded into memory independently of each other, and allows you to boot faster and utilize memory better. The .bin file that you download from software.cisco.com has all the .pkg files you need inside.
Bundle Mode The Bundle mode uses monolithic Cisco IOS images to boot a switch. The Bundle mode consumes more memory than the Install mode because the packages are extracted from the bundle and copied to RAM. You boot a .bin file that contains everything you need to run the Cisco IOS. As per traditional Cisco IOS, you have a boot statement that points to the .bin file you want to load and that gets loaded at the time of boot.
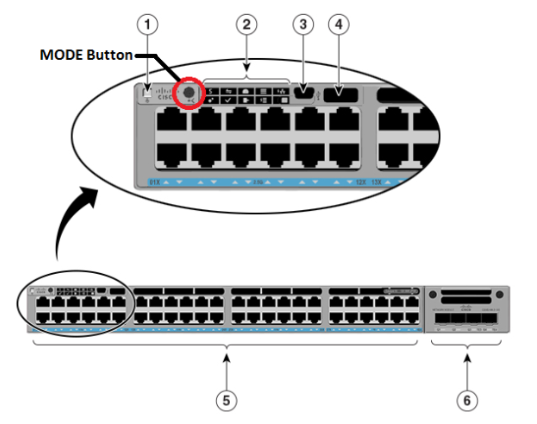
How to verify the Mode of Operation
Switch>Enable
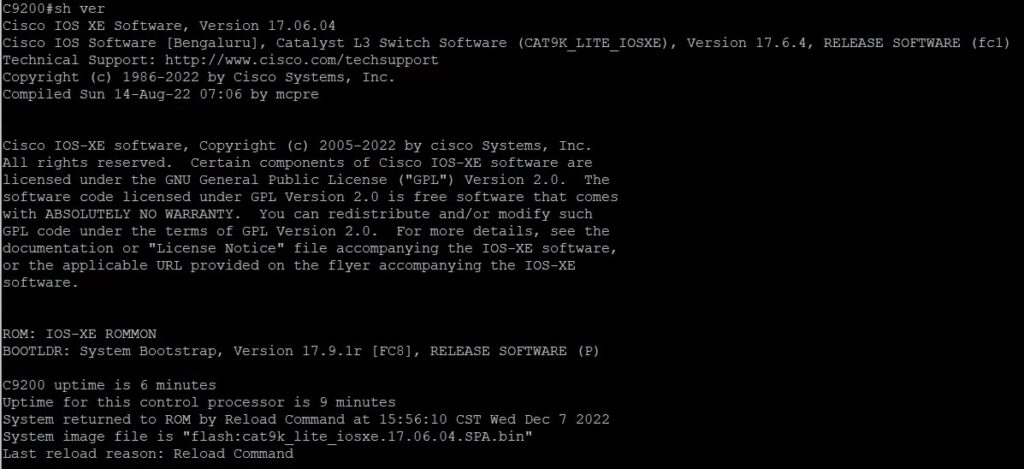
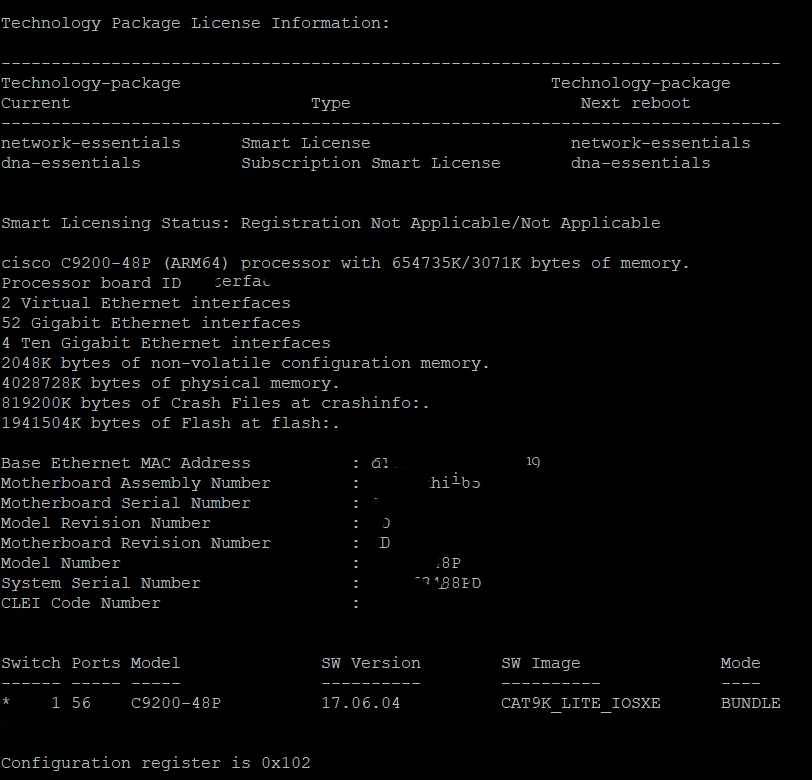
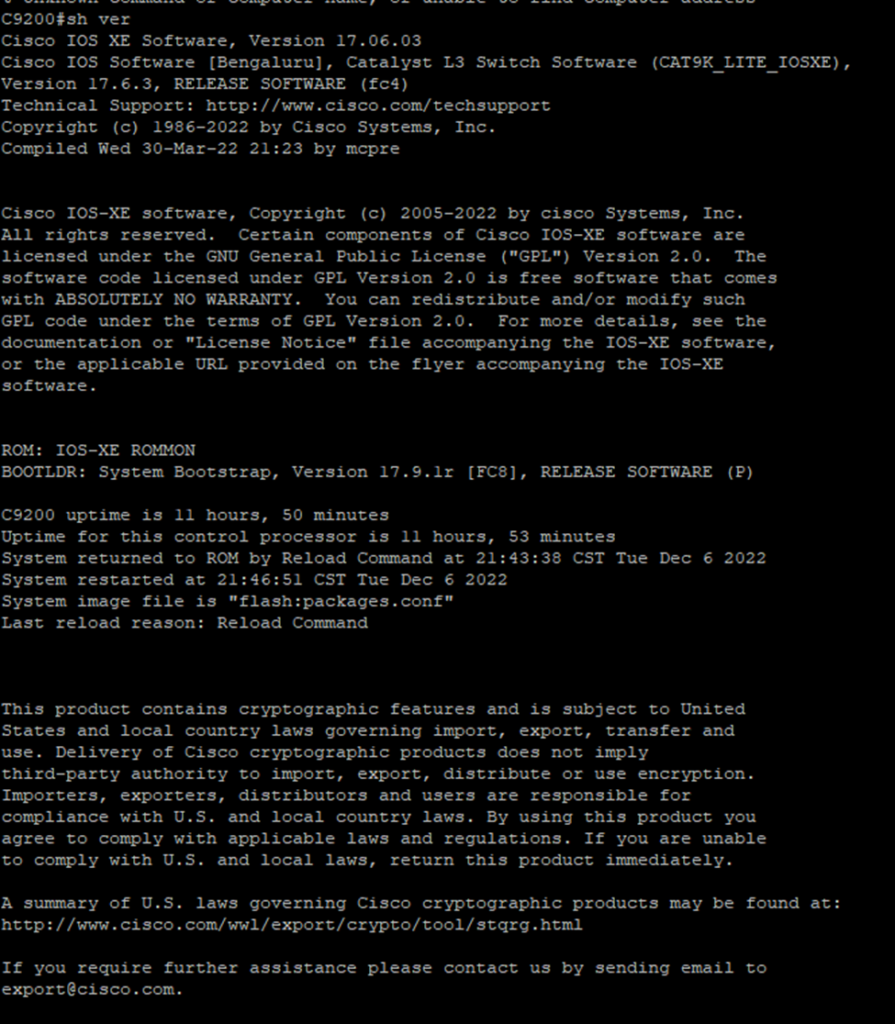
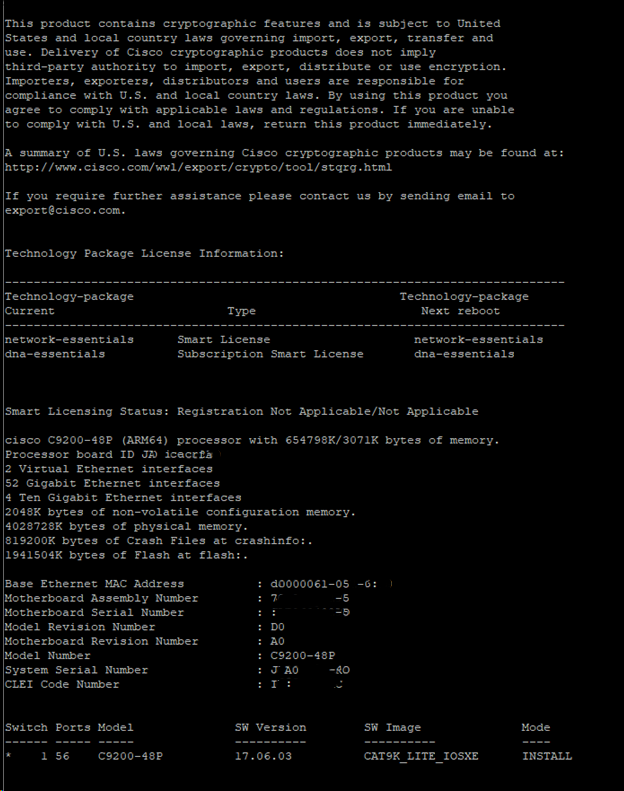
Switch#show version
Switch#end
How to convert from Install Mode to Bundle Mode
>enable
Displays the contents of the BOOT variable, the name of the configuration file pointed to by the CONFIG_FILE variable, the contents of the BOOTLDR variable, and the configuration register setting.
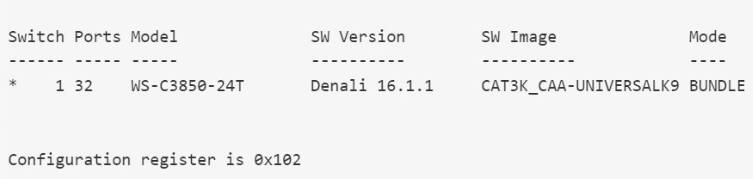
#show version
The Mode is Install now
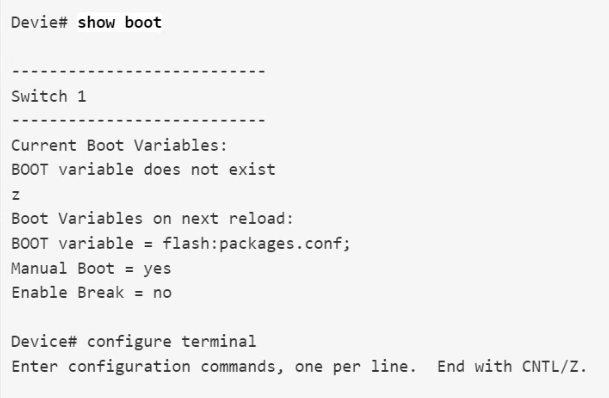
#show boot
Displays the contents of the BOOT variable, the name of the configuration file pointed to by the CONFIG_FILE variable, the contents of the BOOTLDR variable, and the configuration register setting.
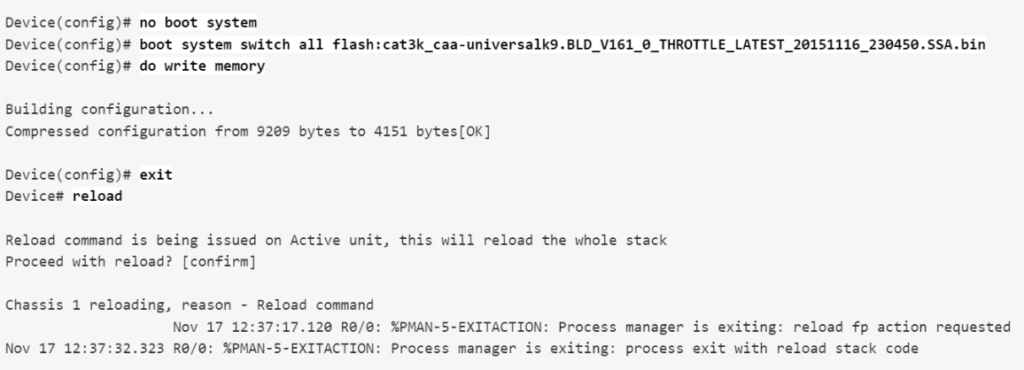
#no boot system
Removes the startup system image specification. Note: Ensure that the .bin file of the Cisco IOS version to be used is loaded before using the no boot system command.
#boot system switch all flash
Updates the boot variable on all the switches in the stack.
Displays the contents of the BOOT variable, the name of the configuration file pointed to by the CONFIG_FILE variable, the contents of the BOOTLDR variable, and the configuration register setting.
#request platform software package expand
Expands individual Cisco IOS XE software packages and the provisioning file from a specified bundle to a specific destination directory.
Situation: We have received many reports that Inspire 2 Bluetooth is not pairing, or it doesn’t sync with Fitbit app because the Bluetooth doesn’t work.
Resolution 1: Restart your mobile device and then please restart your Bluetooth. You can do this by turning off the Bluetooth for at least 10-20 seconds and then turn it on again. After that, please restart your Fitbit device following the instructions here.
Resolution 2: Go to Settings on your inspire 2 band and then clear user data.
Resolution 3: Clear the fitbit apps cache or re-install fitbit.
Resolution 4; You need to squeeze the Inspire 2 with the charging adapter in order to ensure constant contact.
Resolution 5: The issue is resolved when I disconnected the device from the app on my phone.
You may two options to upgrade the software depending on Operation Mode. Normally, install mode boot package file and Bundle mode boot .BIN file.
Option 1 – Install Mode
a. >enable
b. #conf t
c. (conf)#no boot sys
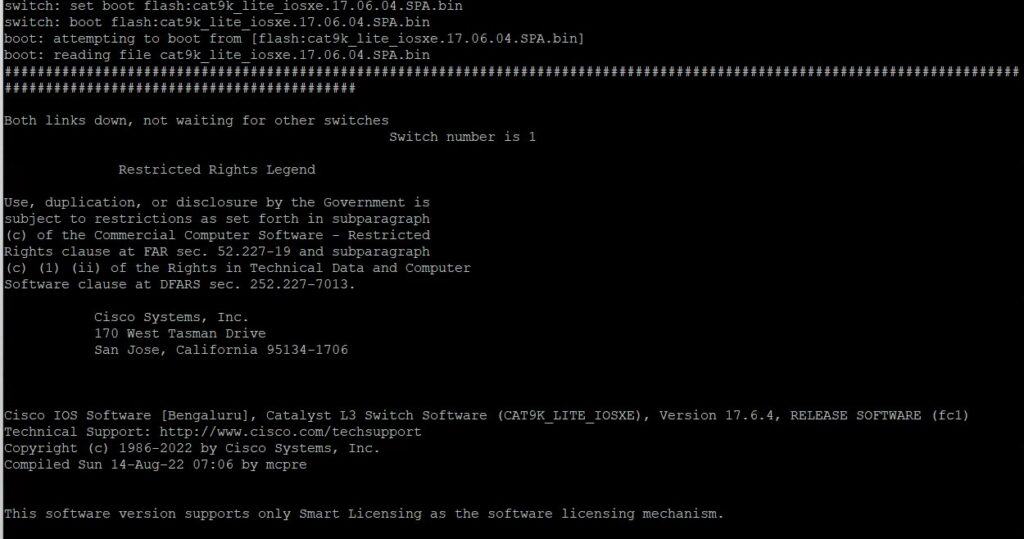
d. (conf)#boot sys flash:packages.conf
e. (conf)#do wr <<<<<< Very important to save configuration changes
4. Return to the privileged mode
a. (config)# end
5. Start the install process (Will ask to reload once the .pkg files finish to be generated)
a. # install add file flash:(image-name.bin) activate commit
6. After reload the install process its finished and just verify that the desired version is installed.
# show version
Option 2 – Bundle Mode
You must set this boot statement with the boot system command. The next time you reload, the switch boots into 16.12.01 rather than 16.11.01.
Switch#configure terminal
Enter configuration commands, one per line. End with CNTL/Z.
Switch(config)#no boot systemSwitch(config)#boot system bootflash:cat9k_iosxe.16.12.01.SPA.bin <---
Switch(config)#end
Switch#wr
Switch#
Switch#show run | include boot systemboot system bootflash:cat9k_iosxe.16.12.01.SPA.bin
Switch#
Switch#show bootBOOT variable = bootflash:cat9k_iosxe.16.12.01.SPA.bin; <---
Configuration Register is 0x102
MANUAL_BOOT variable = no
BAUD variable = 9600
ENABLE_BREAK variable does not exist
BOOTMODE variable does not exist
IPXE_TIMEOUT variable does not exist
CONFIG_FILE variable =
In our example, we will show you how to convert Install Mode to Bundle Mode and, then upgrade the software by booting .BIN.
Situation: You may want to use a terminal emulation program such as putty and telnet backup and restore a Cisco configuration. This article descripts the procedure with putty.
Connect the console cable between your PC and Cisco device.
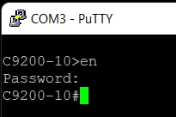
Login your secured user account.
At the Router>prompt, issue the enable command, and provide the required password when prompted. The prompt changes toRouter#, which indicates that the router is now in privileged mode.
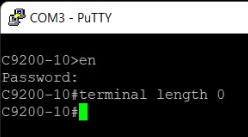
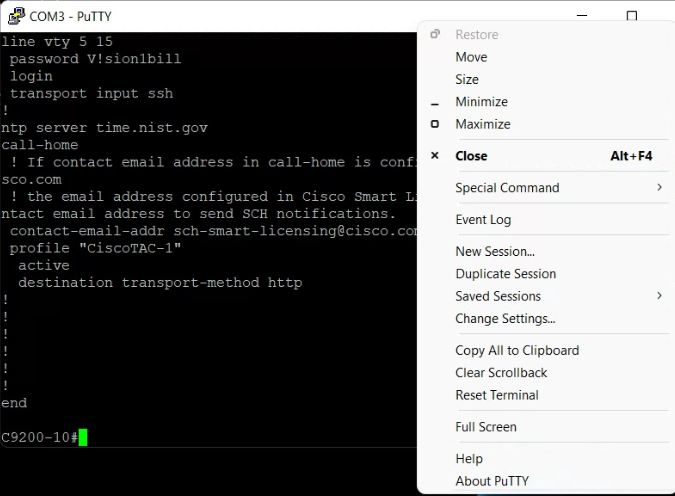
4. Issue the terminal length 0 command in order to force the router to return the entire response at once, rather than one screen at a time .This allows you to capture the configuration without extraneous–more–prompts generated when the router responds one screen at a time.
5. Run the show running-config command and allow time for the router to complete its response. You can see: Building configuration…followed by the configuration.
6. Right click on Terminal Emulation Program top bar and select Copy All to Clipboard.
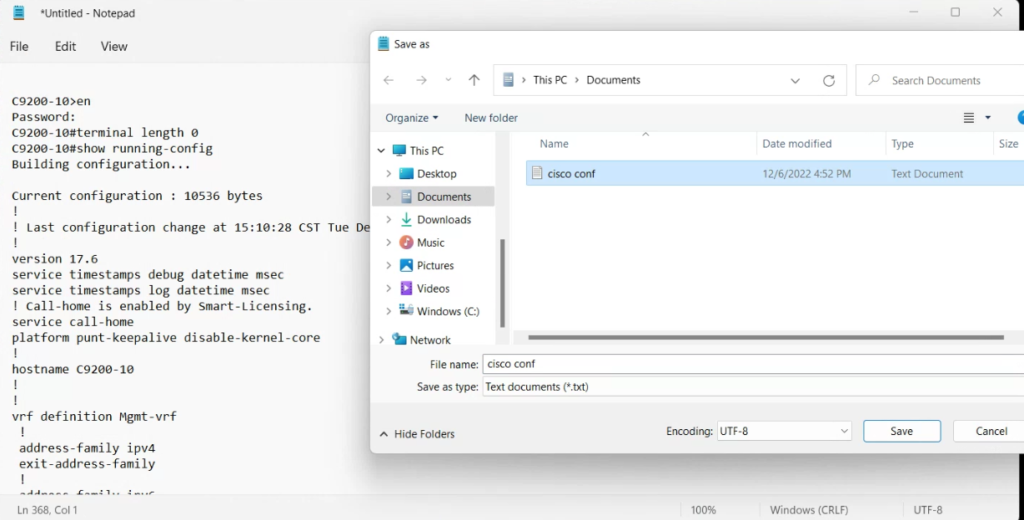
7. Paste the configuration file into Notepad and save the configuration file.